Leveling cabinets is one of those tasks that looks simple but can quickly become frustrating if you miss a step. Crooked cabinets are not only an eyesore, but they also cause problems with countertop installation, appliance fitting, and even door alignment. Whether you’re installing kitchen cabinets for the first time or updating your bathroom storage, getting the cabinets level and securely fastened is critical for both appearance and safety. In this article, you’ll find a clear, step-by-step guide to leveling cabinets and fastening them correctly, plus pro tips, common mistakes to avoid, and answers to popular questions.
Why Cabinet Leveling Matters
When cabinets are not level, you may notice doors that swing open or don’t close, drawers that slide on their own, and gaps between countertops and cabinets. Uneven cabinets also put stress on fasteners, which can lead to loosening over time.
For these reasons, it’s essential to spend time on leveling before you even think about securing your cabinets in place.
Tools And Materials Needed
Before you start, gather all the tools and materials. Having everything ready saves time and reduces mistakes. Here’s what you need:
- 4-foot level (long enough to span cabinets)
- Tape measure
- Pencil or chalk
- Drill and bits
- Shims (wood or plastic)
- Stud finder
- Screwdriver
- Clamps
- Cabinet screws (2.5 to 3 inches, not drywall screws)
- Cabinet jack or helper (optional for wall cabinets)
- Block plane or utility knife (for trimming shims)
- Safety gear (gloves, safety glasses)

Credit: comestayawhile.com
Preparing The Space
A good installation starts with proper preparation. Clean the area and remove any debris from the floor and walls. Check the floor for bumps or dips, as even small uneven spots can affect your result. If your floor is very uneven, consider using a self-leveling compound before you start.
Locate the wall studs with a stud finder. Mark the center of each stud with a vertical line where the cabinets will go. Cabinets must be fastened to studs, not just drywall, for safety and long-term support.
Marking Your Layout
The next step is marking the correct cabinet positions on the wall. Measure up from the floor to the desired cabinet height and use a level to draw a straight, horizontal line. For base cabinets, the standard height is 34.5 inches from the floor to the top of the cabinet (not including countertop). For wall cabinets, measure up from the countertop (usually 18 inches) to get the bottom line for wall cabinets.
Draw vertical lines where cabinet edges will go. This helps you visualize the layout and double-check your measurements before lifting heavy cabinets.
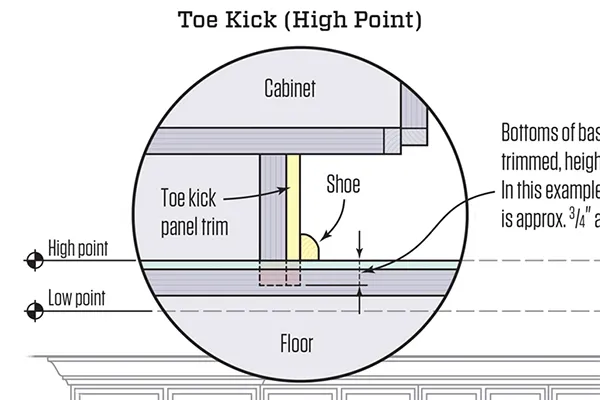
Credit: www.jlconline.com
Leveling Base Cabinets
Step 1: Set The First Cabinet
Start at the highest point of your floor. Place the first base cabinet in position against the wall. Use your level across the top from front to back and side to side. If the cabinet is not level, slide shims under the base or behind the back corners as needed.
Shim only where necessary, and check with your level after each adjustment. Trim extra shim length with a utility knife so nothing sticks out.
Step 2: Connect And Level Additional Cabinets
After the first cabinet is perfectly level and flush against the wall, add the next cabinet beside it. Clamp the face frames together, making sure the cabinet fronts are perfectly even. Use your level across the tops and fronts.
Add shims under the new cabinet where needed. Check again for level and flush fit. Repeat this process for all base cabinets, keeping each one level with the previous.
Step 3: Secure Base Cabinets
Once all base cabinets are level and clamped together, drill pilot holes through the thick back rail of each cabinet into the wall studs. Use cabinet screws (never drywall screws, which are too weak). Tighten the screws until the cabinet is snug against the wall but not so tight that it damages the cabinet.
Reconnect the face frames with screws designed for cabinets, ideally through predrilled holes. Remove clamps after all screws are in.
Example: Shim Placement
A common mistake is to shim only the front or back. Instead, place shims at every point where the cabinet touches the floor and wall. This spreads the weight evenly, prevents flexing, and makes the cabinets last longer.
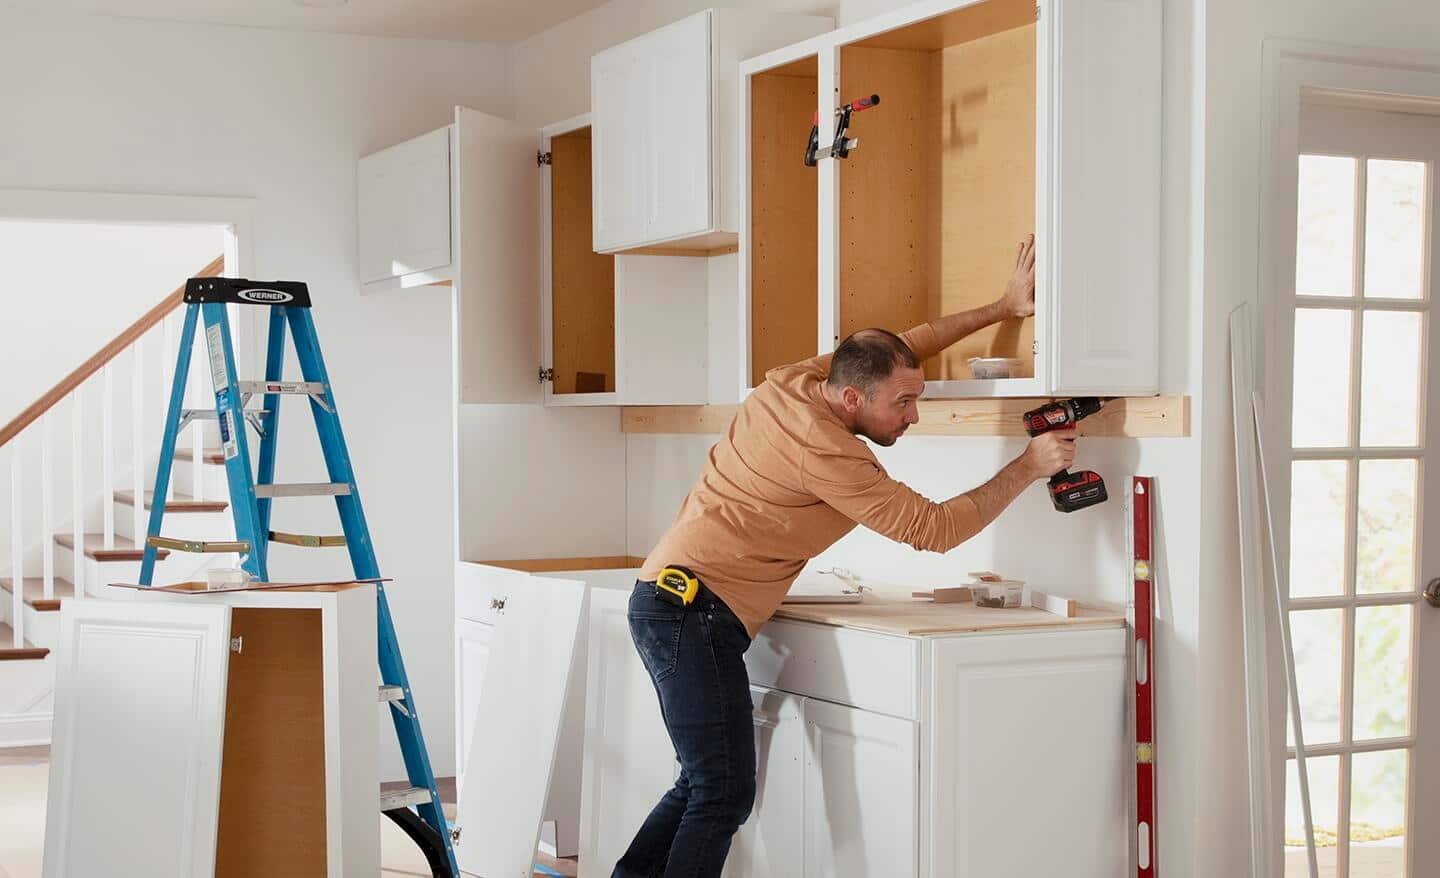
Leveling Wall Cabinets
Step 1: Pre-assemble And Plan
Wall cabinets are heavier and more awkward to handle, so it’s best to assemble them on the floor. Fasten cabinets together (if possible) before you hang them. This makes alignment easier.
Use a cabinet jack or get a helper to hold the cabinets in place. Set the first cabinet at the marked line, making sure it’s perfectly level.
Step 2: Shim And Adjust
If the wall is uneven, use shims between the cabinet back and the wall at stud locations. Never over-tighten screws or you’ll bow the cabinet.
Check level from side to side and front to back. Make small adjustments with shims. If your wall is very wavy, adjust at every stud.
Step 3: Fasten Wall Cabinets
Drill pilot holes through the strong cabinet rail into the wall studs. Insert cabinet screws and tighten until the cabinet is secure. Repeat for each stud the cabinet crosses.
If you’re working alone, you can temporarily drive a screw under the cabinet to act as a “rest” while you make adjustments. Remove it when finished.
Step 4: Connect Cabinets
Clamp the next cabinet to the first, making sure the faces are flush. Drill and screw the face frames together, then secure the cabinet to the wall at the studs. Repeat until all cabinets are hung.
Example: Avoid Bowed Cabinets
If you drive screws without shims behind the cabinet where the wall is uneven, the cabinet box can bend. Always shim behind the mounting rail at every stud for a straight, professional look.
Fastening Cabinets: Key Details
How you fasten cabinets makes a big difference in both safety and appearance. Here are important points:
- Use the right screws. Cabinet screws are thicker and have larger heads than drywall screws. This prevents pull-through.
- Always hit studs. Screws must go into studs, not just drywall, for holding strength.
- Space screws correctly. Place at least two screws per cabinet, at the top and bottom rails, and at every stud the cabinet crosses.
- Check for plumbing/electric. Before drilling, make sure there are no pipes or wires behind your screw location.
Common Mistakes And How To Avoid Them
- Skipping the level check: Don’t assume your floor or wall is straight. Always check with a quality level.
- Using drywall screws: These are too weak and can snap under weight. Use cabinet installation screws.
- Not shimming enough: Gaps between cabinet and wall mean less support. Shim fully at every contact point.
- Not clamping frames: If you don’t clamp and screw face frames, cabinet fronts won’t be flush.
- Over-tightening screws: This can crush the cabinet or pull it out of line. Tighten until snug, not more.
Credit: www.homedepot.com
Data Table: Cabinet Screw Comparison
Choosing the right screw is important. Here’s a quick comparison:
| Type | Length | Strength | Best Use |
|---|---|---|---|
| Cabinet Installation Screw | 2.5-3 in | High | Securing cabinets to studs |
| Drywall Screw | 1.5-2 in | Low | Drywall, not cabinets |
| Wood Screw | 2-3 in | Medium | General woodworking |
Pro Tips For Perfect Results
- Label each cabinet before installing, especially for kitchens with many cabinets.
- Pre-drill holes for all screws to avoid splitting wood.
- Leave a small gap (1/8 inch) between the cabinet and side walls for expansion, especially in humid areas.
- Double-check alignment after every screw. It’s easier to fix problems as you go than at the end.
How To Fix Out-of-level Cabinets
Sometimes, after installation, you notice a cabinet is still out of level. Here’s what you can do:
- Loosen screws slightly and add or adjust shims as needed.
- Re-check level and tighten screws again.
- For small gaps at the floor, use a scribe molding to cover them.
- If the problem is severe, remove the cabinet and restart leveling. It’s better to fix early than to live with slanted cabinets.
Data Table: Typical Cabinet Heights
It’s helpful to know standard cabinet sizes for planning:
| Cabinet Type | Standard Height | Standard Depth |
|---|---|---|
| Base Cabinet | 34.5 in | 24 in |
| Wall Cabinet | 30 or 42 in | 12 in |
| Countertop Clearance | 18 in | — |
Safety Reminders
- Always wear safety glasses when drilling or cutting.
- Use a helper or cabinet jack for wall cabinets; they are heavy and awkward.
- Double-check for pipes and wires before drilling into walls.
- Don’t rush the leveling process. Good prep means fewer problems later.
When To Call A Pro
If your walls or floors are extremely out of level, or if you’re unsure about finding studs, it may be best to call a professional. Some older homes have unique challenges like uneven plaster or hidden pipes. Hiring a pro can save time, money, and frustration.
Data Table: Shim Materials Compared
Shims come in different materials. Here’s a quick guide:
| Shim Material | Pros | Cons |
|---|---|---|
| Wood | Easy to cut, cheap | Can compress, rot if wet |
| Plastic | Won’t rot, uniform | Harder to trim |
| Composite | Strong, moisture-proof | More expensive |
Frequently Asked Questions
How Do I Know If My Cabinets Are Level?
Place a 4-foot level across the top and front of the cabinet. The bubble should be centered between the lines. Check both directions—side to side and front to back.
What If My Wall Is Very Uneven?
Use shims behind the mounting rails at every stud. For severe cases, you might need to fur out the entire wall with strips of wood before installing cabinets.
Can I Install Cabinets Without Finding Studs?
No. Cabinets must be anchored to studs for strength. Drywall alone cannot support cabinet weight safely.
What Screws Should I Use For Cabinets?
Use cabinet installation screws, typically 2.5 to 3 inches long, with a large head for holding power. Never use drywall screws; they are too weak.
Where Can I Find More Detailed Cabinet Installation Guides?
You can find step-by-step guides and videos on the official Family Handyman website.
Leveling and fastening cabinets well is one of the best investments you can make in your kitchen or bathroom. With the right tools, careful preparation, and attention to detail, you can achieve a professional look and long-lasting results. Take your time, check your work often, and don’t hesitate to ask for help if you need it.
Your finished cabinets will be straight, secure, and ready for years of use.