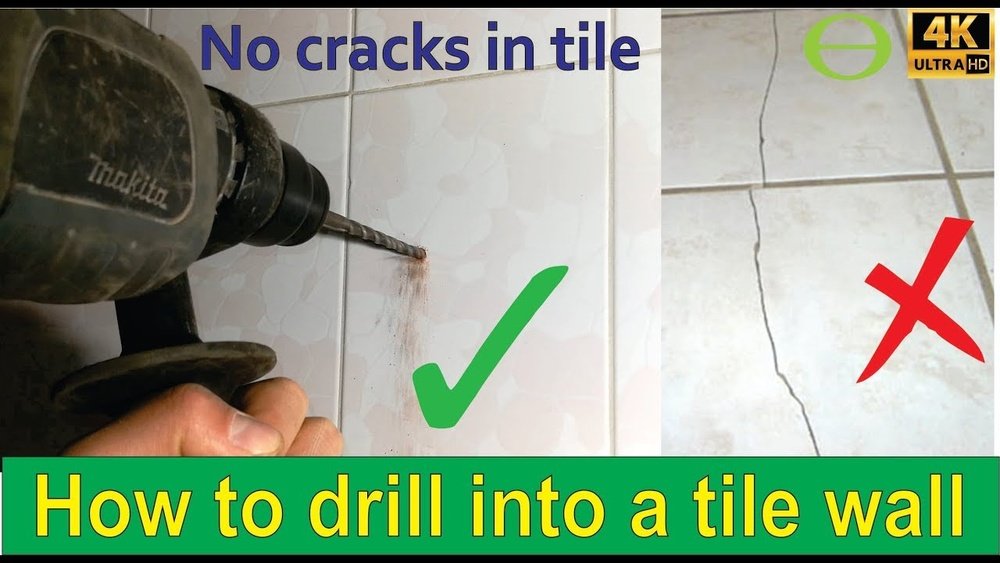
Drilling into tile can feel like a tricky task, especially if you want to avoid cracks or chips. If you’ve ever hesitated to hang shelves, install towel racks, or mount decorations because you’re unsure how to drill safely into your tiled walls, you’re not alone.
But here’s the good news: with the right tools and techniques, you can make clean, precise holes without damaging your tiles. In this guide, you’ll discover simple, step-by-step tips to drill into tile confidently and protect your beautiful surfaces. Ready to learn how to get it right the first time?
Keep reading and master the art of drilling into tile like a pro.

Credit: www.youtube.com
Choosing The Right Drill Bit
Choosing the right drill bit is crucial for drilling into tile safely. Different tiles require specific bits to avoid cracks and chips. Using the proper drill bit helps you create clean holes without damage. Understanding the types of drill bits makes your job easier and more precise.
Diamond-tipped Bits For Porcelain And Glass
Diamond-tipped bits are perfect for hard surfaces like porcelain and glass. They cut smoothly through tough tiles without cracking. These bits last longer and provide precise drilling. Use them with slow speed and gentle pressure for best results.
Carbide-tipped Bits For Ceramic And Stoneware
Carbide-tipped bits work well on ceramic and stoneware tiles. They are strong enough to handle dense materials. These bits prevent chipping and offer clean holes. Keep the bit cool by adding water while drilling to avoid overheating.
Avoiding Regular Twist Bits
Regular twist bits are not suitable for tile drilling. They can cause the tile to crack or shatter easily. These bits are designed for wood or metal, not hard tile surfaces. Always choose a specialized bit to protect your tile and ensure success.
Preparing The Tile Surface
Preparing the tile surface is a key step before drilling. It helps prevent cracks and chips. A clean, stable surface ensures accurate drilling and better results.
Taking time to prepare the surface reduces mistakes. It keeps the tile intact and looks neat after drilling.
Marking The Drilling Spot
Start by marking the exact spot to drill. Use a pencil or a fine-tip marker for this. Make sure the mark is clear but light enough to erase later.
Double-check the spot to avoid errors. Measure carefully to place the hole where you want it. Marking clearly guides the drill bit and prevents slipping.
Using Masking Tape For Grip
Place a small piece of masking tape over the marked spot. The tape creates extra grip for the drill bit. It stops the bit from sliding on the smooth tile surface.
The tape also helps reduce chipping around the hole. Use tape in a cross shape for better hold. This simple step improves drilling control and safety.
Securing Loose Tiles
Check if the tile is firmly fixed to the wall or floor. Loose tiles can shift and crack during drilling. Press gently to test for any movement.
If a tile is loose, fix it first. Use tile adhesive or a suitable glue to secure it. Wait for the adhesive to dry completely before drilling. Stable tiles ensure clean holes and prevent damage.
Setting Up The Drill
Setting up the drill correctly is key to drilling into tile without damage. Tiles are fragile and need gentle handling. The drill must be adjusted to avoid cracks or chips. Proper setup ensures smooth drilling and a clean hole. Follow these steps to prepare your drill for the task.
Disabling Hammer Function
Most drills have a hammer setting for masonry work. This setting causes the drill bit to hammer while spinning. Hammer action can crack or break the tile easily. Turn off the hammer function before drilling tiles. Use the drill in a regular rotary mode only. This prevents unnecessary pressure and protects the tile surface.
Selecting Proper Drill Speed
Choose a slow drill speed for tile drilling. High speed can cause the bit to slip or overheat. Slow speed gives better control and reduces tile damage. Start drilling at a low speed and steady pressure. Increase speed slightly only if needed. Keep the drill steady and avoid sudden movements. This approach makes drilling safer and more precise.
Drilling Techniques
Drilling into tile requires a careful approach and the right techniques. Using proper drilling methods reduces the risk of cracking or damaging your tile. Follow these steps to ensure clean, precise holes without stress.
Starting Slowly With Light Pressure
Begin drilling at a low speed. Apply gentle pressure to avoid cracking the tile surface. Let the drill bit do the work without forcing it. This helps the bit grip the tile without slipping.
Maintaining Steady Pressure
Keep your hand steady and apply even pressure throughout. Avoid sudden pushes or jerks. Consistent pressure prevents the tile from cracking. It also helps the drill bit cut smoothly through the tile.
Cooling The Drill Bit With Water
Heat builds up quickly while drilling tiles. Use water to cool the drill bit often. This prevents overheating and damage to both the bit and tile. A small spray bottle or wet sponge works well for cooling.
Increasing Speed After Breaking The Surface
Once the drill bit passes through the tile surface, increase speed slightly. This speeds up drilling through the softer material behind the tile. Keep steady pressure and avoid rushing to maintain control and accuracy.
Drilling Through The Wall Behind Tile
Drilling through the wall behind tile requires a different approach than just drilling the tile surface. Once you pass the tile, the wall material might be drywall, cement, or brick. Each material needs the right drill bit and settings to avoid damage. The correct tools and techniques ensure a clean hole and protect your walls.
Switching To Masonry Drill Bit
After drilling through the tile, switch to a masonry drill bit. These bits are made to handle hard materials like brick and cement. Using the wrong bit can break the bit or ruin the wall. Masonry bits have a strong tip that lasts longer and drills faster in tough surfaces. Change the bit carefully to keep your drill steady and ready for the next step.
Adjusting Drill Settings For Wall Material
Set your drill to the right mode for the wall type. Turn off the hammer function if drilling drywall or soft plaster. Use hammer mode only for solid brick or concrete. Drill at a slow speed first to avoid slipping or cracking. Increase speed as the bit moves deeper. Keep the drill steady and apply gentle pressure for the best results.
Preventing Common Mistakes
Drilling into tile requires careful attention to avoid damage. Many common mistakes can cause cracks, chips, or uneven holes. Preventing these errors makes the project smoother and safer. Below are key tips to keep your tile intact and your work precise.
Avoiding Tile Cracks And Chips
Use the correct drill bit for your tile type. Diamond-tipped or carbide-tipped bits work best. Place a piece of masking tape on the drilling spot. This prevents the drill bit from slipping and reduces chipping. Apply slow, steady pressure during drilling. Do not rush or force the drill. Let the bit do the work. Support the tile firmly to prevent movement. This reduces the risk of cracks forming.
Keeping The Drill Bit From Slipping
Mark the drilling point clearly before starting. Use masking tape over the mark to create grip. Start drilling at a low speed to keep control. Hold the drill steady and perpendicular to the tile surface. Avoid sudden movements or angling the drill. These can cause the bit to slip and damage the tile. A small indentation at the start helps keep the bit in place.
Managing Heat Build-up
Drilling generates heat that can crack tiles or dull bits. Cool the drill bit regularly with water. A spray bottle or wet sponge works well. Take breaks to let the bit cool down. Using slow drill speed also reduces heat. Overheating weakens the tile and shortens bit life. Keep water nearby to control temperature during drilling.
Safety Tips And Best Practices
Drilling into tile requires careful attention to safety and proper methods. Following key safety tips protects you and prevents damage to the tile. Taking simple precautions makes the process smoother and safer.
Wearing Protective Gear
Always wear safety goggles to protect your eyes from dust and debris. Use gloves to shield your hands from sharp tile edges and drill bits. A dust mask helps prevent inhaling tiny particles released during drilling. Proper footwear ensures stability and guards your feet from dropped tools.
Ensuring Work Area Safety
Clear the area of obstacles and clutter before starting. Make sure the tile surface is dry to avoid slips. Use a sturdy ladder or stool if you need height. Keep children and pets away to avoid distractions. Check for electrical wires or plumbing behind the tile to prevent accidents.
Cleaning Up After Drilling
Use a vacuum or brush to remove dust and small tile fragments. Wipe the surface with a damp cloth to clear remaining residue. Dispose of sharp tile pieces carefully to avoid injury. Store tools properly to keep your workspace organized. Clean up helps maintain a safe and neat environment.
:max_bytes(150000):strip_icc()/SPR-drilling-into-tile-6501004-06-a321a45fea36408db4019449d0039494.jpg)
Credit: www.thespruce.com

Credit: www.tilemountain.co.uk
Frequently Asked Questions
How Do You Drill Into Tile Without Cracking It?
Use a diamond or carbide-tipped bit with a drill set to no hammer. Place masking tape on the tile. Drill slowly with light pressure, cooling the bit frequently with water to prevent cracking.
Can I Use A Regular Drill Bit For Tile?
You should not use a regular drill bit for tile. Use a diamond or carbide-tipped bit to prevent cracking. Drill slowly with steady pressure and keep the bit cool with water. Regular bits can shatter the tile and damage your drill.
What Kind Of Drill Bit Do You Use On Tile?
Use a diamond-tipped or carbide-tipped drill bit for tiles. Avoid hammer mode, drill slowly, and cool the bit with water.
How To Drill A Hole In Ceramic Without Cracking?
Use a diamond or carbide-tipped drill bit with a standard drill (no hammer). Place masking tape on the tile to prevent slipping. Drill slowly with steady pressure. Keep the bit cool by dipping it in water. Secure the tile and avoid rushing to prevent cracks.
Conclusion
Drilling into tile requires patience and the right tools. Use a diamond or carbide drill bit for best results. Apply slow, steady pressure and keep the drill bit cool with water. Masking tape helps prevent slipping and chipping on the tile surface.
Always turn off the hammer function on your drill. Secure loose tiles before starting. These simple steps protect your tiles from cracking. With care, you can drill clean holes safely and easily. Practice on a spare tile if possible. Now, you are ready to drill into tile with confidence.