Installing a recessed medicine cabinet can transform your bathroom. It saves space, looks modern, and keeps things organized. Many homeowners think this job is difficult, but with careful planning and the right tools, you can do it yourself. This guide will help you step-by-step, from choosing the right cabinet to finishing touches.
Even if you are new to DIY, you’ll learn how to avoid common mistakes and get a professional result.
What Is A Recessed Medicine Cabinet?
A recessed medicine cabinet sits inside your wall, not just on top of it. This means the cabinet’s body is hidden, leaving only the door and frame visible. Recessed cabinets are popular because they use less space and look sleek. Unlike surface-mounted cabinets, they don’t stick out, so your bathroom feels bigger and tidier.
Most recessed cabinets are made from steel, wood, or plastic. They come in different sizes and styles, from mirrored doors to plain fronts. You can even find cabinets with built-in lights or outlets.
Choosing The Right Cabinet
Before you begin, select a cabinet that fits your needs and your wall. Measure carefully. The cabinet size should match the space between wall studs, usually 16 inches apart. But some walls have different spacing, so check with a stud finder.
Here is a comparison of common cabinet materials:
| Material | Durability | Price Range | Style Options |
|---|---|---|---|
| Steel | High | $80–$300 | Modern, simple |
| Wood | Medium | $120–$400 | Traditional, ornate |
| Plastic | Low–Medium | $50–$200 | Basic, lightweight |
Steel cabinets last longer and resist moisture. Wood cabinets are stylish but can swell with humidity. Plastic cabinets are cheap and easy to install but may not last as long.
When choosing your cabinet, consider:
- Depth: Deeper cabinets hold more but require thicker walls.
- Height and width: Make sure it fits between studs.
- Door style: Mirrored doors are common, but plain or decorative doors suit different tastes.
- Features: Some cabinets have adjustable shelves, built-in lighting, or outlets.
Credit: www.homedepot.com
Tools And Materials Needed
To install a recessed medicine cabinet, you’ll need:
- Stud finder
- Level
- Tape measure
- Pencil
- Drywall saw or reciprocating saw
- Hammer
- Utility knife
- Screwdriver or drill
- Wood screws
- Safety goggles and gloves
- Wood shims (optional)
- Caulk and paint (for finishing)
Check your cabinet’s instructions for any special tools. If your wall has pipes or electrical wires, you might need extra tools or help from a pro.
Planning Your Installation
Before cutting anything, plan carefully. The most important step is finding the right spot in your wall.
- Choose the location: Pick a spot above your sink or toilet, where the cabinet will be easy to use.
- Find the studs: Use a stud finder to locate the vertical wood beams in your wall. Mark the edges of each stud.
- Check for obstacles: Walls may have pipes, wires, or vents. Look for switches, outlets, or plumbing nearby. Tap the wall and listen for hollow vs. solid spots.
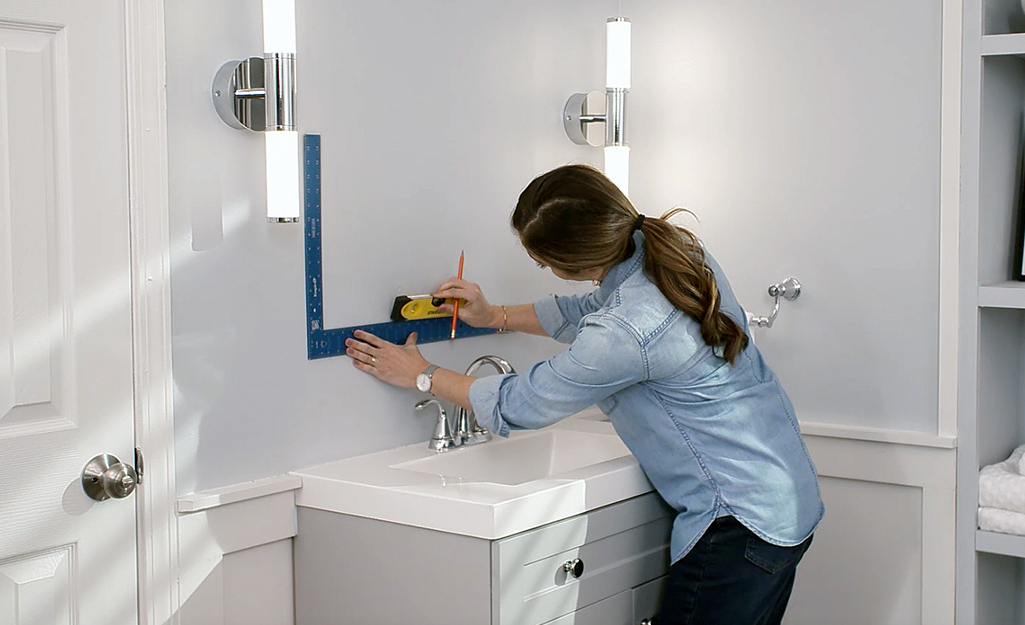
- Measure and mark: Outline your cabinet’s size on the wall with a pencil. Make sure the box fits between the studs.
Here’s a quick comparison of recessed vs. surface-mounted cabinets:
| Feature | Recessed | Surface-Mounted |
|---|---|---|
| Space Saving | Excellent | Fair |
| Installation Difficulty | Medium–Hard | Easy |
| Look | Sleek, modern | Traditional |
| Wall Damage | Medium | Low |

Credit: www.youtube.com
Cutting The Wall Opening
Once you have planned, you can cut the opening for your cabinet. This is where most beginners make mistakes. Be careful and precise.
Steps For Cutting:
- Put on safety gear: Wear goggles and gloves.
- Draw the outline: Use your cabinet’s size to mark the wall.
- Score the drywall: Use a utility knife to cut along your outline. This helps control dust and prevents tearing.
- Cut the opening: Use a drywall saw to cut the opening. Go slowly. If you hit wood, stop—this might be a stud.
- Remove drywall: Pull out the piece. Clean the edges with your knife.
If you find a stud where the cabinet should go, you may need to cut and reframe. This is more advanced. If you see wires or pipes, stop and consult a professional.
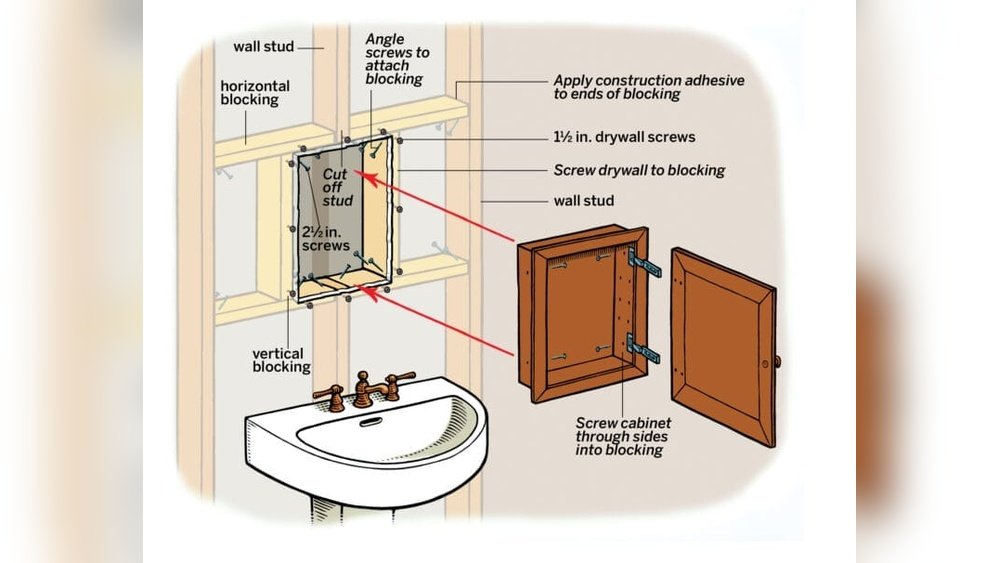
Framing The Opening
For most cabinets, you need a framed box inside the wall. This supports the cabinet and keeps it secure.
Framing Steps:
- Measure the box: Use your cabinet’s instructions for exact size.
- Cut wood pieces: Use 2×4 lumber to make a frame that fits the opening.
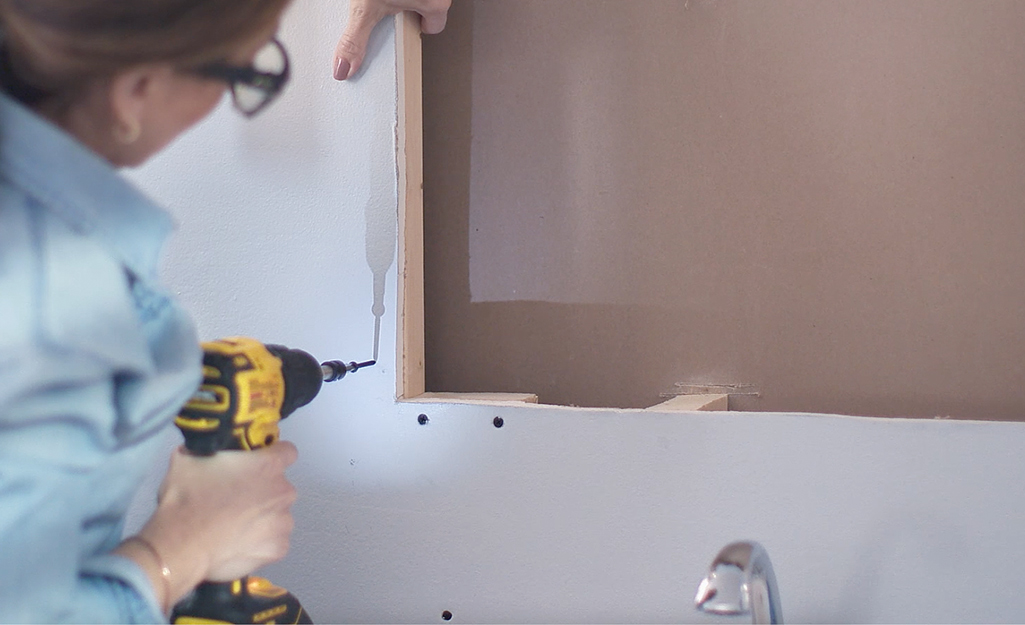
- Build the frame: Nail or screw the wood together. Place the frame inside the wall opening.
- Secure the frame: Use screws to attach the frame to wall studs. Check with a level to make sure it’s straight.
Many homeowners forget to check for level. If the frame is tilted, your cabinet will hang crooked. Always double-check before screwing.
Installing The Cabinet
With the frame ready, you can install the cabinet itself. This part is easier, but accuracy matters.
Steps To Install:
- Test fit: Place the cabinet in the opening. Adjust with wood shims if needed.
- Check alignment: Use a level to make sure the cabinet is straight.
- Secure the cabinet: Use screws to fix the cabinet to the frame. Follow your cabinet’s instructions.
- Install shelves and door: Attach shelves and the door, if not already installed.
Some cabinets require you to attach the door after the box is in place. Be gentle to avoid scratching the mirror.
Finishing Touches
You’re almost done, but finishing matters. Good finishing makes the cabinet look professional.
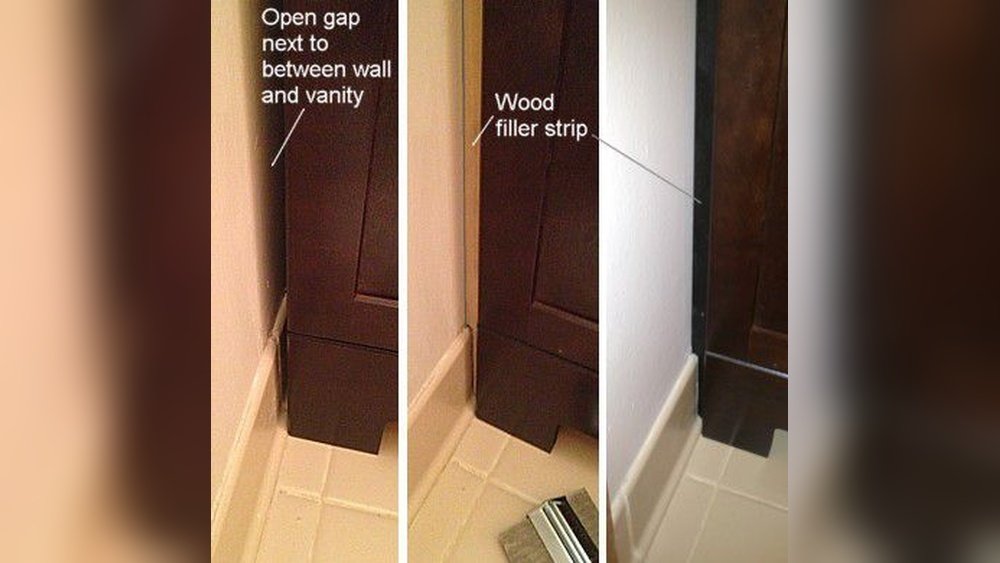
- Caulk gaps: If you see gaps between cabinet and wall, use caulk to seal them. Smooth with your finger.
- Paint edges: Touch up the wall around the cabinet with matching paint.
- Clean up: Remove dust, wipe the cabinet, and check the door swings smoothly.
A hidden tip: Use painter’s tape around the cabinet before caulking. This keeps lines neat and avoids mess.
Common Mistakes And How To Avoid Them
Many beginners make mistakes during installation. Here are two non-obvious pitfalls:
- Ignoring wall thickness: Not all walls are thick enough for deep cabinets. Measure your wall’s depth before buying.
- Missing hidden obstacles: Pipes or wires inside the wall can stop your project. Double-check with a flashlight and small hole before cutting a large opening.
Some people cut a hole that is too big. Always start small, then adjust as needed. Others rush the framing. If the frame is weak, the cabinet may sag or fall.
Safety And Building Codes
Working inside walls can be risky. Always check local building codes. Some areas require permits for wall changes. If you find electrical wires, turn off power before working. For plumbing, shut off water.
If you’re unsure, ask a licensed contractor. It’s better to spend a little extra than face expensive repairs.
For more detailed safety tips, see Home Depot’s guide.
Credit: www.homedepot.com
Cost And Time Estimates
Installing a recessed medicine cabinet is not expensive if you do it yourself. Here is a simple breakdown:
| Expense | DIY Cost | Professional Cost |
|---|---|---|
| Cabinet | $50–$400 | $50–$400 |
| Tools & Materials | $40–$120 | $0 |
| Labor | $0 | $150–$350 |
| Total | $90–$520 | $200–$750 |
Most DIY installations take 2–4 hours. Professionals finish faster, but charge more.
Practical Tips For A Perfect Result
- Take your time measuring. Even small errors make big problems later.
- Use a sharp saw for clean cuts.
- Don’t skip the framing—it’s key for strength.
- Choose a cabinet with adjustable shelves for flexibility.
- If you’re unsure about pipes or wires, drill a small hole first and look inside.
Many people overlook wall thickness. Walls are often 4–6 inches deep, but not always. If your cabinet is deeper than your wall, it will stick out or not fit.
Another tip: If you want extra features (like lights or outlets), buy a cabinet with these included. Adding them later is much harder.
Frequently Asked Questions
How Do I Know If My Wall Can Fit A Recessed Cabinet?
Check the space between studs and wall depth. Most walls are 16 inches between studs and 4–6 inches deep. Use a stud finder and measure carefully. If there are pipes or wires, pick another spot or consult a pro.
Can I Install A Recessed Cabinet In A Tiled Wall?
Yes, but it’s harder. You’ll need a special tile saw and careful planning. Cutting tile is noisy and dusty. Protect tiles from cracking by taping and cutting slowly.
What If I Find Electrical Wires Or Plumbing?
Stop work immediately. Turn off power and water. You may need to move wires or pipes, which is a job for a licensed electrician or plumber. Never cut wires or pipes yourself.
How Long Does The Installation Take?
For most DIYers, installation takes 2–4 hours. If you are experienced, you may finish faster. If you hire a professional, the job is often done in 1–2 hours.
Is It Possible To Remove A Recessed Cabinet Later?
Yes, but you’ll need to patch the wall and possibly rebuild framing. Removing the cabinet leaves a hole, which you can fix with drywall and paint. If you plan to change cabinets often, consider a surface-mounted style.
Installing a recessed medicine cabinet gives your bathroom a clean, modern look and saves space. With careful planning, the right tools, and attention to detail, you can do this job yourself and enjoy the result for years. Take your time, follow these steps, and you’ll get a cabinet that works well and looks great.