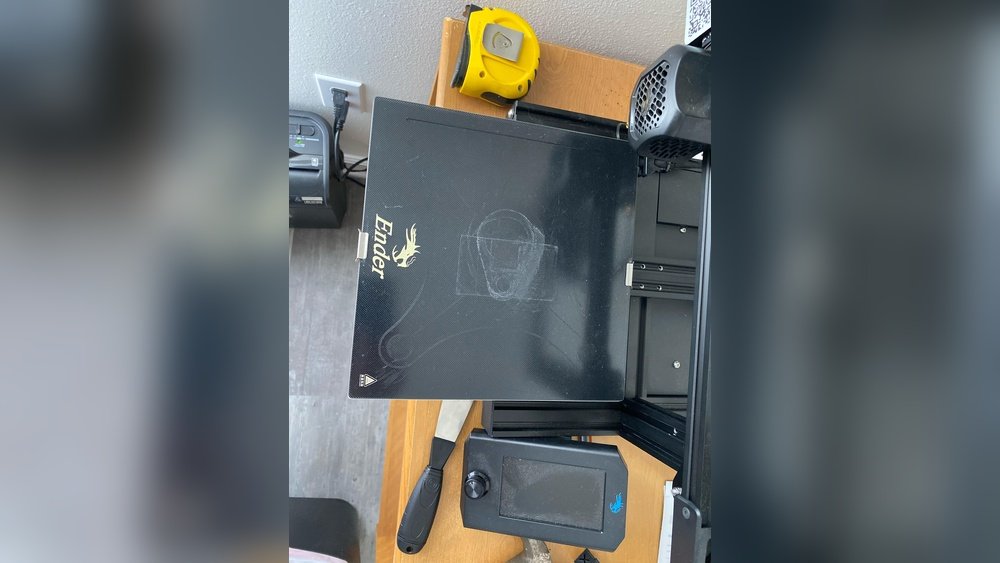
Keeping your 3D printer bed clean is one of the most important steps for getting high-quality prints. It might sound simple, but a dirty bed can cause prints to fail, stick too much, or not stick at all. Many beginners overlook the bed, focusing more on the printer itself.
However, even the best printer will struggle if the bed has dust, grease, or leftover filament. Learning how to clean your 3D printer bed the right way saves time, materials, and frustration.
This guide explains everything you need to know about cleaning your 3D printer bed. You’ll discover which cleaning methods work for different bed types, what products to use, how often to clean, and mistakes to avoid. With clear steps and practical tips, you’ll get reliable results—no matter which printer you own.
Why Cleaning The 3d Printer Bed Matters
A clean printer bed helps your print stick properly. If your bed is dirty, prints can lift, curl, or slip during printing. This is called bed adhesion failure, and it’s one of the top reasons for poor print quality. Clean beds also prevent old filament from mixing with new prints, which can cause rough surfaces or color changes.
Small particles, oils from your hands, and filament leftovers build up fast. Even tiny dust can cause big problems, especially for small or detailed prints. Regular cleaning keeps your printer reliable and reduces wasted material.
Types Of 3d Printer Beds And Their Cleaning Needs
Not all printer beds are the same. The cleaning method depends on the material of your bed. Here are the most common types and how they differ:
| Bed Type | Typical Material | Special Cleaning Needs |
|---|---|---|
| Glass | Borosilicate glass | Needs careful cleaning, avoid scratches |
| PEI Sheet | Polyetherimide | Sensitive to harsh chemicals |
| BuildTak | Plastic composite | Can wear out with strong solvents |
| Metal | Aluminum | Resistant, but avoid abrasive pads |
| Magnetic Flex Plate | Spring steel/PEI | Remove for easier cleaning |
Each bed type needs a different approach. Using the wrong cleaner can damage the surface or reduce print quality. For example, strong solvents can ruin a PEI sheet, while rough scrubbing can scratch glass beds.

Credit: www.youtube.com
What You Need To Clean Your 3d Printer Bed
Before you start, gather the right supplies. Using the best tools makes cleaning easier and safer for your printer.
- Isopropyl alcohol (IPA) (at least 70%) — removes oils and dust
- Warm water — helps dissolve residues
- Mild dish soap — cleans grease
- Lint-free cloths — prevents fibers sticking to the bed
- Plastic scraper — removes stuck filament gently
- Soft brush — sweeps away dust and crumbs
- Acetone (for some beds, like glass or PEI; test first)
- Rubber gloves — keeps oils off the bed
- Paper towels — for quick drying
Avoid using rough sponges, steel wool, or strong chemicals unless your bed can handle them. Always check your printer’s manual for recommended products.
Step-by-step: How To Clean A 3d Printer Bed
The cleaning process depends on your bed type and how dirty it is. Here’s a practical guide for each situation:
1. Routine Cleaning (for Light Dust And Fingerprints)
Most beds need simple cleaning after each print or every few days.
- Turn off your printer and let the bed cool.
- Put on rubber gloves to prevent fingerprints.
- Dampen a lint-free cloth with isopropyl alcohol.
- Wipe the surface gently. Cover the whole bed.
- Use a dry cloth or paper towel to finish.
This removes most dust, oils, and small debris. It’s quick and safe for glass, PEI, BuildTak, and metal beds.
2. Deep Cleaning (for Stuck Filament And Residue)
If your bed has old filament, glue, or sticky residue:
- Remove the bed if possible (especially for magnetic plates).
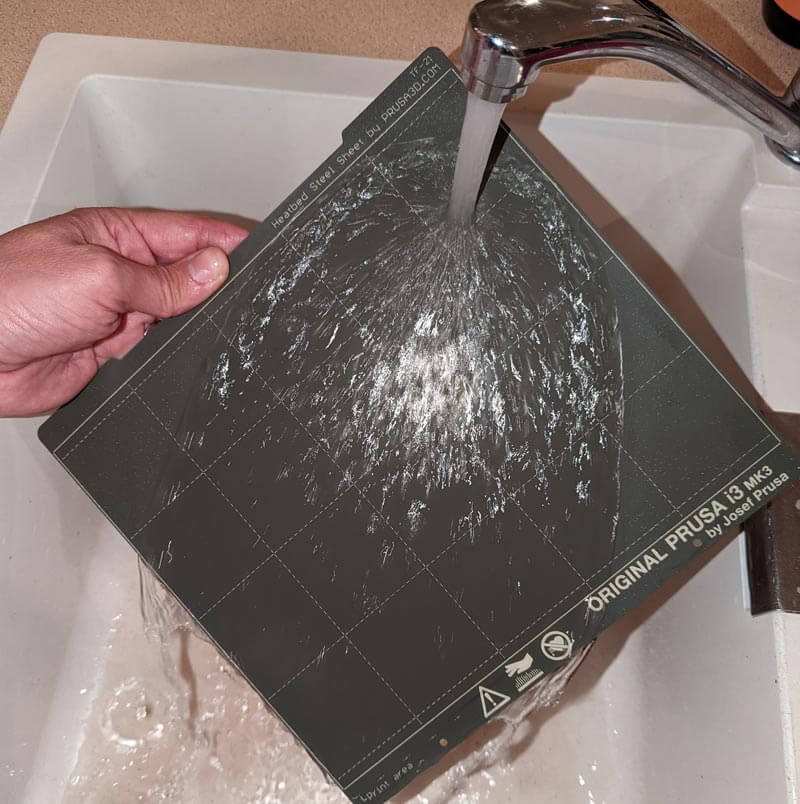
- Mix warm water with a drop of mild dish soap.
- Wet a cloth and scrub gently. For glass, you can be firm; for PEI or BuildTak, use a soft touch.
- Use a plastic scraper for stuck filament. Never use metal tools.
- Rinse with clean water.
- Dry with a lint-free cloth.
If residue remains, try a bit of acetone—but only on glass or PEI. Test on a small spot first. Acetone can damage BuildTak and some plastics.
3. Removing Glue Or Hairspray
Some users apply glue stick or hairspray for better adhesion. These build up over time.
- Use warm water and dish soap.
- Scrub the area with a soft cloth.
- Rinse and dry.
- For stubborn glue, use isopropyl alcohol or acetone (glass only).
4. Cleaning After Failed Prints
Failed prints leave more residue and sometimes melted filament.
- Let the bed cool fully.
- Gently scrape off large chunks with a plastic scraper.
- Clean as in deep cleaning steps.
- Inspect for scratches or damage.
If your bed is scratched, it can affect adhesion. Sometimes, you need to replace the bed or apply a new surface.
How Often Should You Clean Your 3d Printer Bed?
Cleaning frequency depends on your usage:
| Usage Level | Recommended Cleaning |
|---|---|
| Daily printing | Clean after every print |
| Several times a week | Clean every 2-3 prints |
| Occasional printing | Clean before each session |
| Heavy use (multiple users) | Deep clean weekly |
If you touch the bed often or use glue, clean more frequently. For best results, wipe with alcohol before every print.
Common Mistakes When Cleaning 3d Printer Beds
Many beginners make simple mistakes that damage their beds or ruin prints. Avoid these:
- Using metal scrapers — scratches the surface.
- Applying strong solvents on sensitive beds (BuildTak, PEI) — can weaken or dissolve the material.
- Cleaning when the bed is hot — causes streaks and can warp the bed.
- Using paper towels that leave fibers — can affect adhesion.
- Not drying the bed fully — water drops can cause poor sticking.
- Touching the bed after cleaning — oils from fingers cause prints to fail.
It’s easy to rush cleaning, but taking your time saves money and frustration.
Practical Tips For Better Bed Cleaning
Here are some tips from experienced users:
- Use lint-free cloths instead of regular towels. Microfiber is good.
- For PEI beds, avoid acetone unless you know it’s safe. Use alcohol first.
- If your glass bed is cloudy, try a tiny bit of acetone—but always test on a corner.
- For sticky BuildTak, use warm water and mild soap. Avoid scrubbing too hard.
- If your prints keep failing, check for invisible grease with a UV flashlight.
- Always let the bed cool before cleaning. Hot beds can warp or crack.
- Keep your cleaning supplies near the printer for quick access.
- For magnetic flex plates, remove and clean away from the printer to avoid spills.
One insight many miss: the first layer of your print is most affected by bed cleanliness. If your first layer always fails, try cleaning more often.
Should You Use Adhesion Promoters?
Some beds need extra help for prints to stick. Glue stick, hairspray, and special tapes are common. But these add residue and need cleaning.
- Only use glue or hairspray on glass beds, not PEI or BuildTak.
- Apply a thin layer, not a thick one.
- Clean off all promoters after each print.
If you use tapes, replace them when they peel or get sticky.
Credit: www.printsolid.com.au
Signs Your Bed Needs Replacement
Cleaning can’t fix every problem. Sometimes, beds wear out and need replacement.
Look for these signs:
- Deep scratches that won’t clean off
- Surface peeling or bubbling
- Permanent sticky spots
- Warping (bed isn’t flat)
- Prints fail even after thorough cleaning
If you see these, consider buying a new bed or surface. For example, a PEI sheet lasts about 1–2 years with regular use.
Comparing Cleaning Products
Choosing the best cleaning product is important. Here’s a simple comparison:
| Product | Best For | Risks |
|---|---|---|
| Isopropyl Alcohol | All bed types | None if used properly |
| Acetone | Glass, PEI (test first) | Damages BuildTak, plastics |
| Mild Dish Soap | General cleaning | Needs thorough rinsing |
| Plastic Scraper | Stuck filament | Can scratch if used aggressively |
| Microfiber Cloth | Dust, fingerprints | None |
Most experts recommend isopropyl alcohol for routine cleaning, as it’s safe and effective.

Credit: www.youtube.com
Real-world Example: Cleaning A Glass Bed
Suppose you use a glass bed and notice your prints won’t stick. Here’s how to fix it:
- Turn off the printer and let the bed cool.
- Remove the glass bed, if possible.
- Wipe with isopropyl alcohol and a lint-free cloth.
- If prints still fail, wash with warm water and mild soap.
- Dry fully. Check for scratches or residue.
- Apply a tiny bit of glue stick for extra adhesion, then clean after each print.
Many users find that regular alcohol cleaning solves most issues. If problems remain, inspect for deeper issues like bed leveling or surface damage.
Keeping Your Bed Clean For Long-term Success
Clean beds last longer and produce better prints. Make cleaning a habit, not a chore. Store your printer in a dust-free place, and avoid touching the bed with bare hands. If your bed gets dirty, clean it before starting a new print.
If you print with different materials (PLA, ABS, PETG), clean between material changes. Some filaments leave more residue than others.
For advanced tips and expert guidance, visit MatterHackers. Their guides offer deep insights for all printer types.
Frequently Asked Questions
How Do I Clean A Pei Bed Safely?
Use isopropyl alcohol with a lint-free cloth. Avoid acetone unless the manufacturer says it’s safe. For tough residue, try warm water with mild soap. Never use rough sponges or metal tools.
Can I Use Acetone On Buildtak Beds?
No. Acetone damages BuildTak and similar plastic surfaces. Stick with isopropyl alcohol or warm soapy water. For stuck filament, use a plastic scraper.
Why Does My Print Not Stick Even After Cleaning?
Check for invisible grease, uneven bed leveling, or worn-out surfaces. Sometimes, you need to apply glue or replace the bed. Clean before every print for best results.
How Often Should I Deep Clean My Printer Bed?
If you print daily, deep clean once a week. For light use, deep clean every month. Always clean after failed prints or when using adhesives.
What’s The Best Way To Remove Stuck Filament?
Let the bed cool, then gently scrape with a plastic scraper. For melted plastic, use warm water and mild soap. Never force or use metal tools.
Cleaning your 3D printer bed is simple but powerful. With these steps and tips, you’ll enjoy smoother prints, fewer failures, and a longer-lasting printer. Make cleaning part of your regular routine, and your 3D printer will reward you with high-quality results every time.