If you’ve ever tackled a home repair or improvement project, you know how important it is to get a smooth, clean finish when applying caulk. But using a caulk gun can sometimes feel tricky or messy.
That’s where the Husky caulk gun comes in—it’s designed to make your job easier and more precise. You’ll learn exactly how to use your Husky caulk gun like a pro, so your sealant lines look neat and professional every time.
Keep reading to discover simple steps and insider tips that will save you time and frustration on your next project.

Credit: www.ebay.ca
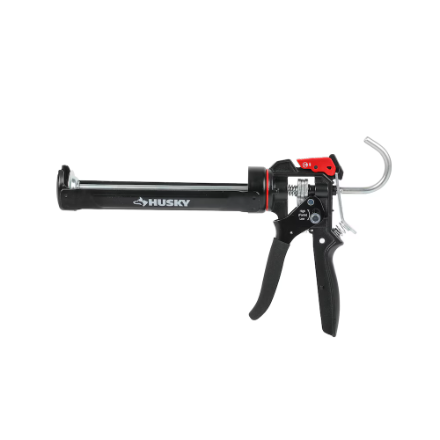
Choosing The Right Husky Caulk Gun
Choosing the right Husky caulk gun is important for smooth and easy application. The right tool makes your work faster and cleaner. Different jobs need different types of caulk guns. Picking the right one saves time and effort. Also, the caulk tube must fit the gun perfectly. This ensures steady flow and less mess. Learn about types and tube compatibility to find the best fit for your project.
Types Of Caulk Guns
Husky offers various caulk guns for different needs. Manual caulk guns are simple and affordable. You control the pressure by squeezing the trigger. These work well for small jobs and beginners. Pneumatic caulk guns use air pressure for smooth flow. They reduce hand fatigue on big projects. Dripless caulk guns stop caulk from leaking after release. This keeps your work clean and neat. Choose a type based on project size and comfort.
Selecting Compatible Caulk Tubes
Not all caulk tubes fit every gun. Husky caulk guns work best with standard 10 oz tubes. Check the size before buying. Some guns accept larger or smaller tubes. Using the wrong size causes leaks or blockages. Also, consider the caulk type—silicone, latex, or adhesive. Each needs a tube that fits the gun well. Match the tube size and caulk type for best results.
Preparing For The Job
Preparing for the job is the first step to use a Husky caulk gun properly. This step makes sure the caulk sticks well and the job looks neat. Proper preparation saves time and avoids mess.
Follow simple steps before starting to apply caulk. Clean the surface, cut the tube tip, and load the caulk tube. Each step is important for smooth caulking.
Cleaning The Surface
Clean the surface where you will apply caulk. Remove dirt, dust, and old caulk. Use a cloth or brush for this. A clean surface helps the caulk stick better. It also makes the finish look smooth and even.
Cutting The Caulk Tube Tip
Cut the tip of the caulk tube at a 45-degree angle. Cut a small opening first. You can cut bigger if needed later. A small opening controls the flow of caulk. This gives you better control and less waste.
Loading The Caulk Tube
Pull the plunger of the Husky caulk gun back. Insert the tube into the gun with the tip facing out. Push the plunger forward until it touches the tube bottom. Test by squeezing the trigger gently. This starts the caulk flow and checks the setup.
Operating The Husky Caulk Gun
Operating the Husky caulk gun is simple and efficient. Proper use helps create clean, professional-looking seals. Focus on holding the gun correctly, applying steady pressure, and keeping the bead smooth. These steps improve accuracy and reduce mess.
Holding The Gun Properly
Hold the Husky caulk gun firmly but comfortably. Grip the handle with your dominant hand. Use your other hand to steady the front of the gun. Keep your wrist straight to control movement. A steady hold prevents uneven lines and spills.
Applying Steady Pressure
Squeeze the trigger slowly and evenly. Avoid sudden bursts of pressure. Consistent force pushes the caulk out smoothly. Let the gun do the work, not your arm. Steady pressure creates a uniform bead without gaps.
Maintaining A Smooth Bead
Move the gun at a steady pace along the joint. Keep the tip close to the surface but not touching. Smooth the bead with a finger or tool after applying. This step seals gaps and creates a neat finish. A smooth bead looks professional and lasts longer.
Credit: hdsupplysolutions.ca
Tips For Professional Sealing
Professional sealing with a Husky caulk gun requires simple but effective techniques. These tips help you apply caulk smoothly and neatly. Clean, even sealing lasts longer and looks better.
Controlling Caulk Flow
Start with a steady, gentle squeeze on the trigger. Too much pressure causes excess caulk to spill. Too little makes the bead uneven. Hold the gun at a consistent angle. Move it slowly along the seam for even coverage.
Using Painter’s Tape For Clean Lines
Apply painter’s tape on both sides of the joint. This keeps caulk off unwanted areas. Press the tape down firmly for a tight seal. Remove the tape before the caulk fully dries. It leaves a sharp, clean edge without mess.
Smoothing The Caulk Bead
Use a wet finger or a caulk finishing tool to smooth the bead. Run your finger gently along the caulk line. This pushes caulk into gaps and removes air bubbles. Clean your finger or tool often to avoid lumps. Smooth beads improve seal strength and appearance.
Cleaning And Maintenance
Keeping your Husky caulk gun clean helps it work well for a long time. Dirt and old caulk can block its parts and make it hard to use. Regular cleaning and simple care can save you time and money later.
Cleaning the gun after each use is very important. This stops caulk from hardening inside. Also, storing the gun properly protects it from damage and rust. Sometimes, parts wear out and need changing. Knowing how to replace these parts keeps your caulk gun ready for every job.
Removing Excess Caulk
After using the caulk gun, remove extra caulk from the nozzle and body. Use a cloth or paper towel to wipe it clean. For dried caulk, gently scrape it off with a plastic tool. Avoid sharp objects that can scratch the gun. Clean parts allow smooth caulk flow next time.
Storing The Caulk Gun
Store the caulk gun in a dry place to stop rust. Keep it away from extreme heat or cold. Hold the plunger back to avoid pressure on the caulk tube. Use a cover or case to protect it from dust. Proper storage keeps the gun ready and extends its life.
Replacing Parts When Needed
Check the caulk gun for worn or broken parts regularly. Common parts to replace include the plunger rod and nozzle. Use parts designed for Husky caulk guns only. Follow the instructions in the manual for safe replacement. New parts help the gun work smoothly every time.

Credit: www.ebay.ca
Frequently Asked Questions
How Do I Load A Cartridge In A Husky Caulk Gun?
To load, pull the plunger rod back fully. Insert the cartridge nozzle first into the frame. Push the plunger against the cartridge base firmly before use.
What Is The Best Way To Apply Caulk With Husky Gun?
Hold the gun at a 45-degree angle. Squeeze the trigger gently for smooth, even caulk flow. Move steadily along the seam for clean lines.
How Do I Clean A Husky Caulk Gun After Use?
Release pressure by pushing the release lever. Remove the cartridge. Wipe excess caulk from the nozzle and frame with a damp cloth.
Can I Use All Caulk Types With A Husky Caulk Gun?
Yes, Husky caulk guns fit standard 10-ounce cartridges, suitable for silicone, acrylic, and latex caulks.
Conclusion
Using a Husky caulk gun makes sealing jobs easier and neater. Practice helps you control the flow and avoid mess. Clean the gun after each use for longer life. Choose the right caulk for your project to get best results.
With patience and care, your work will look professional. Keep these tips in mind for smooth, efficient caulking every time.