Imagine you’re ready to tackle a new DIY project. You’ve got your materials, your workspace is organized, and your enthusiasm is through the roof.
But there’s one essential tool you need to master to bring your project to life: the hand saw. This humble tool might seem simple, but using it correctly can make all the difference between a successful project and a frustrating experience.
In this guide, you’ll discover how to wield a hand saw with confidence and precision. Whether you’re cutting wood for a new shelf or trimming branches in your garden, understanding the nuances of hand saw use will empower you to achieve the results you envision. Stick around to learn the secrets that will make your projects not only easier but also more enjoyable.

Credit: www.homedepot.com
Types Of Hand Saws
Understanding the different types of hand saws can greatly improve your woodworking skills. Each saw is designed for specific tasks, and knowing when to use each one can make your projects more efficient and enjoyable. Whether you’re crafting furniture or fixing up your home, the right hand saw makes all the difference. Let’s dive into the various types of hand saws and how you can use them effectively.
Rip Saws
Rip saws are essential for cutting wood along the grain. They have large, chisel-like teeth which make them ideal for rough cuts. Imagine you’re building a wooden table and need to split a plank lengthwise. A rip saw is your best friend in this scenario. It offers control and precision, letting you create smooth, straight lines. Have you ever tried to cut a long piece of wood with the wrong saw? It feels like fighting a losing battle. Rip saws save you from that frustration.
Crosscut Saws
Crosscut saws are designed for cutting across the grain. They feature smaller, knife-like teeth that create clean cuts. Picture this: you’re making a bookshelf and need perfectly square edges. A crosscut saw helps you achieve that clean finish. It slices through wood with ease, making it perfect for detailed projects. Think about how satisfying it is when a piece fits perfectly because of a precise cut. That’s the magic of a crosscut saw.
Back Saws
Back saws are known for their stiff blades and fine teeth. They’re great for making accurate cuts in woodworking and carpentry projects. Consider a situation where you’re crafting dovetail joints for a drawer. A back saw provides the precision required for intricate work. Its reinforced back keeps the blade straight, allowing for flawless cuts. Have you ever marveled at a perfectly crafted joint? That’s often the result of a skilled hand using a back saw.
Coping Saws
Coping saws are perfect for curved cuts and intricate shapes. They have a thin, flexible blade that can maneuver through tight spaces. Imagine you’re working on a decorative wooden frame with complex patterns. A coping saw allows you to follow those curves effortlessly. It’s like having a paintbrush for wood, letting you create artistic designs. Have you ever wondered how craftsmen achieve those beautiful, flowing shapes? A coping saw is often the tool behind the magic.
Choosing the right saw for your project not only saves time but also enhances the quality of your work. What type of hand saw will you experiment with next? Let each tool be a guide in your woodworking journey.

Credit: cf-t.com
Selecting The Right Hand Saw
Choosing the right hand saw is essential for your project. The right tool makes work easier and more efficient. Each hand saw has its own purpose and design. Knowing what to consider is key. Understanding your project’s needs ensures success.
Material Considerations
Material type affects your saw choice. Wood and metal need different saws. For wood, a crosscut saw works best. It offers clean cuts across the grain. For metal, a hacksaw is ideal. Its fine teeth handle metal’s toughness. Consider the thickness of the material, too. Thick materials may need a specific saw blade. Select a saw with a sturdy handle for comfort.
Project Requirements
Understand your project’s scope. Simple tasks require basic saws. Complex projects may need specialized tools. Length of the saw blade matters. Longer blades are suited for larger cuts. Smaller blades offer more control. Precision cutting requires a fine-toothed saw. Large projects might need a saw with a robust blade. Assess the frequency of use. Frequent use demands a durable saw.
Preparing For The Cut
Preparing for a cut with a hand saw is crucial. It ensures accuracy and safety. Follow these steps to set up for a successful cut. Proper preparation will make the process smoother and more efficient.
Marking The Cut Line
Begin by marking the cut line on your material. Use a pencil for a clear line. A ruler or straight edge will help with precision. Measure twice to avoid mistakes. Clear markings guide your saw along the right path.
Securing The Workpiece
Ensure the workpiece is secure before cutting. Use clamps to hold it steady. This prevents movement and increases accuracy. A stable workpiece reduces the risk of injury. Make sure the clamps are tight and secure.
Proper Sawing Techniques
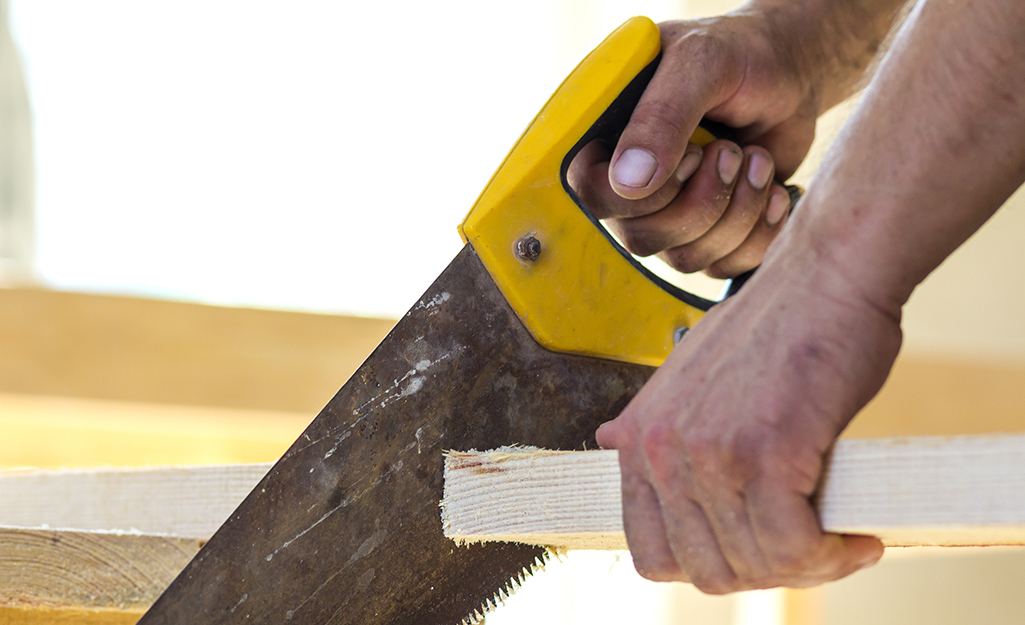
Learning to use a hand saw involves mastering key techniques. These techniques ensure precision, safety, and efficiency. Proper sawing techniques are crucial to achieving clean cuts. Whether you’re a novice or seasoned woodworker, understanding these methods enhances your work.
Grip And Stance
A firm grip is essential. Hold the saw’s handle tightly but comfortably. Your thumb should wrap around the handle, providing control. Position your feet shoulder-width apart. Keep your body balanced. This stance prevents fatigue and ensures stability.
Starting The Cut
Begin with a clear line. Use a pencil or marker to guide your saw. Place the saw’s teeth on the starting point. Use short strokes initially. This helps establish a groove. Maintain steady pressure. Avoid forcing the saw through the wood.
Maintaining The Cut Line
Focus on the cut line while sawing. Keep the saw aligned with this line. Use your dominant eye to maintain accuracy. Periodically check the alignment. Adjust your stance if needed. Consistency in the cut line results in smooth finishes.
Safety Measures
Using a hand saw safely involves wearing protective gear like gloves and goggles. Ensure a firm grip and stable footing. Keep fingers away from the blade and saw in a controlled motion to avoid accidents.
Using a hand saw may seem straightforward, but safety should always be your top priority. Accidents can happen in a split second, and a little precaution goes a long way. Let’s delve into the essential safety measures to ensure your sawing experience is both safe and efficient.Personal Protective Equipment
Before you even pick up the hand saw, ensure you’re wearing the right protective gear. Safety goggles are a must to protect your eyes from flying sawdust and wood chips. Gloves provide a better grip and shield your hands from accidental cuts. Consider wearing a dust mask too, especially if you’re working with materials that produce a lot of dust. Have you ever had sawdust in your eye? It’s not pleasant. Protecting yourself with the right gear is the first step towards a safe sawing experience.Safe Work Practices
Establishing a safe working environment is crucial. Make sure your workspace is well-lit and free from clutter. A tidy space means fewer tripping hazards and more focus on the task at hand. Always secure the material you’re cutting. Using clamps can prevent the wood from slipping, keeping it steady and ensuring a cleaner cut. Remember to keep your hands away from the saw’s path. It might sound basic, but in the middle of a task, it’s easy to forget. Have you ever wondered how professionals make it look so easy? It’s not just skill; it’s safe work practices that make the difference. By taking these safety measures seriously, you not only protect yourself but also improve the quality of your work. Stay safe, and your handsaw will become an invaluable tool in your DIY arsenal.Maintaining Your Hand Saw
Maintaining your hand saw is crucial for long-lasting performance. Proper care ensures smooth cuts and extends the saw’s lifespan. Regular maintenance helps prevent rust and dullness. Let’s explore simple steps to keep your hand saw in top condition.
Cleaning And Lubrication
Start by wiping your hand saw after each use. Use a soft cloth to remove sawdust and debris. This prevents buildup that can cause rust. Ensure the saw is completely dry before storage. Apply a thin layer of oil to the blade. This creates a protective barrier against moisture. A light machine oil works well for lubrication. It helps the saw glide smoothly during cuts.
Sharpening The Blade
A sharp blade is essential for clean cuts. Check your saw’s teeth regularly for sharpness. Use a file to sharpen each tooth individually. Follow the original angle of the teeth for best results. A sharpening guide can help maintain consistency. After sharpening, test the saw on a scrap piece of wood. Ensure it cuts easily and smoothly. Repeat sharpening as needed to keep the blade effective.
Common Mistakes And How To Avoid Them
Using a hand saw seems straightforward, but mistakes are common. These errors can affect the quality of your work. Understanding and avoiding these mistakes can make your sawing tasks easier and more efficient. Let’s explore some frequent missteps and how to steer clear of them.
Overexertion
Many beginners push too hard while sawing. This overexertion leads to fatigue and inaccurate cuts. A hand saw works best with steady, gentle pressure. Allow the saw to do the work. Avoid forcing it through the material. Using light strokes extends both your endurance and the life of the saw.
Misalignment
Misalignment is another common mistake. It happens when the saw doesn’t follow the intended line. Always mark your cut line clearly before starting. Hold the saw firmly but not too tight. Keep your eye on the blade as you cut. Adjust your stance to ensure you’re aligned with the cut line. Remember, precision starts with proper alignment.
Advanced Tips For Precision
Precision in sawing requires skill and focus. It’s more than just cutting. With the right techniques, you can achieve cleaner cuts. This enhances the quality of your work. Let’s explore some advanced tips.
Using A Saw Guide
A saw guide helps maintain a straight line. It reduces the chance of errors. Place the guide firmly along the cutting line. This ensures the saw follows the right path. Always check the alignment before starting. This step is crucial for accuracy.
Employing A Steady Rhythm
A steady rhythm keeps the cut smooth. Start slow, then pick up speed. Maintain consistent pressure on the saw. Avoid stopping midway through a cut. Sudden halts can cause jagged edges. Practice helps develop a natural rhythm. Over time, this becomes instinctive.
Credit: www.homedepot.com
Frequently Asked Questions
How To Use A Hand Saw Step By Step?
1. Choose the right hand saw for your material. 2. Secure the material firmly using clamps. 3. Mark your cutting line clearly with a pencil. 4. Start sawing slowly, using gentle, steady strokes. 5. Maintain consistent pressure and follow the marked line.
How To Cut Wood Straight With A Hand Saw?
To cut wood straight with a hand saw, mark your line clearly with a pencil. Secure the wood firmly using clamps. Start sawing slowly to guide the blade accurately. Maintain a steady hand and consistent pressure. Follow the marked line closely for precision.
What Would You Use A Hand Saw For?
A hand saw cuts wood, plastic, or metal manually. It’s ideal for woodworking, trimming, and crafting tasks. Use it for precise cuts in small projects. It’s perfect for DIY enthusiasts and professionals needing control and portability. Choose it for tasks requiring accuracy and a traditional approach.
When Using A Handsaw, What Should You Do First?
Ensure the handsaw is sharp and clean. Secure the material firmly in place. Mark the cutting line accurately. Wear appropriate safety gear, including gloves and goggles. Position yourself comfortably and maintain a firm grip on the saw.
Conclusion
Using a hand saw can be easy with practice. Follow the steps carefully. Always ensure safety first. Choose the right saw for the task. Use a firm grip and steady strokes. Keep your saw sharp and clean. This helps with cutting efficiency.
Practice will improve your skills over time. Remember to be patient. Mistakes are part of learning. With these tips, you can handle basic woodcutting tasks. Enjoy your projects. Happy sawing!