Do you ever find yourself staring at the grimy grout lines between your tiles, wondering how you can bring them back to life? If you’re nodding in agreement, you’re in the right place.
Learning how to use a grout saw can be your secret weapon in transforming tired-looking tiles into something fresh and clean. Imagine the satisfaction of seeing your kitchen or bathroom sparkle, with grout lines that look as good as new.
In this guide, we’ll walk you through the simple steps to master the grout saw, a tool that’s both affordable and incredibly effective. So, if you’re ready to tackle those stubborn grout lines and make your tiles shine, keep reading. Your home deserves that fresh, clean look, and you deserve the confidence that comes with knowing how to achieve it.
Credit: www.qep.com
Choosing The Right Grout Saw
Choosing the right grout saw makes your tiling job easier. The right tool saves time and effort. It ensures clean and precise grout removal. You need to know what to look for in a grout saw. Consider factors like type, blade, and comfort.
Manual Vs. Electric Options
Manual grout saws are simple and cost-effective. They require physical effort but offer control. Best for small areas and delicate tiles. Electric grout saws suit larger projects. They save time and reduce hand fatigue. They offer speed and efficiency. Choose based on your project size and needs.
Blade Types And Materials
Grout saw blades come in various types. Carbide blades are durable and long-lasting. Diamond blades cut faster and smoother. Choose the blade material based on grout hardness. Softer grout needs different blades than hard grout. Ensure the blade fits your saw model.
Ergonomic Features
Comfort is key during long tasks. Look for ergonomic handles in grout saws. They reduce strain on your hands. Non-slip grips offer better control. Lightweight designs prevent fatigue. Test the saw in your hand for comfort. Ergonomics improve your work quality and speed.
Preparing The Workspace
Using a grout saw can transform old tiles. But preparation is key. A well-prepared workspace ensures safety and efficiency. Let’s explore the steps to set up your area.
Clearing The Area
Remove all movable items from the workspace. This includes rugs, furniture, and decor. A clear area prevents accidents. It also gives you more space to work efficiently. Check the floor for debris. Sweep or vacuum any dust or dirt. A clean surface makes the task smoother.
Protective Gear And Safety Measures
Safety should always be a top priority. Wear protective goggles to shield your eyes. Dust particles can cause irritation. Use gloves to protect your hands from sharp edges. A dust mask is helpful. It prevents inhalation of tiny particles. Ensure the room is well-ventilated. Open windows or use fans for airflow.
Gathering Necessary Tools
Having the right tools is crucial. Besides the grout saw, gather a vacuum or broom. You might need a bucket for debris. A flashlight can help in dimly lit areas. Keep a damp cloth handy for quick clean-ups. Finally, ensure all tools are within reach. Proper organization saves time and effort.
Grout Removal Techniques
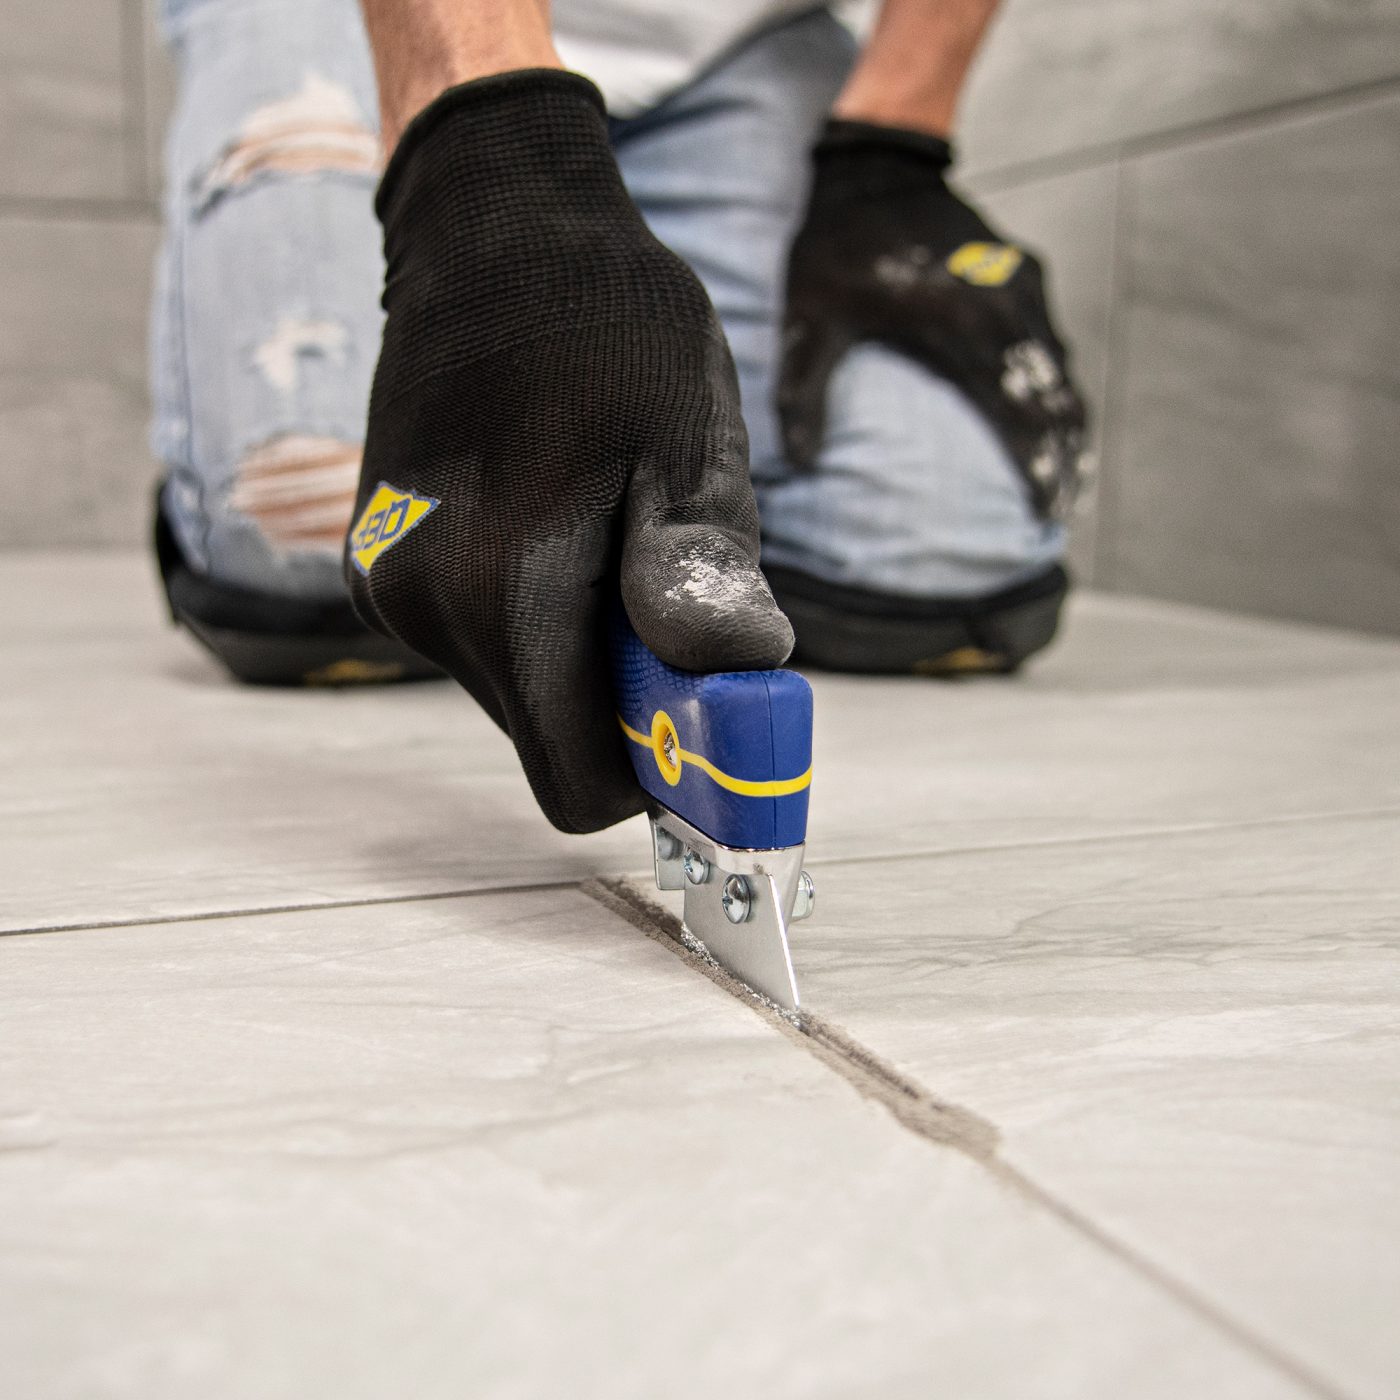
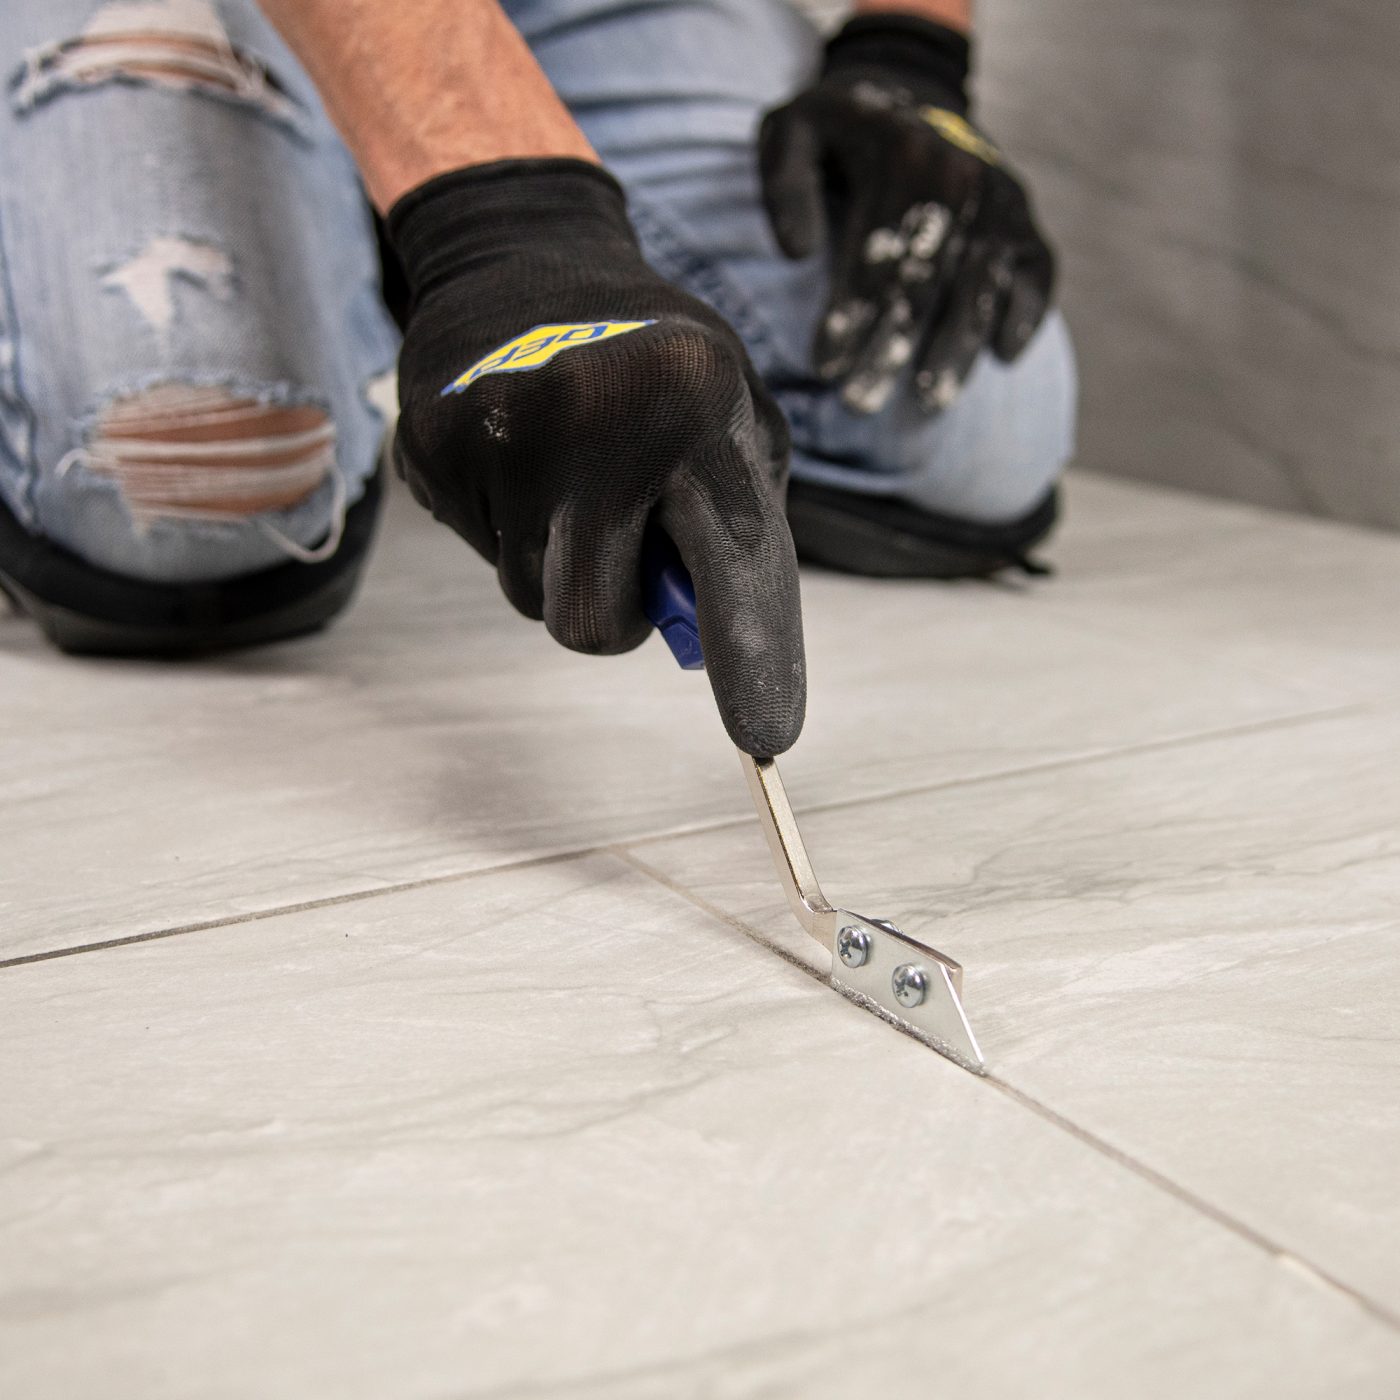
Grout saws are ideal for removing old grout from tiles. These handheld tools feature a sharp blade for precision. Firmly guide the saw along grout lines, applying gentle pressure to avoid damaging surrounding tiles. Regularly check the blade for wear to ensure effective cutting.
Grout removal can seem like a daunting task, but mastering a few techniques can simplify the process. Imagine transforming your dingy bathroom into a sparkling oasis with minimal effort. Knowing the right methods can save you time and prevent costly mistakes.Proper Grip And Handling
Holding a grout saw correctly is the foundation of effective grout removal. Place your hand firmly on the handle, ensuring a comfortable yet secure grip. A steady hand prevents slips and increases precision. Use your dominant hand for control and your other hand for support. This approach gives you the stability needed for precise movements. Think of it as guiding a paintbrush, allowing you to work with accuracy and ease.Angle And Pressure Control
The angle at which you hold the grout saw is crucial. Position it at a 45-degree angle relative to the tile. This helps in targeting the grout without scraping the tiles. Apply consistent pressure, but don’t force it. Too much pressure could crack tiles, while too little might not remove the grout efficiently. It’s a balancing act – find the sweet spot where effort meets effectiveness.Avoiding Tile Damage
Protecting tiles while removing grout is essential. Always keep the saw blade away from the tile edges. If the blade slips, it can cause chips or scratches. Consider using a piece of painter’s tape along the tile edges as a buffer. This simple trick offers an extra layer of protection. Have you ever marred a tile and wished you had taken more precautions? Avoid that regret by being proactive. Understanding these grout removal techniques can make the difference between a smooth renovation and a stressful ordeal. With practice, you’ll gain confidence and skill. What are you waiting for? Grab your grout saw and start refining your technique today!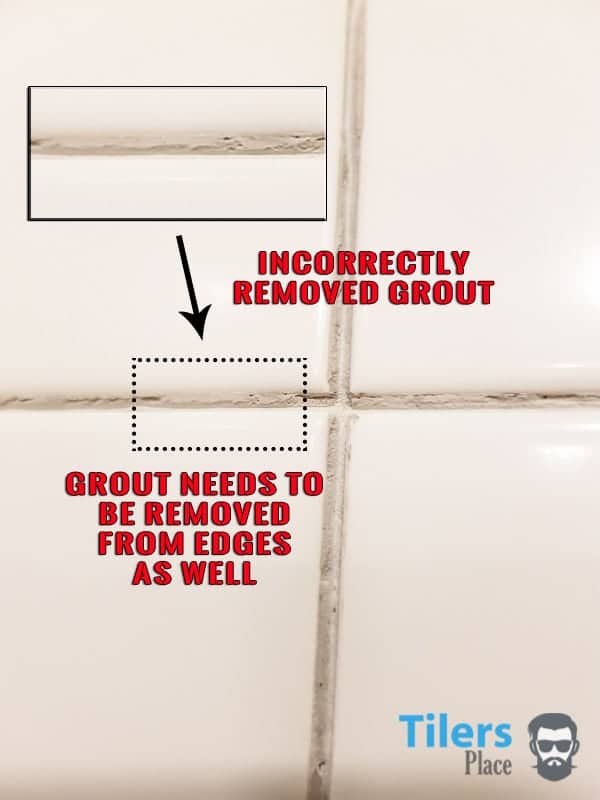
Credit: tilersplace.com
Dealing With Stubborn Grout
Removing stubborn grout becomes manageable with a grout saw. This simple tool helps scrape away old grout efficiently. Ensure a steady hand and work patiently for best results.
Dealing with stubborn grout can be a frustrating experience, especially if you’re trying to refresh your bathroom or kitchen. Sometimes, no matter how much you scrub, the grout just won’t budge. But don’t worry, there are methods to tackle even the most obstinate grout. Whether it’s using heat, chemicals, or considering professional help, you have options. Let’s dive into some practical solutions.Using Heat For Easier Removal
Applying heat is a clever way to soften stubborn grout. You might have a heat gun lying around your garage, which is perfect for this task. Direct the heat onto the grout line for a few seconds to loosen it. Be cautious not to overheat and damage surrounding tiles. If you don’t have a heat gun, a hairdryer can serve as an alternative. The key is patience—apply heat gradually and scrape gently with your grout saw once the grout starts to soften.Chemical Grout Softeners
Chemical grout softeners can be a lifesaver when heat isn’t enough. These products are designed to break down grout’s tough consistency. Apply the softener according to the instructions on the packaging, usually letting it sit for a few minutes. Once softened, the grout should be much easier to remove with your grout saw. Always wear gloves and ensure proper ventilation when working with chemicals to protect yourself. Have you ever tried using a softener only to find it didn’t work as expected? Sometimes, it’s necessary to test different products to find the one that suits your specific grout type.When To Consider Professional Help
If you’ve tried everything and the grout still won’t budge, it might be time to consider professional help. Professionals have specialized tools and techniques that can save you time and frustration. Ask yourself: is the time and effort you’re spending worth the money you’d save by doing it yourself? Sometimes, letting an expert handle it is the best decision, especially if you’re dealing with delicate tiles. Plus, a professional can offer tips to maintain your grout in the future, preventing stubborn build-up. By understanding these methods, you can make informed decisions on how to tackle stubborn grout. Whether you choose heat, chemicals, or professional help, each option provides a unique advantage. What’s your go-to technique for dealing with stubborn grout?Post-removal Cleanup
After removing grout, cleaning up the area is crucial. This ensures a smooth finish for your tile surfaces. Proper post-removal cleanup involves several steps. Each step ensures the longevity of your new grout application. Below, we explore how to clean and prepare your tiles for a fresh look.
Cleaning Tile Surfaces
Begin by wiping down the tile surfaces. Use a damp sponge or cloth. Remove any loose debris or dust. This makes the tiles ready for inspection. A clean surface helps the new grout adhere better.
Inspecting For Residual Grout
Examine the tiles closely. Look for any leftover grout. Residual grout can affect the new application. Use a brush or scraper for stubborn bits. Ensure all tiles are free of old grout.
Preparing For New Grout Application
Once clean, ensure surfaces are dry. Moisture can weaken new grout. Gather your tools and materials. Read any instructions on grout products carefully. Being prepared makes the process smoother.
Credit: www.qep.com
Maintaining Your Grout Saw
Regular care keeps your grout saw effective. Clean the blade after each use. Check for rust or wear. Store it in a dry place to prevent damage. Always handle the saw with care to prolong its lifespan. Proper maintenance ensures smooth operation and clean grout lines every time.
Maintaining your grout saw is crucial for ensuring it performs efficiently and lasts longer. A well-maintained tool not only saves you money but also enhances your DIY projects. Taking care of your grout saw can be straightforward with a few simple steps. You might be wondering how to keep your grout saw in top condition. Let’s dive into some practical tips.Cleaning And Storage Tips
After using your grout saw, cleaning it thoroughly is essential. Use a soft brush to remove any dust or debris from the blade and handle. Warm, soapy water can help in removing stubborn grime, but ensure you dry the tool completely to prevent rust. Once clean, store your grout saw in a dry place. Consider hanging it on a pegboard or placing it in a toolbox. Keeping it protected from moisture will extend its life significantly.Blade Replacement Guide
A sharp blade is key for efficient grout removal. If your grout saw isn’t cutting as effectively, it might be time to replace the blade. Begin by identifying the type of blade your saw uses, which you can find in the user manual or on the manufacturer’s website. To replace the blade, use a screwdriver to loosen the screws holding the blade in place. Gently remove the old blade and insert the new one, ensuring it’s secured tightly. Regular blade inspections can prevent damage to your tool and improve performance.Troubleshooting Common Issues
Even with careful maintenance, problems can arise. If your grout saw is making unusual noises, check for loose parts or debris lodged in the blade. Tighten any loose screws and clean the tool thoroughly. If the saw isn’t cutting properly, despite a new blade, consider the pressure you’re applying. Sometimes, less force can lead to a more precise cut. Have you ever thought about the impact of your technique on tool longevity? Adjusting your method can make a significant difference. Maintaining your grout saw isn’t just about keeping it clean. It’s about ensuring a seamless experience every time you tackle a home improvement project. By taking these steps, you can confidently rely on your grout saw for years to come.Frequently Asked Questions
Do You Have To Scrape Out Old Grout Before Regrouting?
Yes, removing old grout is necessary before regrouting. This ensures a better bond and prevents future issues. Use a grout removal tool for efficiency. Clean the surface thoroughly before applying new grout. This process helps achieve a durable, professional finish.
How To Tile Grout For Beginners?
Clean the tiles and mix the grout. Use a rubber float to apply grout diagonally. Remove excess grout using the float’s edge. Let it dry for 10 minutes, then wipe tiles with a damp sponge. Polish with a dry cloth once fully dry for a clean finish.
What’s The Fastest Way To Remove Grout?
Use a grout removal tool or oscillating multi-tool with a grout removal blade. Ensure precision by applying steady pressure. For small areas, a manual grout saw works well. Always wear protective gear like goggles and gloves for safety. Clean the area thoroughly after removal to prepare for new grout.
What Happens If You Wait Too Long To Wipe Grout?
Waiting too long causes grout haze, making it difficult to clean. It can also harden, requiring more effort to remove. This may result in uneven, unattractive surfaces. Always clean grout promptly to avoid these issues and maintain the quality and appearance of your tile installation.
Conclusion
Using a grout saw effectively can transform your tiling projects. It requires patience and a steady hand. Always ensure safety by wearing protective gear. Start with gentle strokes to avoid damaging tiles. Practice makes perfect, so don’t rush the process.
With regular cleaning, your grout saw remains sharp and efficient. Proper maintenance extends its life. By following these steps, your tiles will look clean and professional. Remember, careful use saves time and effort. Enjoy your beautifully finished tile work. It’s all about the details in every project.
Now, you’re ready to tackle any grout challenge.