Your kitchen knives are only as good as their sharpness. A dull knife can turn simple cooking tasks into frustrating, unsafe experiences.
But how do you sharpen your kitchen knives properly so they cut smoothly and safely every time? In this guide, you’ll learn easy, effective techniques to bring your blades back to life. Whether you’re dealing with a slightly blunt edge or a seriously dull blade, mastering the right sharpening method will save you time and effort in the kitchen.
Keep reading to discover step-by-step tips that anyone can follow to sharpen knives like a pro. Your hands—and your meals—will thank you.
Choosing The Right Sharpening Tools
Choosing the right sharpening tools is key for a sharp kitchen knife. Different tools serve different purposes. Some remove a lot of metal quickly. Others refine and polish the edge for precision cuts.
Understanding each tool helps you keep knives sharp and safe. Use the best tool for your blade’s condition and your skill level. This section explains popular sharpening options and their uses.
Whetstones: Coarse Vs Fine Grit
Whetstones come in various grit levels. Coarse grit stones have rough surfaces. They remove metal fast and fix very dull or damaged blades.
Fine grit stones have smooth surfaces. They polish the edge and create a sharp finish. Start with coarse grit for reshaping. Follow with fine grit to refine the blade.
Soak whetstones in water until no bubbles appear. Place the stone on a stable surface with coarse side up. Hold the knife at the correct angle and slide it slowly across the stone. Repeat on both sides until a burr forms.
Flip the stone to the fine grit side. Use lighter pressure to smooth the edge and remove the burr. A few gentle passes create a razor-sharp finish.
Using Leather Strops
Leather strops polish the blade after sharpening. They remove tiny burrs and align the edge. Stropping creates a smooth, sharp cutting surface.
Apply stropping compound to the leather for better results. Pull the blade backward along the strop, keeping a steady angle. Repeat several times on each side. Stropping is gentle and perfect for maintenance.
Alternative Sharpening Devices
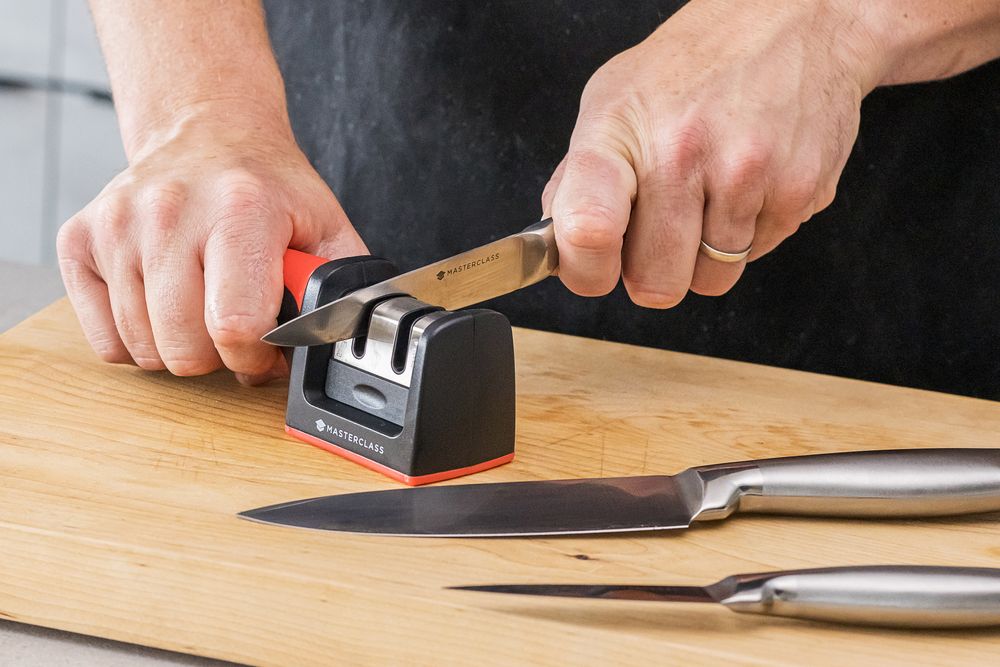
Electric sharpeners and pull-through sharpeners offer convenience. They have fixed angles for consistent sharpening. Use them for quick edge touch-ups.
These devices remove metal faster but less precisely than whetstones. Avoid over-sharpening and damaging the blade. Choose a sharpener with good reviews and safety features.
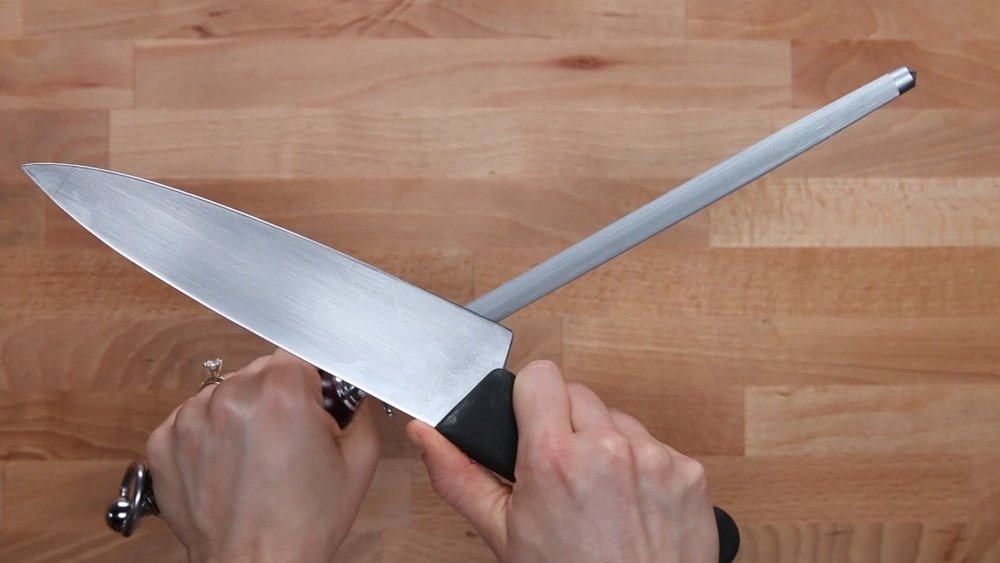
Manual sharpening rods help realign edges but do not sharpen dull blades. Use them regularly to keep knives performing well between full sharpening sessions.

Credit: www.youtube.com
Preparing Your Sharpening Setup
Setting up your sharpening area correctly is key for a sharp kitchen knife. A good setup ensures safety and better results. Take time to prepare before starting the sharpening process.
Organize your tools and workspace so everything is within reach. This reduces distractions and makes sharpening easier. Proper preparation helps you maintain a consistent angle and pressure while sharpening.
Soaking And Positioning The Whetstone
Submerge your whetstone in water for about 10 to 15 minutes. Wait until air bubbles stop rising. This step softens the stone and improves sharpening performance.
Place the whetstone coarse side up on a non-slip surface. The coarse grit removes dull metal quickly. Later, flip it to the fine grit side for polishing.
Ensuring A Stable Work Surface
Choose a flat, sturdy table or countertop to work on. A stable surface prevents the stone from moving during sharpening. Use a damp towel or rubber mat under the whetstone to stop slipping.
Keep your body comfortable and steady. Good posture helps maintain control of the knife and stone. Stability reduces the risk of accidents and improves sharpening accuracy.
Sharpening Techniques
Sharpening techniques ensure your kitchen knives cut smoothly and last longer. Using the right methods keeps the blade sharp and safe. These simple steps help you sharpen like a pro at home.
Maintaining Consistent Angle
Keep the sharpening angle steady to protect the blade edge. Most kitchen knives sharpen best at 15 to 20 degrees. Use a guide or practice holding the knife to keep this angle constant. A consistent angle prevents uneven edges and dull spots.
Proper Knife Grip And Movement
Hold the knife handle firmly but relaxed. Place your index finger on the spine for control. Move the blade smoothly across the stone, from heel to tip. Push the knife away from you with steady pressure. Repeat on the other side with the same motion. Smooth, even strokes sharpen evenly and avoid damage.
Creating And Removing The Burr
A burr is a thin metal ridge formed on the blade edge during sharpening. Feel for this tiny bump along the blade after several passes. Once the burr appears, switch to a finer grit stone or strop. Use lighter pressure to remove the burr and polish the edge. Removing the burr is key to a sharp, clean blade.
Credit: www.cookserveenjoy.com
Finishing And Polishing The Edge
Finishing and polishing the edge is the final step in sharpening kitchen knives. This process smooths the blade and boosts its sharpness. A well-polished edge cuts cleanly and lasts longer. It removes any tiny rough parts left after sharpening. This step makes your knife safer and more efficient in the kitchen.
Using Fine Grit For Refinement
Switch to a fine grit sharpening stone after the coarse grit. Use gentle, even strokes to smooth the blade’s edge. This helps remove tiny burrs and sharpens the knife further. Keep the same sharpening angle to maintain the edge shape. Light pressure is key to avoid removing too much metal.
Employing A Leather Strop
A leather strop removes the last bits of rough metal. Pull the blade away from the edge across the strop. This action polishes and aligns the edge perfectly. Stropping helps the knife stay sharp longer. Use several passes on each side for best results.
Final Light Pressure Passes
Finish by making light pressure passes on the fine grit or strop. These gentle strokes refine the edge and polish the blade. Keep the knife angle steady during each pass. This step gives the blade a razor-sharp and smooth finish. It ensures the knife slices through food easily and safely.
Testing Sharpness
Testing sharpness is a crucial step after sharpening kitchen knives. It confirms if the blade is ready for safe, effective use. Proper testing avoids accidents and ensures clean cuts every time.
Two simple methods help check sharpness without special tools. These methods show if your knife edge is smooth, even, and sharp enough for kitchen tasks.
Paper Slice Test
Hold a sheet of regular printer paper in one hand. Use the knife to slice through the paper with light pressure. A sharp knife cuts smoothly without tearing or snagging.
If the blade struggles or tears the paper, it needs more sharpening. Repeat sharpening and test again until the paper slices cleanly. This test mimics cutting soft foods and shows the blade’s slicing ability.
Light Reflection Inspection
Hold the knife blade under a bright light at an angle. Look closely at the edge for any shiny spots or reflections. These bright spots mean dull or uneven areas.
A sharp edge appears dark and matte because it is very thin. No light should reflect off the cutting edge itself. Polish the blade if you see reflections to smooth and sharpen the edge more.

Credit: www.oxo.com
Common Mistakes To Avoid
Sharpening kitchen knives is a skill that improves cutting efficiency and safety. Many people make simple errors that reduce the sharpness or damage the blade. Avoiding these common mistakes helps keep knives sharp longer and protects your investment.
Inconsistent Sharpening Angle
Maintaining a steady angle while sharpening is crucial. Changing angles can create uneven edges and dull spots. Most kitchen knives need about a 15 to 20-degree angle. Use a guide or practice to keep this angle steady throughout the process. Consistency sharpens the blade evenly and improves performance.
Applying Excessive Pressure
Pressing too hard damages the blade and the sharpening tool. Gentle, controlled strokes work best. Excessive force can remove too much metal, shortening the knife’s life. Let the sharpening stone or tool do the work. Light pressure ensures a clean, sharp edge without harm.
Neglecting Regular Maintenance
Sharpening only when knives become very dull causes more wear. Regular maintenance keeps edges sharp and easier to manage. Use a honing rod or light sharpening after every few uses. This practice prevents deep dullness and keeps your knives ready for any kitchen task.
Knife Care Tips Post-sharpening
Proper care after sharpening keeps kitchen knives sharp longer and ensures safety. Taking simple steps in cleaning, drying, and storage protects the blade. This section covers key tips for knife care post-sharpening.
Proper Cleaning And Drying
Clean knives immediately after use to prevent damage. Use warm water and mild soap. Avoid harsh detergents and steel wool, which can dull the blade. Rinse thoroughly to remove all soap residue.
Dry knives completely with a soft towel. Never leave them wet or soak them in water. Moisture causes rust and corrosion. Proper drying preserves the sharp edge and blade quality.
Safe Storage Practices
Store knives in a way that protects the blade and prevents accidents. Use a knife block, magnetic strip, or blade guards. Avoid tossing knives in drawers with other utensils.
Keep knives away from moisture and humidity. A dry, cool place helps maintain sharpness and prevents rust. Proper storage extends the life of your knives and keeps your kitchen safe.
Frequently Asked Questions
What Is The Best Way To Sharpen A Kitchen Knife?
Soak a coarse and fine grit whetstone in water. Hold the knife at a consistent angle. Slide the blade from heel to tip across the coarse side until a burr forms. Flip to fine grit, repeat with lighter pressure. Finish with a leather strop or light passes to polish.
What Is A Common Mistake When Sharpening A Knife?
A common mistake is sharpening at the wrong angle, which can dull the blade quickly. Applying uneven pressure also reduces effectiveness.
How Do Chefs Get Knives So Sharp?
Chefs sharpen knives using whetstones, starting with coarse grit to shape the edge. They finish with fine grit to refine and polish the blade. Consistent angle and pressure ensure a razor-sharp edge. Some use leather strops to perfect sharpness. Regular honing maintains the blade between sharpenings.
Why Are Pull Through Sharpeners Bad?
Pull-through sharpeners remove too much metal quickly, damaging the blade’s edge. They create uneven angles and reduce knife lifespan. These sharpeners often dull knives faster and limit precise sharpening control. Using a whetstone or professional sharpener preserves blade integrity and sharpness longer.
Conclusion
Sharpening kitchen knives properly keeps them safe and efficient. Use a whetstone with care and patience. Start with coarse grit, then move to fine grit. Keep a steady angle and pressure while sharpening. Test the blade by slicing paper smoothly.
Regular sharpening saves money and improves cooking. A sharp knife makes meal prep faster and easier. Practice often to maintain the blade’s edge. Your kitchen work becomes more enjoyable and precise. Simple steps lead to great results in knife care.


