Are you ready to transform your dining space with a personal touch? Imagine the pride of showcasing a dining room table that you crafted with your own hands.
Not only will it serve as a centerpiece for meals and gatherings, but it will also be a testament to your creativity and skill. Building your own table might sound challenging, but it’s easier than you think. You don’t need to be a master carpenter to pull this off.
With the right guidance and a few essential tools, you can create a stunning piece that matches your style perfectly. Dive into this guide to discover how you can make a dining room table that will become the heart of your home. Don’t miss out on learning how simple and rewarding this project can be for you!
Choosing Materials
Selecting the right materials shapes the look and durability of your dining room table. Wood offers a classic feel, while metal adds a modern touch. Consider strength and cost for a perfect blend of style and function.
Choosing the right materials for your dining room table is crucial. It affects the table’s look, feel, and durability. Different materials offer unique qualities. Each material can transform your dining space. Let’s dive into the best materials for your table.
Wood Types
Wood is a popular choice for dining tables. It brings warmth and elegance to your home. Oak is a strong and durable option. It resists wear and tear. Walnut has a rich, dark color. It adds a touch of luxury to any room. Pine is lighter and more affordable. It gives a rustic charm. Choose wood that fits your style and budget.
Metal Options
Metal tables are modern and sleek. Steel is a common choice. It’s strong and lasts for years. Aluminum is lighter. It’s easy to move and maintain. Metal can blend with wood for a mixed-material look. This adds character and uniqueness to your table. Consider metal for a contemporary vibe.
Glass And Alternative Materials
Glass tables are stylish and sophisticated. They create an illusion of space. Perfect for smaller dining rooms. Tempered glass is safe and durable. It resists scratches and heat. Other materials like acrylic offer similar benefits. They are lightweight and versatile. Explore these options for a modern, airy feel.

Credit: www.reddit.com
Designing The Table
Crafting a dining room table involves choosing the right wood and tools. Start by measuring the space available. Assemble the pieces carefully to ensure a sturdy finish. A well-built table adds charm to any dining area.
Designing the table is a crucial step in crafting a dining room table. This stage defines the table’s appearance and functionality. A well-designed table becomes the centerpiece of any dining room. It must reflect personal taste and meet practical needs. Let’s explore the essential elements of designing the table.
Determining Size
The table size depends on the room dimensions. Measure the dining space to ensure the table fits comfortably. Consider the number of people it should seat. More space is better for larger families. Leave enough room around the table for chairs and movement. Aim for at least 36 inches between the table and walls.
Selecting Style
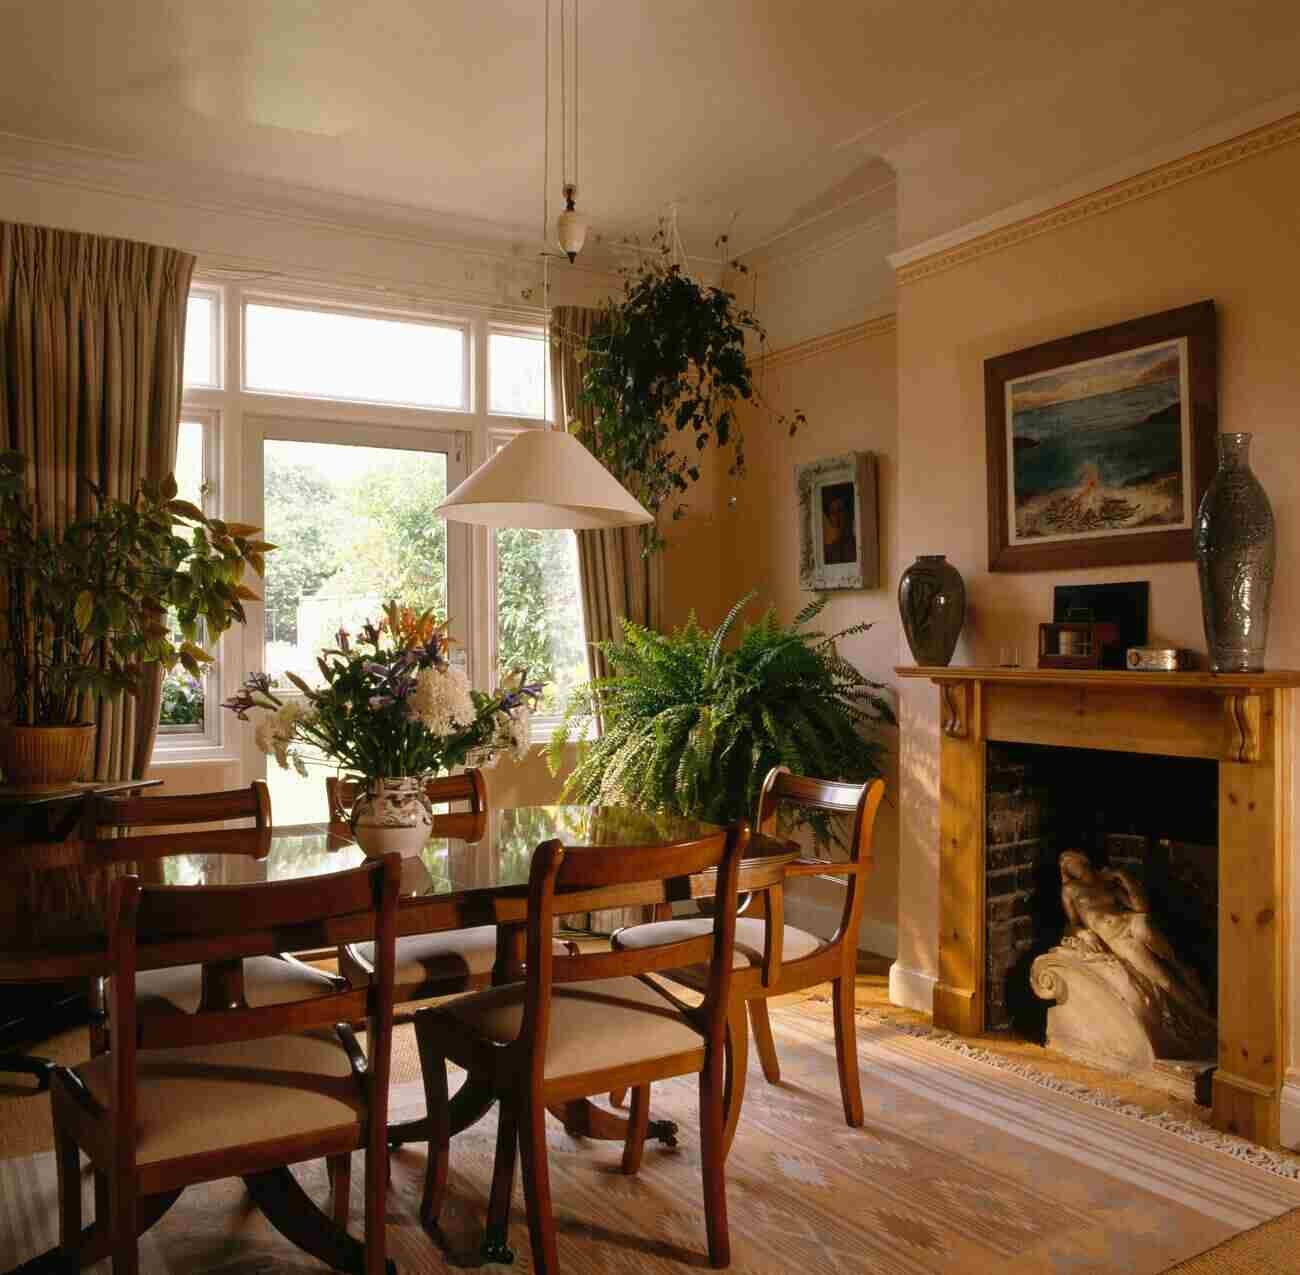
The table style should match the room’s decor. Choose between modern, rustic, or traditional styles. Consider the room’s color scheme and existing furniture. Wood tables offer a classic look. Glass tables provide a sleek, contemporary feel. The style sets the tone for dining experiences.
Incorporating Functionality
Functional design enhances the table’s usability. Consider features like extendable leaves for flexibility. Think about storage options, like drawers or shelves. These additions provide convenience during meals. Ensure the table height suits all users. Comfort and accessibility are key to a successful design.
Gathering Tools And Supplies
Creating a dining room table is an exciting project. It starts with gathering the right tools and supplies. This step is crucial for a smooth building process. With the right gear, you can craft a beautiful and sturdy table. Here’s a guide to help you gather everything you need.
Essential Tools
You’ll need a saw for cutting wood pieces. A drill is essential for making precise holes. A tape measure ensures accurate dimensions. Sandpaper helps smooth the wood surface. A screwdriver tightens screws and fasteners. Lastly, a hammer helps with nailing.
Safety Equipment
Safety goggles protect your eyes from wood dust. Wear gloves to shield your hands from splinters. A dust mask prevents inhalation of sawdust. Ear protection can reduce noise from power tools. Sturdy shoes keep feet safe from falling objects. Always prioritize safety in your workspace.
Additional Supplies
Wood glue helps bond joints securely. Wood stain enhances the table’s appearance. Varnish provides a protective finish. Nails and screws are necessary for assembly. A paintbrush or rag applies stain and varnish evenly. Sanding blocks help reach tricky spots.
Preparing The Workspace
Preparing your workspace is a crucial step in making a dining room table. An organized and safe area ensures a smooth building process. It helps you focus and reduces risks.
Workspace Setup
Choose a spacious and well-lit area for your project. Natural light is best for visibility. Ensure there is enough room for your materials and tools. A garage or a large workshop is ideal. Clear the area of any clutter. This prevents accidents and gives you space to work comfortably.
Organizing Materials
Gather all necessary materials before starting. This includes wood, screws, and tools. Arrange them in a logical order. Keep frequently used items within reach. Use labeled containers to avoid confusion. This saves time and keeps the process smooth.
Safety Precautions
Safety should be a priority in your workspace. Wear protective gear like goggles and gloves. Ensure your tools are in good working condition. Keep a first aid kit nearby for emergencies. Make sure the area is well-ventilated. This reduces exposure to dust and fumes.
Building The Tabletop
Creating a dining room table can be a rewarding project. The tabletop is the heart of the table. It sets the tone for your dining space. Building a strong tabletop requires precision and care. Let’s explore the key steps to craft a stunning tabletop.
Cutting The Wood
Begin by selecting quality wood for your tabletop. Measure the dimensions accurately. Use a saw to cut the wood pieces. Ensure each piece matches your desired size. Precision in cutting is crucial. It ensures a smooth assembly.
Joining Techniques
Joining the wood pieces is a critical step. There are several techniques to consider. Use dowels for a sturdy bond. Try biscuit joining for ease and strength. Ensure the pieces fit snugly. A tight fit prevents shifting.
Sanding And Finishing
Sanding smooths out the surface. Use a fine-grit sandpaper for best results. Sand along the grain for a polished look. After sanding, apply a finish. Choose between varnish, stain, or paint. Each finish offers a unique appearance. Ensure the finish is even. This adds beauty and protection to your tabletop.

Credit: inmyownstyle.com
Constructing The Base
Constructing the base of a dining room table is a crucial step. A strong base ensures durability and longevity. It supports the tabletop, making sure it remains steady. The base consists of several parts working together. Proper assembly of each part is essential for overall stability.
Leg Attachment
Attaching the legs is the first step in building the base. Choose sturdy wood for the legs. Secure each leg with bolts or screws. Ensure the legs are evenly spaced. This allows for even distribution of weight. Double-check each attachment for tightness.
Support Framework
The support framework connects the legs and enhances stability. Use cross beams or aprons to form the framework. Measure twice to ensure accuracy. Cut the wood to fit snugly between the legs. Secure the framework with nails or screws. This prevents wobbling during use.
Stability Checks
Stability checks are vital before finishing the base. Place the table on a flat surface. Check each leg for movement. Ensure the framework holds firm. Test the table with gentle pressure. Look for any signs of weakness. Make adjustments if necessary.
Assembling The Table
Assembling a dining room table is a crucial step in the building process. It’s where all the pieces come together to form a functional and beautiful centerpiece. This process requires precision, patience, and attention to detail. A well-assembled table not only enhances your dining area but also ensures durability and stability. Follow these steps to make sure your table is assembled correctly and securely.
Connecting Top And Base
Start by aligning the table top with the base. Ensure the base is sturdy and level before proceeding. Use clamps to hold the pieces together if necessary. Fasten screws into pre-drilled holes for a secure fit. Double-check the alignment before tightening the screws completely.
Securing Joints
Inspect all joints for gaps or misalignments. Tighten any loose connections with a wrench or screwdriver. Apply wood glue to enhance the bond between pieces. Let the glue dry for a few hours for maximum strength. Reinforce joints with brackets or additional screws if needed.
Final Adjustments
Examine the table for wobbling or uneven surfaces. Adjust the legs to ensure stability. Sand any rough edges for a smooth finish. Apply a coat of varnish to protect the wood. Confirm all parts are securely fastened before using the table.

Credit: www.youtube.com
Applying Finishes
Applying finishes to your dining room table enhances its beauty and durability. A well-applied finish can bring out the wood’s natural grain. It also protects the surface from damage. Each type of finish offers its own unique benefits and aesthetics. Whether you prefer the classic look of stained wood or a bold painted surface, the right finish can transform your table into a centerpiece.
Staining And Varnishing
Staining adds depth and color to your table. Choose a stain that complements your room’s decor. Apply the stain with a clean cloth or brush. Wipe off excess stain for an even finish. Allow the stain to dry completely. Varnishing provides a protective layer over the stain. Use a clear varnish for a glossy or matte look. Apply it with a brush in thin, even coats. Let each coat dry before adding another.
Painting Options
Painting your dining table offers a vibrant, modern look. Select a paint type suitable for wood surfaces. Sand the table to remove any old finish. Apply a primer to help the paint adhere better. Use a brush or roller for even paint application. Choose colors that match your dining room theme. Allow the paint to dry thoroughly between coats.
Protective Coatings
Protective coatings keep your table safe from spills and scratches. Polyurethane is a popular choice for wood surfaces. It offers strong protection and a clear finish. Apply it with a brush in thin layers. Let each layer dry before applying the next. For added protection, consider using a tablecloth or placemats. This adds an extra barrier against daily wear and tear.
Maintenance Tips
Creating a dining room table is a rewarding task. It becomes a centerpiece of family gatherings and meals. Once crafted, maintaining its beauty and functionality is vital. Regular care ensures your table lasts for years. Explore these maintenance tips for keeping your table in prime condition.
Cleaning Advice
Dust the table weekly to prevent buildup. Use a soft, lint-free cloth to avoid scratches. For deeper cleaning, dampen the cloth with warm water. Mild soap can be added if necessary. Avoid harsh chemicals which can damage the finish. Always dry the table completely after cleaning. Moisture can warp wood over time.
Repair Techniques
Small scratches can be fixed easily. Use a matching wood polish or crayon. Rub gently over the scratch until it blends. For deeper cuts, use wood filler. Sand the area lightly, then apply filler. Let it dry, then sand again for smoothness. Finish with matching stain or paint for a seamless look.
Longevity Strategies
Place the table away from direct sunlight. UV rays can fade the finish over time. Use coasters and placemats to protect surfaces from heat and spills. Consider applying a protective sealant. This adds an extra layer of defense. Lastly, adjust humidity levels in the room. Wood expands and contracts with humidity changes.
Frequently Asked Questions
What Materials Are Best For A Dining Table?
Solid wood is a popular choice for dining tables. It offers durability and timeless appeal. Oak, maple, and walnut are favored options. For a modern touch, consider metal or tempered glass. Each material has unique benefits and fits different aesthetics.
How Do I Choose The Right Table Size?
Measure your dining space first. Allow 36 inches between the table and walls for movement. Consider the number of diners. A 60-inch table suits four to six people. For large gatherings, opt for an extendable design. Proper sizing ensures comfort and functionality.
What Tools Do I Need To Build A Table?
You’ll need basic tools like a saw, drill, and sander. A measuring tape, square, and clamps are essential for precision. Safety gear, including goggles and gloves, is crucial. Quality tools ensure a sturdy and professional-looking table.
How Long Does It Take To Build A Table?
Building a dining table can take several days. This includes time for cutting, assembling, and finishing. Complexity and skill level affect the timeline. Allow extra time for drying if staining or painting. Patience ensures a well-crafted piece.
Conclusion
Building your own dining room table can be rewarding. You gain a unique piece for your home. Plus, it reflects your style and effort. Follow each step carefully, ensuring safety and precision. Choosing quality materials will enhance durability. Take pride in every cut and joint.
Enjoy the process as much as the result. Invite friends and family to gather around your creation. Share meals and stories on a table you built. Your dining room will have a personal touch. Your table can become a centerpiece for years to come.
Happy crafting!