Are you ready to add style and extra storage to your space with floating shelves? Installing them might seem tricky, but with the right steps, you can secure your shelves safely and confidently.
Imagine a clean, modern look without bulky brackets—floating shelves give you just that. But the key is making sure they hold up your favorite books, plants, or décor without wobbling or falling. In this guide, you’ll discover simple, proven tips to install your floating shelf securely, so you can enjoy both beauty and strength in your home.
Keep reading and learn how to make your floating shelves a reliable part of your space!

Credit: shelfology.com
Tools And Materials
Installing a floating shelf requires specific tools and materials for a safe and sturdy setup. The right equipment ensures the shelf can support weight and stay fixed on the wall. This section covers essential tools, types of shelves, and the right wall anchors and brackets. Understanding these basics helps you prepare well before starting the installation.
Essential Tools
You need a drill with drill bits for making holes in the wall. A level helps keep the shelf straight. A tape measure ensures correct spacing and placement. A pencil is necessary to mark drilling points. Screwdrivers, both flat and Phillips head, are important for attaching brackets. Stud finders help locate wall studs for better support. A hammer may be useful for some anchors.
Shelf Types
Floating shelves come in various materials like wood, metal, and glass. Wooden shelves are popular for their strength and style. Metal shelves offer a modern look and can hold heavier items. Glass shelves add elegance but need strong supports. Choose shelves based on the weight they must hold and the room’s decor.
Wall Anchors And Brackets
Wall anchors provide extra support when studs are not available. Plastic anchors work well for light loads. Metal anchors hold more weight and are better for drywall. Toggle bolts offer strong grip in hollow walls. Brackets secure the shelf to the wall and hide the mounting hardware. Use heavy-duty brackets for large or heavy shelves. Match anchors and brackets to the shelf type and wall material for best results.
Credit: www.homedepot.com
Preparing The Wall
Preparing the wall is a crucial step before installing a floating shelf securely. It ensures the shelf can hold weight without damage or falling. Taking time to prepare the wall properly makes the installation safer and more durable.
This section covers three important tasks: finding studs, measuring and marking, and checking the wall surface. Each step helps create a strong foundation for your floating shelf.
Finding Studs
Studs are wooden beams behind the drywall. They provide the best support for heavy shelves. Use a stud finder to locate these studs accurately. Move the finder slowly along the wall. Mark the edges of each stud with a pencil. Avoid drilling into empty drywall alone. Anchoring screws into studs prevents shelves from falling.
Measuring And Marking
Measure the height where you want the shelf. Use a tape measure and level to keep marks straight. Mark the points where screws will go on the wall. Check spacing between studs if possible. Measure twice to avoid mistakes. Clear and precise marks guide your drilling and mounting.
Checking Wall Surface
Look at the wall surface for damage or uneven spots. Cracks, holes, or loose drywall can weaken the shelf hold. Repair any issues with filler or patch kits. Make sure the wall is clean and dry. A smooth surface helps the shelf sit flush and secure. Proper wall condition increases shelf stability.
Installing Supports
Installing supports is the key step to hold your floating shelf firmly. The right supports carry the shelf’s weight and prevent it from falling. Choose supports based on your wall type and shelf size. This guide covers three common methods to secure your floating shelf safely.
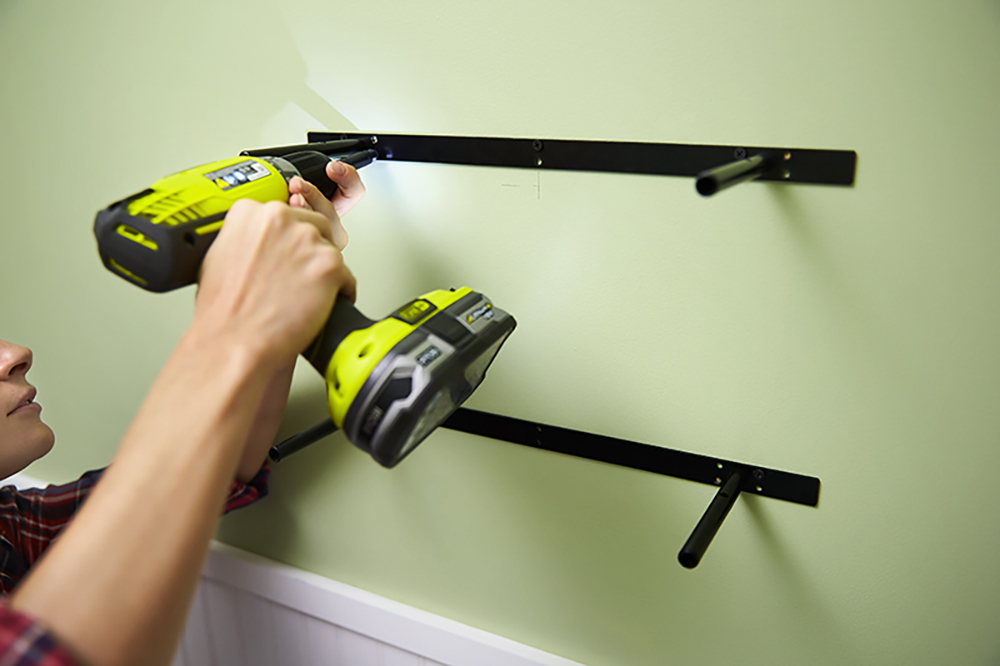
Using Studs For Support
Studs are the strongest anchor points inside your wall. Find studs with a stud finder or tap method. Mark the stud locations clearly before drilling. Attach the shelf brackets or mounting plates directly to the studs. Use long screws that penetrate deep into the wood. This method offers the best stability for heavy shelves. It prevents the shelf from sagging or pulling away.
Drywall Anchors
Drywall alone cannot hold heavy shelves. Use drywall anchors to add strength. Choose anchors rated for the shelf weight. Insert anchors into drilled holes in drywall carefully. Screw the shelf brackets into the anchors tightly. This method works well for lighter shelves or when studs are not available. Always check the weight limits on your anchors before installation.
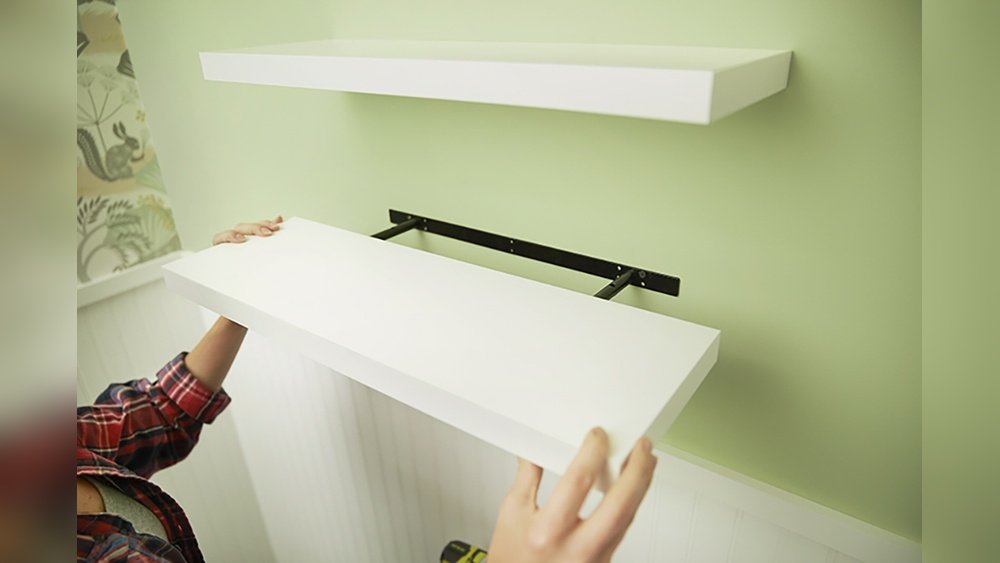
Steel Rod Reinforcement
Steel rods provide hidden, strong support inside the shelf. Drill a steel rod into the wall stud horizontally. Slide the shelf onto the rod, letting it rest securely. This method hides the support and keeps the shelf floating visually. Use drywall screws near the shelf edges to stop rotation. Steel rods work best for medium to heavy shelves. They add both strength and clean design.
Mounting The Shelf
Mounting a floating shelf securely is essential for safety and durability. Proper mounting holds the shelf firmly to the wall. This section guides you through the key steps for a strong installation.
Aligning The Shelf
Start by choosing the exact spot on the wall. Hold the shelf bracket against the wall. Use a pencil to mark the holes for screws. Double-check the marks before drilling. Proper alignment ensures the shelf fits flush and looks neat.
Securing With Screws
Use wall anchors if you do not hit studs. Drill pilot holes at the marked points. Insert anchors for better grip in drywall. Screw the bracket firmly into the wall. Tight screws keep the shelf from wobbling or falling.
Ensuring Level Placement
Place a level on top of the shelf. Adjust the shelf until the bubble is centered. Tighten all screws while checking the level. A perfectly level shelf prevents items from sliding off. Level placement also improves the shelf’s visual appeal.
No-drill Alternatives
Installing floating shelves without drilling is ideal for renters or those avoiding wall damage. Several no-drill options offer secure support for lightweight to medium-weight shelves. These alternatives use adhesives, brackets, or tension rods to hold shelves firmly in place. Each method suits different shelf sizes and wall types.
Heavy-duty Adhesive Strips
Heavy-duty adhesive strips provide a simple way to mount floating shelves. They stick firmly to smooth, clean surfaces like painted drywall or tile. These strips hold light to medium items without screws or nails. Make sure to follow weight limits on the packaging. Press the strip firmly and wait before attaching the shelf. This method is quick and leaves no holes.
No-stud Bracket Systems
No-stud bracket systems use strong brackets that grip the wall without anchors. They often clamp to drywall or use tension to stay in place. These brackets support medium-weight shelves securely. Installation requires careful measuring to keep shelves level. Perfect for renters or anyone avoiding wall damage. These brackets usually come with all parts needed for easy setup.
Tension Rod Supports
Tension rods work by pressing between two walls or inside a window frame. They create a stable frame to support a floating shelf. This option fits narrow spaces where drilling is impossible. Tension rods hold light shelves and small items. Adjust the rod’s length to fit the space tightly. This method is removable and damage-free, ideal for temporary shelving needs.

Credit: www.youtube.com
Weight Capacity Tips
Understanding the weight capacity of your floating shelf is crucial for safety and durability. Proper weight management prevents damage to the shelf and the wall. These tips help you keep your shelf sturdy and secure.
Checking Product Limits
Always read the manufacturer’s instructions about weight limits. Each shelf has a maximum load it can hold safely. Exceeding this limit risks shelf failure and wall damage. Consider the material of the shelf and brackets for added strength.
Distributing Load Evenly
Place items evenly across the shelf surface. Avoid putting all weight on one side or in the center only. Even distribution reduces stress on mounting points and hardware. Balance heavier objects with lighter ones to maintain stability.
Avoiding Overloading
Do not exceed the recommended weight capacity. Overloading causes shelves to bend or fall. Regularly check the shelf for signs of strain or damage. Remove excess weight immediately to prevent accidents.
Common Installation Mistakes
Installing a floating shelf may seem simple, but many make mistakes that weaken the shelf’s hold. These errors cause shelves to tilt, fall, or damage walls. Knowing common installation mistakes helps avoid frustration and keeps shelves secure.
Ignoring Stud Locations
Studs provide strong support in walls. Many skip finding studs and drill into drywall alone. Drywall cannot hold heavy weight and will fail. Always use a stud finder and anchor shelves into studs. This ensures the shelf stays firm and stable.
Using Wrong Anchors
Different walls need different anchors. Using small plastic anchors on heavy shelves leads to failure. Heavy shelves require metal or toggle anchors for strength. Choose anchors based on shelf weight and wall type. Using the right anchor keeps the shelf safe.
Poor Leveling
Shelves must be level to avoid items sliding off. Many install shelves without checking with a level tool. Even a small tilt looks bad and causes objects to fall. Use a spirit level before final tightening. This simple step makes shelves look neat and work well.
Maintenance And Safety
Maintaining floating shelves ensures they stay safe and strong over time. Regular care helps avoid accidents and keeps your shelves looking great. Follow simple safety tips to handle heavy items and remove shelves without damage.
Regular Stability Checks
Check your floating shelves every few months. Press gently on different spots to test firmness. Look for any wobbling or loose screws. Tighten brackets or anchors if needed. Early fixes prevent bigger problems later.
Handling Heavy Items Safely
Place heavy items near the shelf supports. Avoid putting too much weight in the middle. Spread weight evenly to reduce stress. Lift heavy objects carefully to avoid sudden pulls. Use additional brackets if you plan to hold very heavy items.
Removing Shelves Without Damage
Remove shelves slowly and gently. Unscrew all fasteners fully before pulling the shelf off. Use a putty knife to loosen edges if stuck. Patch holes with spackle and sand smooth. Paint over patched areas to restore the wall.
Frequently Asked Questions
How To Make Sure Floating Shelves Are Secure?
Secure floating shelves by anchoring into wall studs with steel rods or heavy-duty brackets. Use drywall anchors in keyhole slots to prevent rotation. Ensure proper weight support and tighten all fasteners firmly for stability.
Can I Have Floating Shelves Without Drilling?
Yes, you can install floating shelves without drilling using strong adhesive strips or no-drill mounting kits. These work best for lightweight items. Avoid heavy loads, as adhesives have weight limits. Temporary supports like tension rods or placing shelves on furniture also provide no-drill options.
What Is The Best Way To Attach Floating Shelves?
The best way to attach floating shelves is by securing hidden brackets into wall studs. Drill holes, mount brackets firmly, then slide the shelf onto them for strong support and a clean look.
How Do You Stabilize A Floating Shelf?
Stabilize a floating shelf by securely mounting brackets into wall studs. Use steel rods or drywall anchors for extra support. Ensure keyhole slots fit tightly to prevent rotation. Check weight limits and level the shelf during installation for a sturdy, balanced hold.
Conclusion
Installing a floating shelf securely takes careful planning and the right tools. Start by finding wall studs for strong support. Use proper anchors or brackets to hold weight safely. Measure and level your shelf before drilling to avoid mistakes. Take your time and double-check each step to ensure stability.
A well-installed floating shelf adds style and function to any room. Keep safety in mind for lasting results you can trust. Now, enjoy your neat, secure shelf that holds your favorite items confidently.