If you’ve ever struggled to find anything in your corner kitchen cabinets, you know how frustrating wasted space can be. But what if you could turn that awkward, hard-to-reach area into a smart, organized spot that works perfectly for your needs?
You’re about to learn how to build a custom blind corner cabinet organizer yourself, saving money and making the most of every inch. This simple DIY guide will show you step-by-step how to transform your cabinet, so you can finally say goodbye to clutter and hello to easy access.
Ready to unlock your kitchen’s hidden potential? Let’s get started!
Materials And Tools
Creating a custom blind corner cabinet organizer requires careful preparation. Gathering the right materials and tools ensures your project runs smoothly. The quality of supplies affects the durability and functionality of your organizer.
Below is a list of essential supplies and recommended tools to help you build a sturdy and efficient cabinet organizer.
Essential Supplies
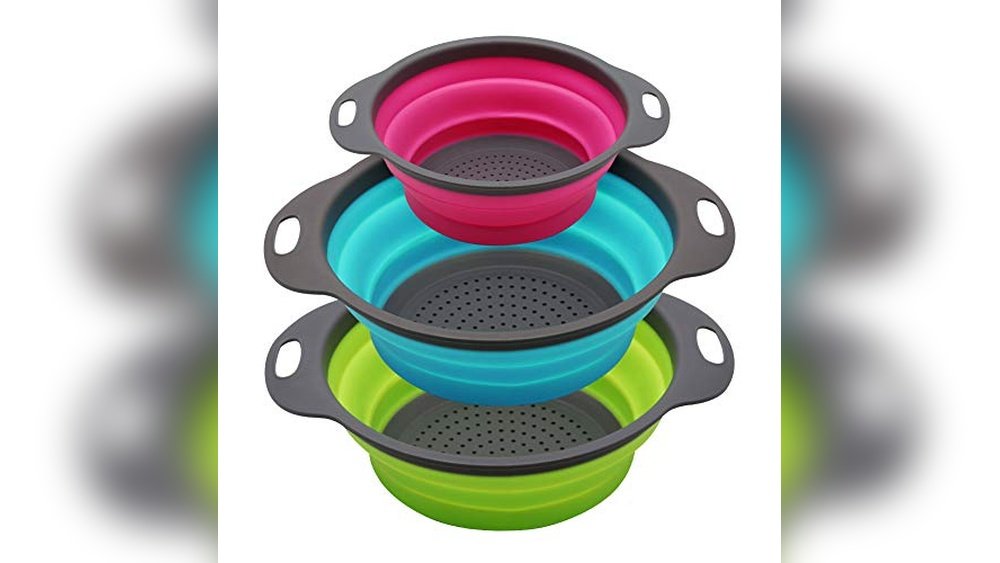
- Plywood or MDF boards for the shelves and structure
- Wood screws to secure parts together
- Wood glue for added strength
- Drawer slides or pull-out hardware for smooth operation
- Sandpaper to smooth rough edges
- Wood finish or paint to protect and enhance appearance
- Measuring tape for accurate dimensions
- Edge banding to cover raw plywood edges
Recommended Tools
- Power drill with drill bits for making holes
- Jigsaw or circular saw for cutting wood pieces
- Clamps to hold parts firmly while gluing
- Screwdriver for assembling hardware
- Carpenter’s square to check right angles
- Level to ensure shelves are even
- Measuring tape for precise cuts
- Pencil for marking measurements
Credit: www.baycitiesconstruction.com
Measuring Your Cabinet
Measuring your cabinet is the first step in creating a custom blind corner cabinet organizer. Accurate measurements help ensure your DIY organizer fits perfectly and uses every inch of space. Taking your time here saves effort later and improves the final result.
Assessing The Space
Open your cabinet door fully. Look inside to see the shape and size clearly. Note any obstacles like hinges or pipes. Check if shelves or dividers exist inside. These details affect your organizer design. Stand in front of the cabinet to get a good view. Imagine how your organizer will fit and move inside. This helps plan your measurements carefully.
Recording Dimensions
Use a tape measure for accuracy. Measure the cabinet’s height from bottom to top. Record the width of each wall inside the corner. Measure depth from the front edge to the back corner point. Write down all numbers clearly on paper. Double-check each measurement to avoid mistakes. Accurate records will guide your cutting and assembly. Keep your notes handy while building your organizer.
Design Planning
Design planning is the first step to create a custom blind corner cabinet organizer. It helps organize ideas and avoid mistakes. Careful planning ensures the organizer fits perfectly and works well.
Start by measuring the cabinet space carefully. Note the width, depth, and height inside the corner cabinet. These numbers guide your design choices.
Choosing Organizer Style
Pick a style that fits your needs and cabinet space. Popular styles include pull-out trays, lazy Susans, and sliding shelves. Each style offers different access and storage options.
Consider the items you want to store. Large pots need wide shelves. Small containers work well with tiered trays. Choose a style that makes it easy to reach everything.
Think about your woodworking skills too. Simple pull-outs are easier to build. Complex rotating systems may need more tools and experience.
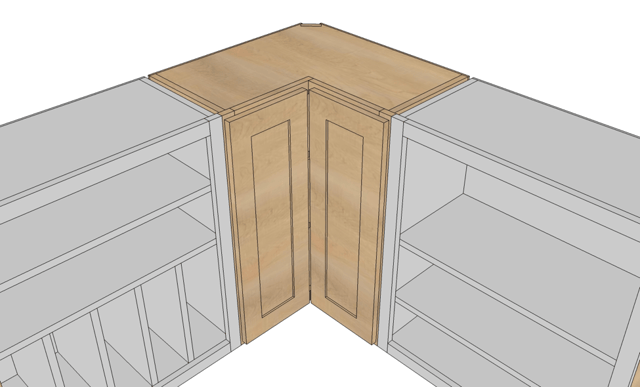
Sketching The Layout
Draw a clear sketch of your organizer design. Use graph paper or a digital tool for accuracy. Mark all dimensions and moving parts.
Show how shelves or trays will slide or rotate. This helps spot problems early. Make sure nothing blocks the cabinet doors or walls.
Label each part in the sketch. This makes building easier and reduces errors. Keep your design simple and practical for best results.

Credit: blog.kitchenmagic.com
Cutting And Preparing Wood
Cutting and preparing wood is a key step in building a custom blind corner cabinet organizer. Accurate cuts ensure the pieces fit perfectly. Proper preparation helps the wood last longer and look better. Taking time here saves effort during assembly and use.
Selecting Wood Types
Choose wood that is strong and smooth. Plywood is a good choice for cabinet shelves. It resists warping and holds screws well. Solid wood like maple or oak adds durability. Avoid soft woods that can dent or scratch easily. Consider wood that matches your kitchen style.
Cutting Panels And Shelves
Measure twice before cutting wood panels and shelves. Use a sharp saw for clean edges. A circular saw or table saw works well for straight cuts. Cut shelves slightly smaller than the cabinet space. Sand edges to remove splinters and rough spots. Label pieces to keep track during assembly.
Assembling The Organizer
Assembling the custom blind corner cabinet organizer is a crucial step. It shapes the final functionality and appearance. This stage requires focus and patience. Follow each step carefully to ensure a perfect fit in your corner cabinet space.
Building The Frame
Start by cutting the wood pieces according to your measurements. Use sturdy materials like plywood for strength. Join the pieces with screws or wood glue for stability. Make sure the frame fits snugly inside the cabinet. Check for square corners using a carpenter’s square. Sand the edges smooth to avoid splinters. The frame is the base that supports shelves and drawers. Take time to build it accurately.
Installing Shelves And Drawers
Measure the interior space to plan shelf placement. Cut shelves to fit the frame width and depth. Secure shelves with brackets or shelf pins for easy adjustment. For drawers, assemble box components and attach drawer slides. Install slides inside the frame aligned properly for smooth movement. Insert drawers and test their glide. Adjust slides if drawers stick or wobble. Shelves and drawers maximize storage and accessibility. Proper installation makes your organizer practical and durable.
Installing Hardware
Installing hardware is a key step in building your custom blind corner cabinet organizer. It ensures smooth operation and easy access to your stored items. Proper hardware installation makes the organizer functional and durable.
Take your time to measure and align hardware accurately. This prevents misalignment and ensures a professional look. Use the right tools and follow manufacturer instructions closely for best results.
Drawer Slides And Hinges
Choose sturdy drawer slides for smooth movement. Full-extension slides allow you to reach the back of the drawer easily. Install slides on both sides of the drawer for stability.
Attach hinges firmly to the cabinet frame. Soft-close hinges reduce noise and wear. Mark hinge positions before drilling to avoid mistakes.
Handles And Pulls
Select handles or pulls that match your cabinet style. Position them at a comfortable height for easy grip. Use a template to mark holes for consistent placement.
Secure handles tightly with screws. Loose handles can damage the wood and cause frustration. Test each handle after installation to confirm proper function.
Finishing Touches
Finishing touches bring your custom blind corner cabinet organizer to life. They protect the wood and give it a polished look. These steps make your DIY project last longer and look neat. Focus on sanding, sealing, and then painting or staining for best results.
Sanding And Sealing
Start by sanding the entire surface smoothly. Use fine-grit sandpaper to avoid scratches. Sanding removes rough spots and prepares wood for sealing.
Apply a wood sealer evenly to protect from moisture and stains. Let it dry completely before the next step. Sealing also helps the paint or stain stick better.
Painting Or Staining
Choose paint or stain based on your kitchen style. Paint offers vibrant colors and a smooth finish. Stain highlights the wood grain and gives a natural look.
Apply thin, even coats and allow drying time between each coat. This prevents drips and uneven color. Finish with a clear topcoat for extra protection.
Installation Tips
Installing a custom blind corner cabinet organizer takes careful steps. Proper installation ensures smooth operation and maximizes your space. Follow these tips for a perfect fit and secure setup.
Fitting The Organizer In Cabinet
Measure the cabinet interior precisely before placing the organizer. Check the depth, width, and height to confirm it fits well. Position the organizer so shelves or trays slide freely without obstruction. Avoid forcing it inside; adjust the size if needed. Align the organizer evenly to prevent tilting or gaps.
Securing And Adjusting
Use screws or brackets to secure the organizer firmly to the cabinet walls. Tighten all fasteners but avoid over-tightening, which can damage the wood. Test the movement of shelves or trays for smooth gliding. Adjust the tracks or mounts if the organizer sticks or wobbles. Recheck all connections after a few days to ensure stability.
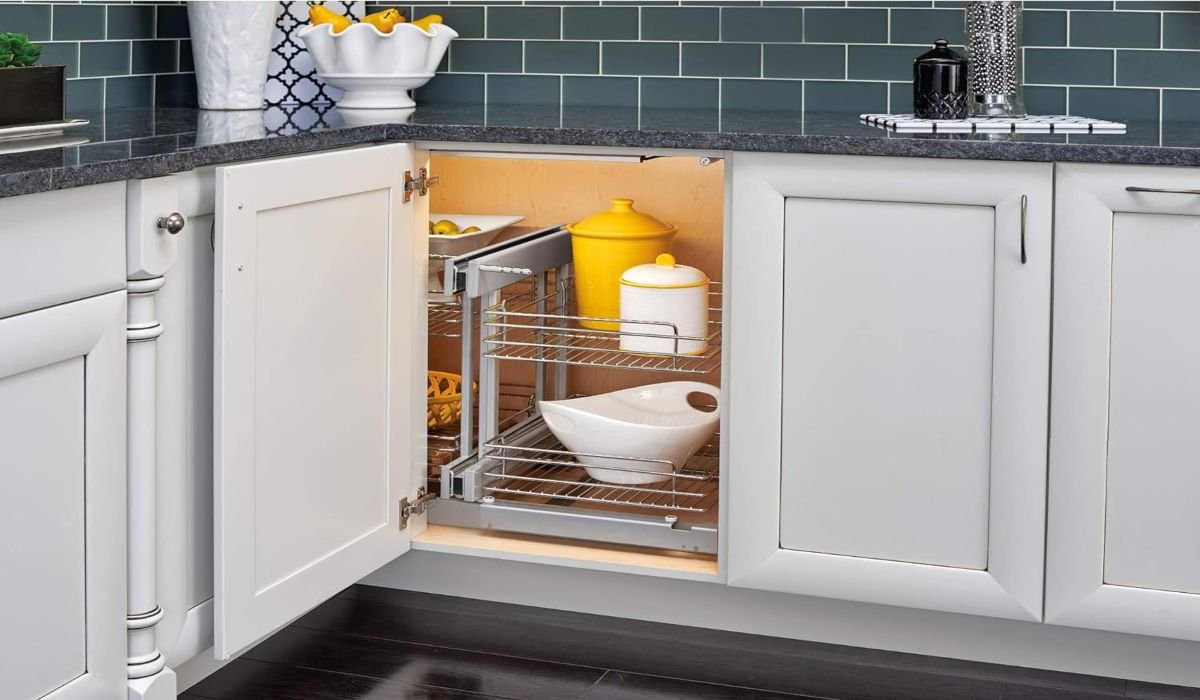
Maximizing Storage
Maximizing storage in a blind corner cabinet transforms wasted space into valuable storage. This area often remains underused because of its awkward shape. Custom organizers help make this tricky spot practical and neat. Thoughtful arrangements improve access and keep items visible. Small changes create big storage gains and reduce clutter in your kitchen.
Using Baskets And Bins
Baskets and bins help group items inside the corner cabinet. They prevent loose items from falling or getting lost. Choose stackable baskets to use vertical space better. Clear bins allow you to see contents without opening them. Label each basket or bin for quick finding. This method keeps everything tidy and easy to reach.
Organizing Tips
Sort items by frequency of use. Store everyday items near the front for quick access. Place seasonal or less used items deeper inside. Use adjustable shelves or pull-out trays to improve reach. Keep similar items together to save time. Regularly declutter to keep the space efficient and clean.

Credit: www.youtube.com
Maintenance And Care
Proper maintenance and care keep your custom blind corner cabinet organizer working well. Regular attention prevents damage and extends its life. Clean and check your organizer often. Small fixes stop bigger problems later.
Cleaning Tips
Use a soft cloth to wipe shelves and drawers. Avoid harsh chemicals that can damage wood or metal parts. Mild soap with water works best. Dry surfaces well to prevent moisture damage. Clean spills immediately to avoid stains. Dust regularly to keep parts moving smoothly.
Troubleshooting Common Issues
If drawers stick, check for dirt or debris in tracks. Clean tracks gently and apply a small amount of lubricant. Tighten loose screws to keep parts stable. If shelves sag, add extra support brackets. For misaligned parts, adjust screws and hinges carefully. Replace broken pieces promptly to keep organizer safe and functional.
Frequently Asked Questions
How To Organize A Blind Corner Cabinet?
Use wedge or triangular bins to maximize blind corner cabinet space. Install pull-out trays or lazy Susans for easy access. Arrange items by frequency of use. Keep heavier items near the front. Utilize adjustable shelves to customize storage efficiently.
How To Organize An Awkward Corner Cabinet?
Use wedge or triangle bins to fit the shape. Add pull-out trays or lazy Susans for easy access. Keep items organized and reachable.
How Much Space Do You Need For A Blind Corner Cabinet?
A blind corner cabinet needs at least 36 inches of wall space on each side. Depth should be 24 inches for optimal storage.
What Is The Difference Between A Blind Corner Cabinet And A Lazy Susan?
A blind corner cabinet uses deep, hard-to-reach space in kitchen corners. A Lazy Susan is a rotating shelf inside cabinets for easy access.
Conclusion
Creating a custom blind corner cabinet organizer saves space and adds order. Simple materials and tools make the DIY process easy to follow. With this project, you can access hidden corners without hassle. Organizing your kitchen becomes more efficient and enjoyable.
Try this method to improve your cabinet’s function today. Small changes bring big improvements in your home storage. Keep your kitchen tidy and clutter-free with custom solutions. Enjoy the satisfaction of building something useful yourself.