Are you struggling with getting your 3D prints to stick? Or maybe they’re sticking a little too well, and you’re left with a mess?
The secret often lies in how clean your 3D printer bed is. A spotless bed can make the difference between a perfect print and a frustrating failure. In this guide, you’ll discover easy tips and tricks to keep your printer bed in top shape.
You’ll learn how to maintain it with minimal effort, ensuring every print is a success. Ready to transform your 3D printing experience? Let’s dive into the simple steps that will make your prints flawless every time. Keep reading to unlock the secrets of a clean and efficient 3D printer bed!

Credit: www.youtube.com
Tools And Materials Needed
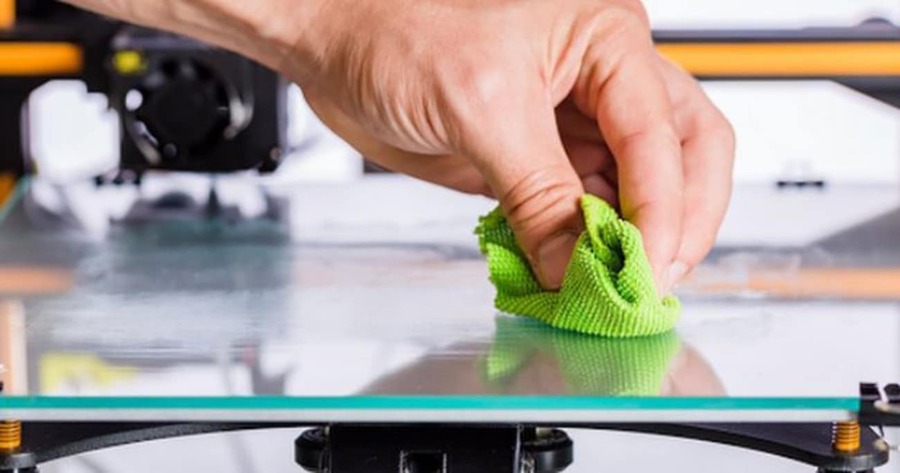
Gather essentials like isopropyl alcohol, a soft cloth, and a plastic scraper. Use distilled water for diluted cleaning solutions. Ensure gloves and safety goggles are handy for protection. Keep a microfiber cloth nearby for a polished finish.
Cleaning your 3D printer bed is essential for maintaining print quality and ensuring your machine runs smoothly. To do this effectively, you’ll need a few key tools and materials. Having the right items on hand can make the process quick and efficient, allowing you to keep your focus on creating amazing prints. Let’s dive into the essential tools and materials needed for the job.Scraper Or Spatula
A scraper or spatula is vital for removing prints and residue from the printer bed. Choose one with a flat edge to avoid scratching the surface. A flexible metal scraper works well for most bed types, but a plastic one can be safer for delicate surfaces.Microfiber Cloths
Microfiber cloths are perfect for cleaning the printer bed without causing scratches. They’re soft, absorbent, and effective at picking up dust and debris. Keep a few on hand for a spotless finish.Isopropyl Alcohol
Isopropyl alcohol is excellent for dissolving stubborn residues, especially when dealing with sticky filament like PETG. Use a concentration of at least 70% for the best results. Apply it with a microfiber cloth for a streak-free shine.Warm Soapy Water
For non-electrical parts, warm soapy water can be a gentle yet effective cleaning solution. It’s particularly useful for glass beds. Rinse thoroughly and dry completely to prevent watermarks.Sandpaper
Sandpaper can help in leveling out any inconsistencies on the bed surface. A fine grit, such as 220, can smooth out minor imperfections without damaging the bed. Use it sparingly to maintain the bed’s integrity.Adhesive Remover
Adhesive remover is handy for tackling tough glue or tape residues. Make sure it’s safe for your bed type. Test it on a small area first to avoid any potential damage.Personal Tip: A Consistent Routine
Creating a consistent cleaning routine can save you time and extend the life of your 3D printer bed. In my experience, setting aside a few minutes after each print session for a quick clean-up prevents build-up and keeps prints flawless. What habits can you incorporate into your routine to enhance your printing experience? Gather these tools and materials, and you’re well on your way to maintaining a pristine 3D printer bed. Having a clean bed not only improves print adhesion but also leads to higher-quality prints. Are you ready to elevate your 3D printing game?Preparing The Workspace
Cleaning your 3D printer bed starts with preparing the workspace. A tidy area makes the process easier and safer. It helps avoid mishaps and ensures efficient cleaning. Below are steps to get your workspace ready.
Organize Your Tools
Gather all necessary cleaning tools. Keep them within easy reach. A scraper, microfiber cloth, and cleaning solution are essential. Having everything organized saves time and effort.
Clear The Area
Remove any clutter around the printer. This prevents accidents and gives you more space. A clean area boosts your focus and efficiency.
Ensure Proper Lighting
Good lighting helps you see dirt and debris clearly. It ensures you clean every spot. Use a desk lamp if needed. Bright lighting prevents missed areas.
Ventilate The Space
Open windows or use a fan. Fresh air keeps you comfortable while cleaning. It also helps to disperse fumes from cleaning agents.
Wear Protective Gear
Wear gloves to protect your hands. Some cleaning solutions can be harsh. Gloves keep your skin safe and clean.
Removing Excess Filament
Cleaning a 3D printer bed is essential for smooth printing. A common issue is excess filament stuck on the bed. This residue can affect new prints. Removing it ensures better adhesion and print quality. Let’s explore some effective methods.
Using Scrapers
Scrapers are handy for removing filament. Use a plastic scraper to avoid damage. Gently slide it under the filament. Apply consistent pressure. Work slowly to lift the material. Metal scrapers can scratch the bed. Use them carefully if necessary. Scraping maintains a clean surface.
Applying Heat
Heat can soften filament residue. Turn on the printer bed. Set it to a low temperature. 60°C is often effective. Wait until the bed warms up. Soft filament is easier to remove. Use a scraper to lift it gently. Heating protects the bed from scratches. It also makes the cleaning process easier.
Credit: www.cytron.io
Cleaning Techniques For Different Bed Types
Cleaning a 3D printer bed is essential for optimal printing. Different bed types require specific techniques. This ensures a clean surface for each print. Let’s explore how to clean glass, metal, and magnetic beds effectively.
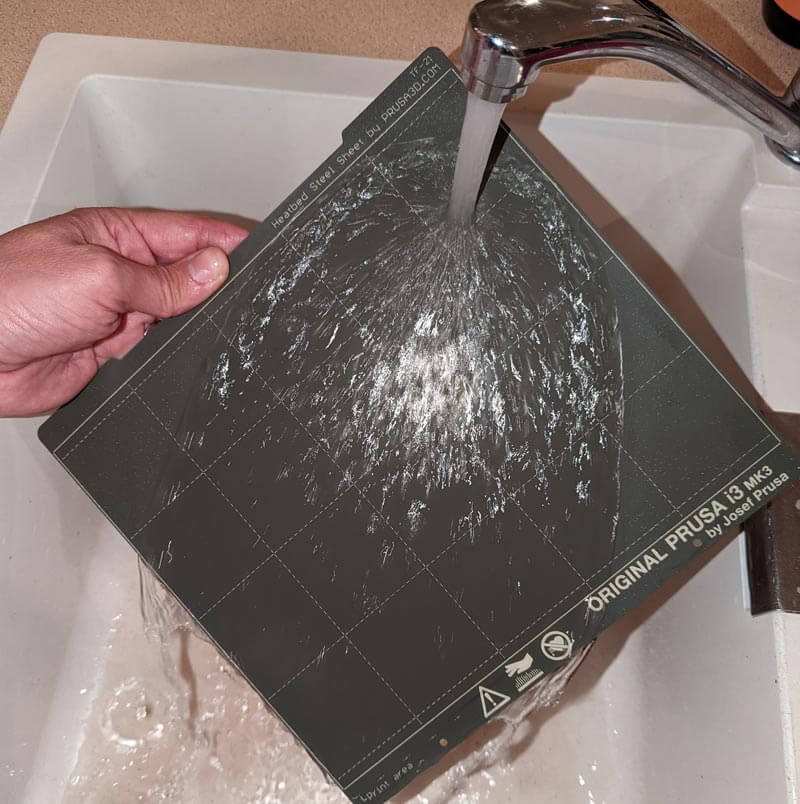
Glass Beds
Glass beds provide a smooth and shiny surface. Use a soft cloth to wipe the surface. Warm water mixed with mild soap can help. Rinse the cloth and wipe again to remove soap. For stubborn residue, try isopropyl alcohol. Ensure the bed is dry before the next print.
Metal Beds
Metal beds are durable but can get scratched. Use a microfiber cloth to clean off dust. Vinegar can help with sticky spots. Apply it to the cloth first. Rub gently to avoid scratches. Dry the bed completely before using it again.
Magnetic Beds
Magnetic beds are flexible and easy to use. Remove the bed and wash it with warm soapy water. Rinse thoroughly to remove soap. Lay it flat to air dry. Avoid using sharp tools to scrape off material. This can damage the surface.
Using Cleaning Solutions
Cleaning a 3D printer bed can enhance print quality. Use gentle cleaning solutions to remove residue. Always ensure the surface is dry before starting a new print for best results.
Cleaning your 3D printer bed is essential for ensuring high-quality prints and prolonging the life of your machine. Using cleaning solutions can effectively remove residue and maintain the bed’s optimal condition. You don’t need fancy products; simple household items work wonders. Let’s explore how you can keep your 3D printer bed spotless using isopropyl alcohol and soap and water.Isopropyl Alcohol
Isopropyl alcohol is a popular choice for cleaning 3D printer beds. It’s efficient at dissolving residue left from filaments and adhesives. A quick wipe with a cloth dampened in isopropyl alcohol can instantly refresh your printer bed. Consider this: during a late-night printing session, I noticed my prints were failing due to poor adhesion. A swift clean with isopropyl alcohol fixed the issue, restoring my prints to perfection. Isopropyl alcohol is quick-drying, so you won’t have to wait long before starting your next print. Plus, you can easily find it at most stores, making it a convenient option.Soap And Water
Soap and water might seem too simple, but they’re highly effective for cleaning 3D printer beds. Gentle dish soap combined with warm water can remove dirt and grease without damaging the bed. One day, I realized my printer bed had accumulated a lot of grime from continuous use. I mixed a few drops of dish soap with water and used a sponge to clean the surface. The results were surprisingly excellent, and my subsequent prints adhered perfectly. Don’t forget to dry the bed thoroughly to avoid any water damage. It’s a simple yet reliable method that uses items you already have at home. Which cleaning solution will you try first? The choice is yours, but remember, a clean bed is key to successful printing!Maintaining Bed Adhesion
Clean the 3D printer bed using isopropyl alcohol and a soft cloth to ensure strong bed adhesion. Avoid using harsh chemicals, which can damage the surface. Regular cleaning prevents print failures and helps maintain high-quality prints.
Maintaining bed adhesion is crucial for successful 3D printing. When your printer bed isn’t properly prepared, it can lead to failed prints, wasted materials, and frustration. Ensuring your prints stick well to the bed involves a mix of techniques and careful monitoring. Let’s dive into some practical tips to keep your 3D printer bed in top shape.Applying Adhesive Agents
Adding adhesive agents can drastically improve bed adhesion. Products like glue stick or hairspray are popular among 3D printing enthusiasts. They offer a simple solution to enhance grip on the printer bed. Have you ever tried using a glue stick and found it surprisingly effective? It’s a quick fix that can save a print from disaster. Just remember to apply it evenly across the bed before starting a print. It’s also worth exploring specialized adhesives designed for 3D printing. These can offer more robust adhesion and are tailored for specific filament types. But always check compatibility to avoid any unpleasant surprises.Monitoring Temperature Settings
Temperature plays a vital role in bed adhesion. If the bed temperature is too low, your prints may not stick. Conversely, too high temperatures can lead to warping. Have you checked your printer’s recommended settings for your filament type? It’s essential to ensure you’re within the right temperature range. This can make the difference between a perfect print and a failed attempt. Consider investing in a bed thermometer for precise monitoring. It’s a small tool that can provide peace of mind and help maintain optimal conditions for your prints. By focusing on these aspects, you’ll find your prints sticking better and fewer issues with adhesion. What other tips have worked for you in maintaining bed adhesion? Your insights could be the missing piece for someone else’s successful print.Common Mistakes To Avoid
Ensure the printer bed is cool before cleaning to prevent damage. Avoid using harsh chemicals; they can ruin the surface. Use a soft cloth or sponge for gentle cleaning to maintain the bed’s integrity.
Cleaning a 3D printer bed is essential for optimal printing results. Mistakes during cleaning can affect print quality or damage the printer. Understanding common errors ensures a smooth process and extends the printer bed’s life. Let’s explore some frequent mistakes and how to avoid them.Using Abrasive Materials
Using rough materials can scratch the printer bed. Scratches can ruin the surface, causing prints to stick or detach improperly. Always use soft cloths and gentle cleaners.Applying Excessive Force
Pressing too hard while cleaning can warp the bed. A warped bed leads to uneven prints. Use light pressure and gentle motions for better results.Ignoring Bed Temperature
Cleaning a hot bed can cause burns or warp the surface. Allow the bed to cool down before cleaning. This protects both the bed and your hands.Using Incorrect Cleaning Solutions
Some solutions can damage the printer bed. Avoid strong chemicals. Opt for mild cleaners or water to keep the surface intact.Neglecting Regular Cleaning
Skipping regular cleaning leads to build-up. Build-up affects print adhesion and quality. Clean the bed after every few prints to maintain efficiency.Overlooking Residue Removal
Leaving residue can cause prints to fail. Residue affects adhesion and surface smoothness. Ensure all debris is wiped away for a clean start.Not Checking For Damage
Failing to inspect the bed can miss underlying issues. Damage affects print quality and bed performance. Regular checks help catch problems early.Troubleshooting Bed Issues
Cleaning a 3D printer bed is crucial for optimal prints. Troubleshooting bed issues can be daunting. Common problems include warping and uneven surfaces. Understanding these issues can enhance your printing experience.
Dealing With Warping
Warping distorts prints, ruining your hard work. It occurs when parts of the print cool unevenly. The edges lift, altering the shape. To combat this, ensure the bed temperature is consistent. Use bed adhesives like glue sticks or hairspray. They help prints stick better. Adjust the initial layer settings. A thicker first layer can improve adhesion.
Fixing Uneven Surfaces
Uneven surfaces cause print imperfections. Check the bed level first. A misaligned bed leads to uneven layers. Use a leveling tool for precision. Regular calibration prevents this issue. Clean the bed thoroughly. Residue can affect print quality. A clean bed ensures even layering. Consider using a build plate. It provides a flat, consistent surface.
Credit: www.printsolid.com.au
Frequently Asked Questions
What Do You Clean A 3d Printer Bed With?
Use isopropyl alcohol to clean a 3D printer bed. Apply with a lint-free cloth. For stubborn residues, use a scraper carefully. Ensure the bed is cool before cleaning. Regular maintenance keeps prints adhering well. Avoid harsh chemicals that may damage the surface.
How Do You Get Pla Residue Off A Bed?
Use a scraper to gently remove PLA residue. Apply isopropyl alcohol for stubborn spots. Heat the bed slightly to loosen residue, then wipe clean with a cloth. Regular cleaning prevents buildup and ensures optimal 3D printing performance.
Will 70% Isopropyl Alcohol Clean Resin?
70% isopropyl alcohol can clean resin effectively. It dissolves uncured resin and helps remove residue. Ensure adequate ventilation while cleaning. Always wear gloves to protect your skin.
How To Clean A Textured 3d Printer Bed?
Use isopropyl alcohol and a soft cloth to gently wipe the textured 3D printer bed. Avoid harsh chemicals. Ensure the bed is cool before cleaning. Regular maintenance enhances print quality and prolongs bed life.
Conclusion
Cleaning your 3D printer bed is crucial for quality prints. A clean bed prevents adhesion issues and print failures. Regular maintenance keeps your printer running smoothly. Always use gentle cleaning tools. Avoid harsh chemicals that can damage surfaces. Follow proper cleaning steps to extend your printer’s life.
Clean after each print session for best results. A well-maintained printer produces smoother prints. Take time to inspect the bed for any wear. Replace parts if necessary. Keep your workspace tidy and organized. Happy printing and enjoy your crafting journey!