If you love your dog, you want to make sure they can get on and off your bed safely and comfortably. But jumping up or down can be tough on their joints, especially as they get older or if they have mobility issues.
That’s where a dog ramp comes in—a simple, gentle way to help your furry friend climb up without strain. Building your own dog ramp for your bed is easier than you might think, and it lets you customize the size and angle perfectly for your pet’s needs.
In this guide, you’ll discover step-by-step how to create a ramp that keeps your dog safe, happy, and close to you. Ready to give your dog the comfort they deserve? Let’s get started!
Credit: www.reddit.com
Choosing The Right Ramp
Choosing the right ramp for your dog’s bed is essential for safety and comfort. A well-made ramp helps your dog access the bed easily without stress. Not all ramps suit every dog, so select one based on your dog’s needs. Consider size, health, and how your dog moves.
Benefits For Older And Injured Dogs
Ramps reduce strain on joints and muscles. Older dogs with arthritis or hip problems find ramps easier to use. Injured dogs avoid jumping, which can delay healing. A ramp offers gentle support and steady footing. It helps maintain your dog’s independence and confidence.
Suitability Compared To Stairs
Ramps provide a smooth, gradual slope. Stairs can be hard for dogs with poor balance or weak legs. Ramps lower the risk of slipping or falling. Dogs with long legs or large bodies often prefer ramps. Small, agile dogs may handle stairs better, but ramps are safer for most.
Key Features To Consider
Choose a ramp with a non-slip surface for safety. The ramp length should create a gentle incline, not too steep. Materials should be sturdy but lightweight for easy movement. Consider the ramp’s width to fit your dog comfortably. Portability matters if you move the ramp often. Look for ramps with side rails to prevent falls. Ensure the ramp height matches your bed’s height exactly.
Measuring And Planning
Measuring and planning are crucial first steps for building a dog ramp for a bed. Accurate measurements ensure the ramp fits well and feels safe for your dog. Proper planning helps avoid mistakes and wasted materials.
Careful consideration of length, angle, and materials creates a sturdy, comfortable ramp. This section breaks down these key points.
Determining Ramp Length
Start by measuring the height from the floor to the bed’s top edge. Use a tape measure for accuracy. The ramp length depends on this height and the desired slope.
Longer ramps have gentler slopes, which are easier for dogs to climb. Keep your dog’s size and mobility in mind. A ramp too short may be too steep and unsafe.
Calculating The Ideal Angle
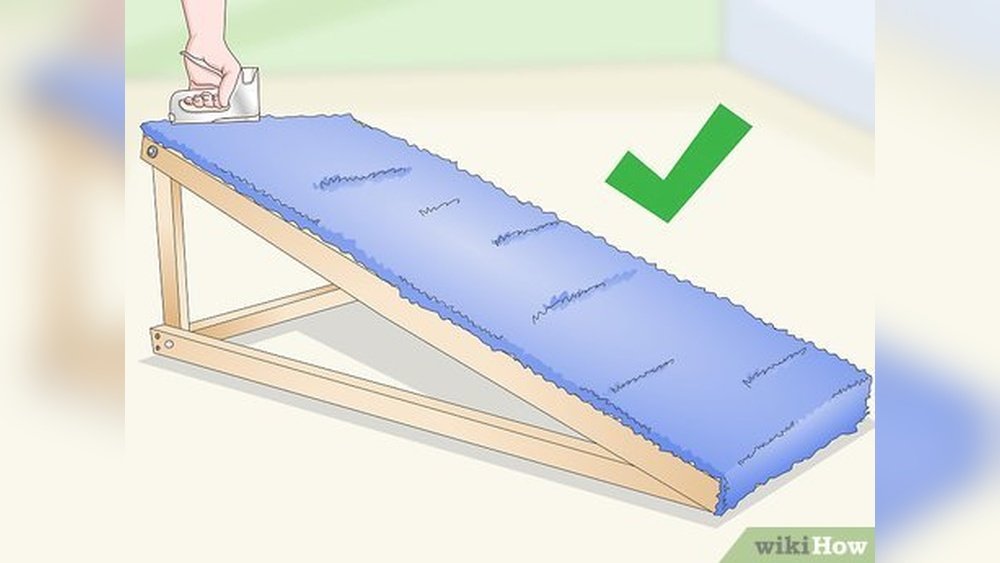
The ideal ramp angle is between 18 and 25 degrees. This range offers a gentle slope that reduces strain on your dog’s joints. Steeper ramps can cause slips or discomfort.
Use a simple online ramp calculator or a protractor to find the right angle. Remember, a lower angle means a longer ramp. Balance length and space available.
Selecting Materials
Choose materials that are strong and slip-resistant. Wood is a popular choice because it is sturdy and easy to work with. Plywood with a non-slip surface works well for the ramp deck.
Consider adding carpet, rubber mats, or grip tape for extra traction. Use screws and brackets to secure all parts firmly. Avoid smooth or slippery surfaces that can harm your dog.
Building The Ramp
Building the ramp for your dog’s bed creates a safe and easy way for your pet to climb. The process involves simple steps anyone can follow. Using the right materials ensures a strong and stable ramp. This guide breaks down the building process into clear parts for better results.
Cutting And Assembling The Frame
Start by measuring the height of your bed to determine the ramp length. Cut wood pieces to create a rectangular frame. Use sturdy plywood or hardwood for strength. Assemble the frame with screws, making sure all corners are square. Double-check the frame for stability before moving on.
Adding The Ramp Surface
Next, attach the ramp surface to the frame. Use a flat, solid board that fits the frame size. Secure it tightly with screws or nails. This surface will support your dog’s weight and provide a smooth path. Sand the edges to avoid splinters and sharp spots.
Ensuring Non-slip Traction
Non-slip traction is crucial for your dog’s safety. Cover the ramp surface with non-slip tape or a textured mat. You can also apply a thin layer of outdoor carpet or rubber. Make sure the material covers the entire surface evenly. This prevents slipping and gives your dog confidence while climbing.
Safety Enhancements
Safety is a top priority when building a dog ramp for your bed. Proper safety enhancements protect your dog from slips and falls. They also ensure the ramp stays in place during use. This section covers key safety steps to make your ramp secure and reliable.
Securing The Ramp To The Bed
Attach the ramp firmly to the bed frame. Use strong brackets or straps that hold the ramp steady. Avoid loose attachments that can shift or wobble. Check all fasteners regularly to keep the ramp safe. A secured ramp prevents accidents and builds your dog’s confidence.
Adding Side Rails Or Edges
Side rails stop your dog from slipping off the ramp sides. Build low rails on both edges using wood or plastic strips. Make sure the rails are smooth and free of sharp corners. The rails should be high enough to guide your dog but not block the path. This simple addition improves safety greatly.
Testing Stability And Strength
Test the ramp before letting your dog use it. Press down firmly on different areas to check for wobbling or weakness. Make sure the ramp supports your dog’s weight without bending. Adjust or reinforce any weak spots immediately. A strong, stable ramp makes every climb safe and easy.
Training Your Dog
Training your dog to use a ramp for the bed takes patience and care. Dogs need time to get used to the new ramp. Proper training helps your dog feel safe and confident. It also encourages regular use, which protects their joints and muscles. Follow simple steps to make the process smooth and stress-free for your pet.
Introducing The Ramp Gradually
Start by placing the ramp near the bed without forcing your dog onto it. Let your dog explore the ramp at their own pace. Use treats and gentle praise to create a positive experience. Allow short sessions at first, slowly increasing the time. This gradual approach reduces fear and builds trust.
Encouraging Confidence
Stand by your dog and offer encouragement as they try the ramp. Use a calm voice and offer treats at the top and bottom. Guide your dog with a leash if needed, but never push them. Practice often in a quiet space free of distractions. Celebrate small successes to boost your dog’s confidence.
Maintaining Usage Over Time
Keep the ramp in the same place to create a routine. Praise your dog every time they use the ramp correctly. Check the ramp regularly for safety and comfort. Replace treats with gentle petting as your dog becomes more confident. Consistent use helps your dog stay healthy and happy.
Credit: breezeresidency.com
Maintenance Tips
Proper maintenance keeps your dog ramp safe and durable. Regular care prevents damage and ensures comfort for your pet. Simple steps can extend the ramp’s life and functionality.
Cleaning The Ramp
Wipe the ramp surface with a damp cloth often. Use mild soap and water for tougher dirt. Avoid harsh chemicals that can harm your dog’s paws. Let the ramp dry completely before use to prevent slipping.
Inspecting For Wear And Tear
Check the ramp weekly for cracks or loose parts. Look at the joints and screws carefully. Pay attention to any worn-out grip tape or slippery spots. Early detection helps avoid accidents and costly repairs.
Making Repairs When Needed
Tighten loose screws and bolts promptly. Replace worn grip tape or add new traction strips. Fill small cracks with wood filler if the ramp is wooden. For major damage, consider rebuilding parts to keep it safe.

Credit: www.reddit.com
Frequently Asked Questions
How To Build A Simple Dog Ramp?
Measure your bed height and cut a wooden plank accordingly. Sand the surface for smoothness. Attach non-slip material on top. Secure the ramp at a gentle angle (about 18-25 degrees). Add side rails for safety. Test stability before allowing your dog to use it.
What Is The Correct Angle For A Dog Ramp?
The correct angle for a dog ramp is between 18 and 25 degrees. This gentle incline ensures easy, safe access for dogs, especially those with mobility issues. Steeper angles can cause strain, so keep the slope gradual for comfort and joint protection.
Do Dogs Prefer Steps Or Ramps?
Dogs generally prefer ramps over steps because ramps reduce joint strain and provide a gentler, gradual incline. Ramps suit older, injured, or large dogs better. Small, agile dogs may manage stairs, but ramps offer safer, long-term joint protection and easier mobility for most dogs.
How Can I Make My Diy Dog Ramp Safer?
Add non-slip materials like grip tape or carpet to the ramp surface. Secure the ramp firmly to prevent movement. Ensure the incline is gentle, ideally under 30 degrees. Check for sharp edges and smooth them out. Train your dog to use the ramp safely and supervise initially.
Conclusion
Building a dog ramp for your bed helps your pet climb safely and easily. A simple ramp reduces joint strain and prevents injuries. Use the right angle and sturdy materials for best results. Measure carefully to ensure the ramp fits your bed height.
Watching your dog use the ramp brings peace of mind. This project saves money and supports your dog’s health. Start building today to give your dog a comfortable way up. Your pet will thank you with happy, pain-free steps every day.