Building your own cabinet can be a deeply satisfying project. Not only do you get custom storage for your space, but you also gain skills and confidence in woodworking. Even if you’re not an expert, with careful planning and the right steps, you can create a strong, attractive cabinet for your kitchen, bathroom, or workshop.
This guide shows you, step by step, how to build a cabinet from scratch—even if you have limited experience.
Understanding Cabinet Basics
Before you start cutting wood or buying materials, it’s important to understand cabinet structure. Most cabinets are made from a few main parts:
- Box (Carcass): The main structure, usually a rectangle.
- Face Frame: The front outline that gives strength and a finished look.
- Back Panel: Provides support and keeps the box square.
- Shelves: Interior platforms for storing things.
- Doors and Drawers: For accessing the inside.
There are two main types: frameless (European style) and framed. Frameless cabinets are easier for beginners because there’s less detail work.
Planning Your Cabinet
Think about where the cabinet will go and what it will store. Measure the space carefully. Sketch your design, noting the height, width, and depth. Standard kitchen base cabinets are usually 24 inches deep and 34. 5 inches tall, but you can adjust for your needs.
Key Planning Steps
- Measure the space: Use a tape measure and write down the numbers.
- Decide cabinet type: Wall, base, or tall cabinet?
- Sketch a plan: Draw a simple diagram with dimensions.
- List features: Will it have shelves, drawers, or just doors?
- Choose materials: Plywood, MDF, or solid wood?
Pro tip: Allow for door and drawer clearances in your measurements. Beginners often forget this, making installation harder later.
:max_bytes(150000):strip_icc()/CabinetsDwg2-1319246ccb9344b2ba1b390ebfc7c7aa.png)
Credit: www.woodmagazine.com
Gathering Tools And Materials
Having the right tools and materials makes the job smoother. Here’s a basic list for a simple cabinet:
Tools
- Circular saw or table saw
- Drill and bits
- Screwdriver
- Clamps (at least 4)
- Measuring tape
- Square
- Level
- Hammer
- Random orbital sander or sandpaper
- Pencil
Materials
- 3/4-inch plywood (for box and shelves)
- 1/4-inch plywood (for back panel)
- Wood screws (1-1/4” and 1-3/4”)
- Wood glue
- Hinges
- Cabinet pulls or knobs
- Edge banding (optional)
- Paint or finish
Buying slightly more material than you need is smart. You may need extra for mistakes or testing.
Cutting And Preparing Parts
Now, transfer your measurements to the wood. Label each piece before you cut. This avoids mistakes and confusion later.
Cutting Tips
- Cut all the same-length pieces at once for accuracy.
- Use a guide or straight edge with your saw.
- Double-check measurements before cutting (“measure twice, cut once”).
Most cabinets need:
- 2 sides
- Top and bottom
- Back panel
- Shelves
- Face frame pieces (if using)
Here’s a simple breakdown for a 30” tall, 24” wide, 12” deep wall cabinet:
| Part | Quantity | Size (inches) | Material |
|---|---|---|---|
| Sides | 2 | 30 x 12 | 3/4″ plywood |
| Top/Bottom | 2 | 22.5 x 12 | 3/4″ plywood |
| Shelves | 1-2 | 22.5 x 11.5 | 3/4″ plywood |
| Back | 1 | 29.25 x 22.5 | 1/4″ plywood |
Beginner insight: It’s easy to forget the thickness of the material when planning your cuts. Always subtract for the width of the side panels when cutting top and bottom pieces.
Assembling The Cabinet Box
Lay out the parts on a flat surface. Start by attaching the top and bottom to the sides. Use wood glue and screws for strength.
Assembly Steps
- Apply glue to the edge of the side panel.
- Align the bottom panel so it’s flush with the edge.
- Drill pilot holes to prevent splitting.
- Drive screws through the side into the edge of the bottom panel.
- Repeat for the top panel.
With the box formed, slide in the back panel. Check for square by measuring diagonally corner to corner; both numbers should match. If not, nudge the box until they do, then fasten the back with small screws or nails.
Installing Shelves
Shelves can be fixed or adjustable. Fixed shelves add strength, but adjustable shelves are flexible.
Fixed Shelf Installation
- Mark the height for the shelf on both sides.
- Use a square to draw a line.
- Attach shelf with glue and screws from the outside.
Adjustable Shelf Installation
- Drill a series of holes in both sides.
- Use shelf pins to support the shelf.
- Space holes every 2 inches for flexibility.
Non-obvious tip: If you plan on storing heavy items, add a center support or use thicker shelves to prevent sagging.

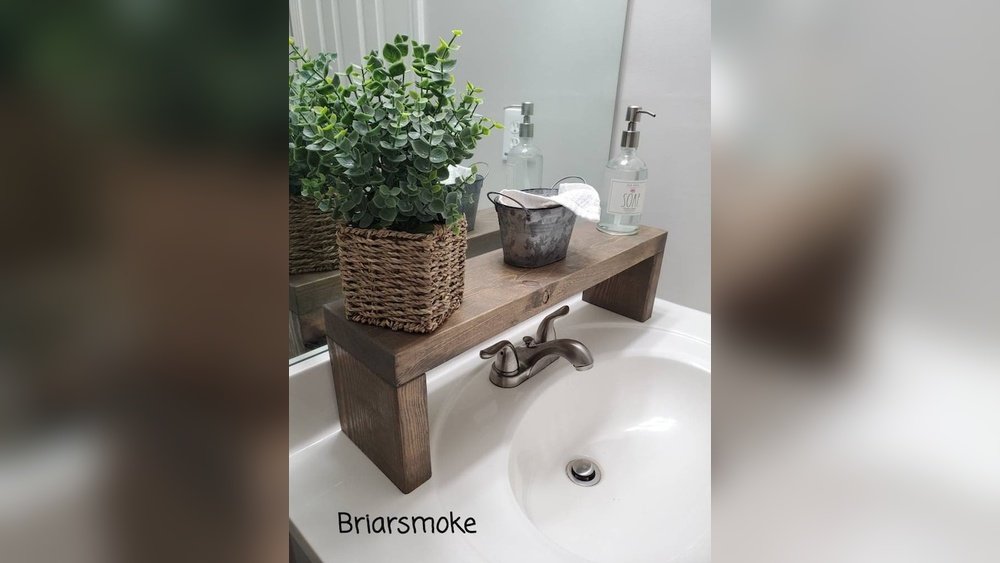
Credit: www.thehandymansdaughter.com
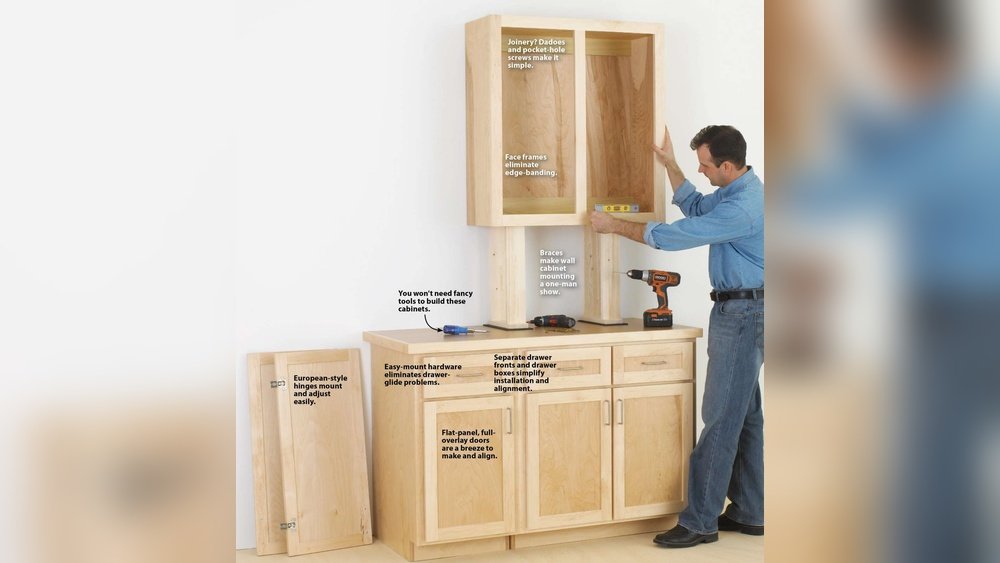
Making And Attaching The Face Frame (optional)
A face frame gives the cabinet a classic look and extra strength. It’s made from strips of solid wood, usually 1-1/2 inches wide.
Building The Face Frame
- Cut rails (horizontal pieces) and stiles (vertical pieces).
- Join with pocket screws, dowels, or wood glue.
- Clamp and let dry.
Attach the frame to the box front with wood glue and a few finish nails. Sand the edges smooth.
Building Doors And Drawers
Making Simple Cabinet Doors
The easiest door is a slab door—just a flat piece of plywood cut to size.
- Cut the door slightly smaller than the cabinet opening (leave 1/8” gap on all sides for clearance).
- Sand edges smooth.
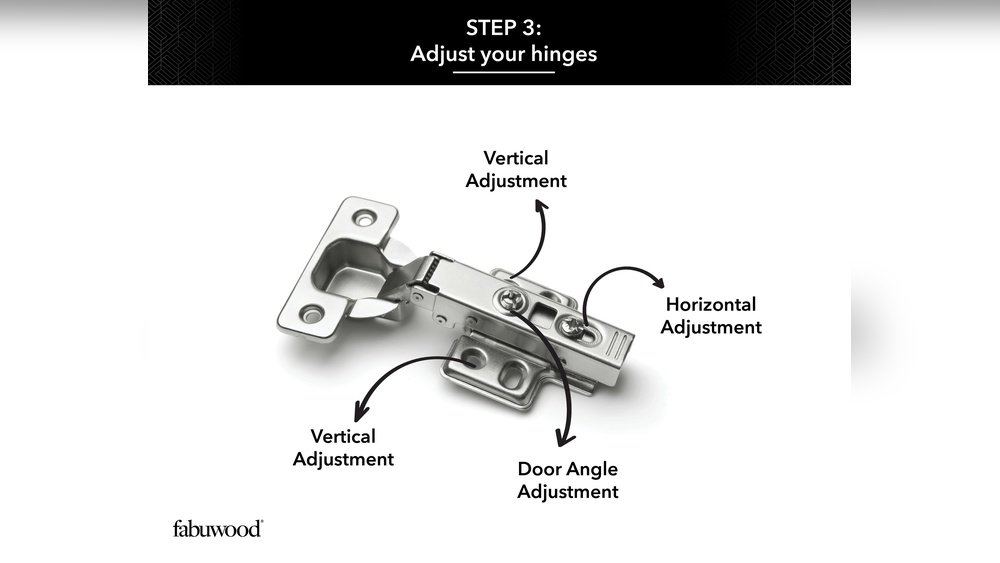
- Attach hinges (concealed or surface-mount).
- Install door with screws.
If you want a raised-panel or shaker style, this requires more advanced joinery.
Drawer Basics
For beginners, focus on doors first. Drawers need accurate measuring, runners, and square assembly. If you want drawers:
- Build a box with 1/2-inch plywood.
- Attach the bottom.
- Install drawer slides inside the cabinet.
- Mount the drawer front.
Common beginner mistake: Not allowing enough space for drawer slides or hinges, causing drawers or doors to jam.
Surface Preparation And Finishing
Sand all surfaces with 120- and then 220-grit sandpaper. Wipe off dust with a damp cloth. Choose a finish—paint, stain, or clear coat.
Painting Tips
- Use a quality primer for plywood or MDF.
- Apply paint in thin, even coats.
- Sand lightly between coats for a smooth finish.
Staining Tips
- Apply wood conditioner if using softwood.
- Wipe stain with a clean cloth for an even look.
- Finish with a clear sealer.
Installing Hardware
Add hinges, drawer slides, and knobs or pulls. Measure carefully so all parts are straight and even.
- Position hinges 3 inches from top and bottom.
- Use a template for handles to keep them at the same height.
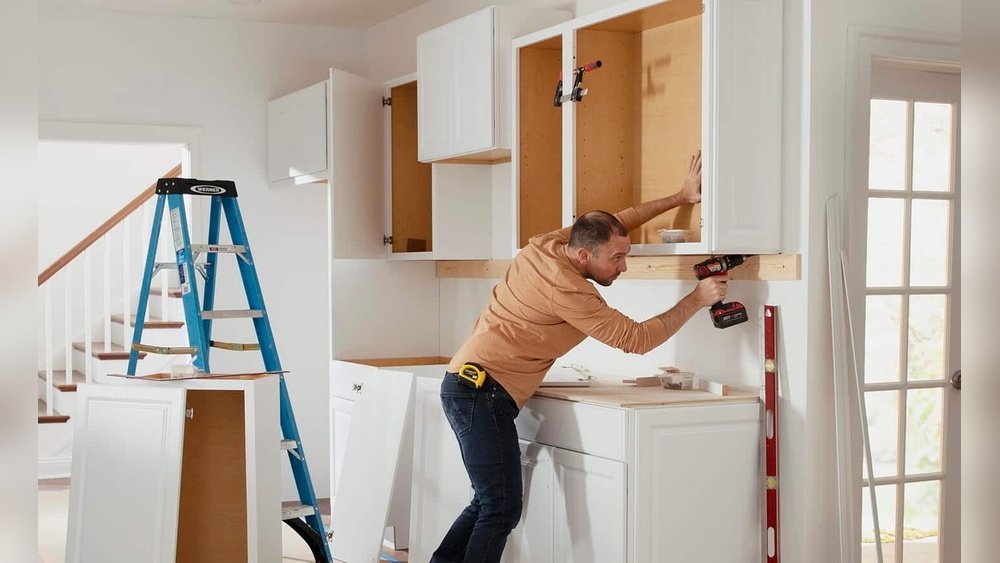
Mounting The Cabinet
If your cabinet is for a wall, find the wall studs using a stud finder. Mark the positions on the wall.
- Drill pilot holes through the cabinet back into the studs.
- Use long screws (2-1/2 inches or longer) to anchor the cabinet.
- Check with a level before tightening.
If it’s a base cabinet, check for level and adjust with shims under the bottom.
Comparing Cabinet Materials
Understanding materials helps you pick the right one for your needs and budget.
| Material | Cost | Durability | Finish Options | Water Resistance |
|---|---|---|---|---|
| Plywood | Medium | High | Paint, stain | Good |
| MDF | Low | Medium | Paint only | Poor |
| Solid wood | High | Very high | Paint, stain | Varies |

Credit: www.courtandnate.com
Troubleshooting Common Problems
Even with careful work, issues can happen. Here’s how to handle the most common ones:
Doors Don’t Close Evenly
Check if the box is square. Adjust hinges and use shims if needed.
Box Out Of Square
Loosen screws, nudge the box until it’s square (measure diagonally), and retighten.
Gaps Between Face Frame And Box
Clamp tightly when gluing. Fill small gaps with wood filler before sanding.
Shelves Sagging
Use thicker wood, add a center support, or reduce shelf span.
Safety Tips
- Wear safety glasses when cutting or drilling.
- Use hearing protection with power tools.
- Work in a well-ventilated area when sanding or painting.
- Clamp workpieces securely before cutting.
Non-obvious safety insight: Always check for nails or screws in recycled wood before cutting, as hitting metal can damage your tools or cause injury.
Going Further: Custom Cabinets
Once you master the basics, try more advanced features:
- Pull-out trays
- Soft-close hardware
- Decorative moldings
- Glass doors
For more design ideas and cabinet standards, the Wikipedia Cabinetry article is a helpful resource.
Frequently Asked Questions
What Is The Best Wood For Building Cabinets?
Plywood is the most popular for boxes because it’s strong, stable, and resists warping. For doors and face frames, hardwood like maple or oak gives a premium look. MDF is cheaper but not as strong or water-resistant.
How Do I Get Perfectly Square Corners?
Use a carpenter’s square when assembling each joint. Check diagonal measurements: both should match if the box is square. Clamp parts before screwing to prevent shifting.
Can I Build A Cabinet Without Power Tools?
It’s possible, but much slower and harder. A hand saw and brace can be used, but power tools give cleaner, more accurate cuts. Even a small drill and circular saw make a big difference.
What Finish Is Most Durable For Kitchen Cabinets?
Polyurethane or acrylic-based paints are very durable for kitchens. They resist water, stains, and heat better than regular paint. For a natural look, use a high-quality clear varnish.
How Do I Make Sure My Cabinet Fits Perfectly In The Space?
Measure your space at several points—walls and floors are not always straight. Leave a small gap (1/8”) for adjustments. Use shims during installation to level and align the cabinet.
Building a cabinet is a rewarding project. With good planning and careful work, you can create a cabinet that fits your space, style, and needs perfectly. Take your time, enjoy the process, and don’t be afraid to make mistakes—they’re a key part of learning woodworking.