Attaching cabinets is a big step in any kitchen or storage project. If you do it right, your cabinets will look good and stay strong for many years. If you make mistakes, you might see crooked lines, doors that do not close, or cabinets that feel loose.
This guide will show you exactly how to attach cabinets, whether you are working with wall cabinets, base cabinets, or both. You will learn not only the steps, but also the small details that many beginners miss. With the right tools, clear steps, and a bit of patience, you can get professional-looking results even if you are a first-timer.
Tools And Materials You Need
Before you start, gather everything you need. Missing tools can slow you down or cause mistakes, so check this list carefully:
- Drill with screw-driving bits
- Level (long and short if possible)
- Stud finder
- Tape measure
- Pencil
- Clamps
- Screws (2.5″–3″ cabinet screws or #10 wood screws)
- Shims (thin, wedge-shaped wood pieces)
- Cabinet jack or temporary support ledger
- Safety gear (gloves, eye protection)
- Wood glue (optional for face frames)
- Impact driver (helpful, but not required)
- Step ladder
You will also need a helper for most installations. Cabinets are heavy and hard to hold alone.
Planning And Preparation
The first step is not grabbing your drill—it’s measuring and planning. Rushing this part is the most common beginner mistake.
Measure The Space
Use your tape measure to check the width, height, and depth of the installation area. Mark the centerlines for sinks, windows, or appliances. Write down every measurement, and compare them to your cabinet sizes. Even small mistakes here can ruin your layout.
Check For Level And Plumb
Walls and floors are rarely perfectly straight. Use your level to check both. If your floor slopes, you might need to trim cabinet bases or use more shims. Mark high and low spots with a pencil.
Locate The Studs
Cabinets must be attached to wall studs, not just drywall. Use a stud finder to locate each stud and mark their centerlines on the wall with a pencil. Most studs are 16″ apart, but always check.
Plan The Order
Always attach wall cabinets before base cabinets. This keeps your workspace clear and prevents damaging the base cabinets.

Credit: www.familyhandyman.com
Removing Old Cabinets And Prepping The Area
If you are replacing old cabinets, take them out carefully:
- Remove cabinet doors and drawers first to make cabinets lighter.
- Unscrew any trim or molding.
- Find the screws inside the cabinets that attach them to the wall.
- Ask your helper to support the cabinet as you remove the last screws.
- Clean the wall and repair holes or damage with spackle.
Marking Reference Lines
To keep cabinets straight, mark these lines on the wall:
- Top line for wall cabinets: Measure up from the floor the height of your base cabinets plus your countertop. Add 18–20 inches (standard backsplash height), then mark this as the bottom of your wall cabinets. From there, measure up the height of your wall cabinets.
- Level line for base cabinets: Use your level to draw a straight line around the room at the height of the base cabinets.
A good reference line is critical. Cabinets should always be level, even if your floor or ceiling is not.
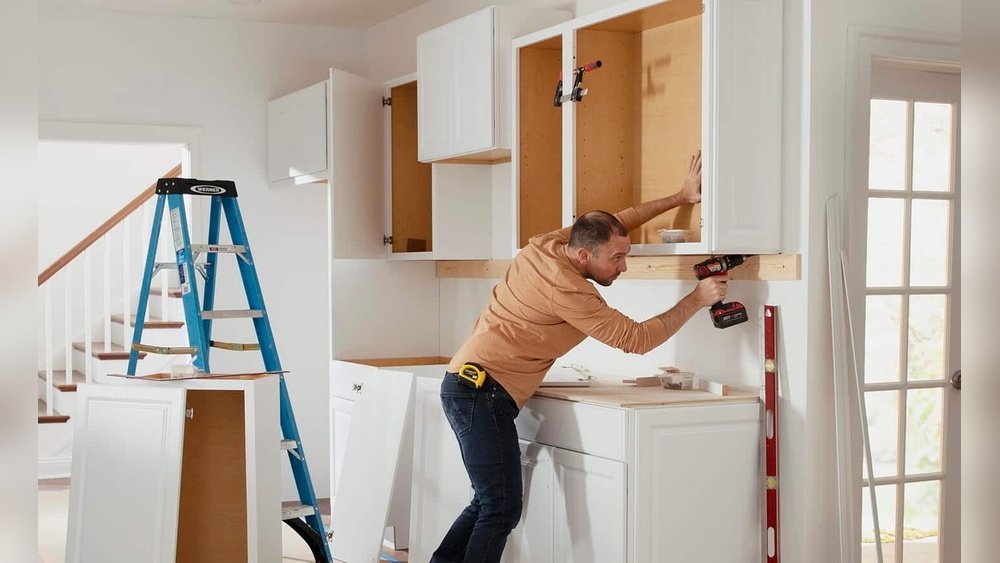
How To Attach Wall Cabinets
Wall cabinets are the hardest to install because you must hold them up while attaching them. Here’s how to do it safely and correctly.
Step 1: Remove Doors And Hardware
Take off the doors and any adjustable shelves. This makes the cabinet lighter and easier to maneuver.
Step 2: Drill Pilot Holes
Drill holes through the back of the cabinet at the spots where the cabinet will meet wall studs. This prevents the wood from splitting.
Step 3: Set Up A Support
You can use a cabinet jack (a special tool) or a temporary ledger board. To make a ledger board:
- Screw a straight 1×3 or 2×4 board into the wall, right under your reference line for the bottom of the wall cabinets.
- This will hold the weight while you fasten the cabinets.
Step 4: Position And Clamp Cabinets
Lift the first cabinet onto the ledger with your helper. Make sure the side matches your reference marks. Clamp the next cabinet to the first one through their face frames (if they have them) to keep them tight together.
Step 5: Check For Level And Plumb
Before you attach anything, use your level to check the front and sides. Adjust with shims if needed. Cabinets must be perfectly vertical (plumb) and level.
Step 6: Screw Cabinets To The Wall
Use 2.5″–3″ cabinet screws (not drywall screws) through the pilot holes into wall studs. Start with the top hole, but do not tighten all the way until all screws are in and everything is level.
Step 7: Connect Cabinets Together
If you have more than one cabinet, clamp the face frames together and drill a small pilot hole. Screw them together with special face frame screws, or wood screws if the frame is thick enough. This gives a seamless look and extra strength.
Step 8: Fill Gaps With Shims
If the wall is wavy, insert thin shims between the cabinet and wall at screw points. Trim off the extra shim with a sharp knife.
Step 9: Replace Doors And Shelves
Once all wall cabinets are attached and level, remove the ledger board. Put doors and shelves back in place.
How To Attach Base Cabinets
Base cabinets are easier to handle but need careful leveling for countertops to fit well.
Step 1: Place And Level Base Cabinets
Set the corner or end cabinet first. Use your level to check both front-to-back and side-to-side. Insert shims under the cabinet as needed until it is perfectly level. Do not worry if there are small gaps at the floor—these will be hidden by toe kicks later.
Step 2: Attach To The Wall
Drill pilot holes through the cabinet back into wall studs, just like with wall cabinets. Use the same 2. 5″–3″ screws.
Step 3: Connect Cabinets Together
Clamp the face frames together, drill pilot holes, and screw them together. Check for level as you go. Attach all cabinets before installing countertops.
Step 4: Secure Shims And Trim
If you used shims, trim them flush with the cabinet edges. This stops them from poking out or interfering with trim.
Step 5: Check Gaps And Adjust
Look for gaps between cabinets and the wall or floor. If needed, loosen screws, adjust shims, and retighten. Take your time—this is where most mistakes are made.
Special Situations
Some installations are more complex. Here’s how to handle them:
Attaching Cabinets To Masonry Walls
Drill holes with a masonry bit and use plastic anchors or masonry screws. Always check that your anchors are rated for the cabinet weight.
Dealing With Out-of-square Walls
If your walls are not square, start with the most visible corner. Scribe (trace) the shape of the wall onto the cabinet and trim the cabinet back with a saw if needed. This is common in older homes.
Installing Filler Strips
If you have a gap at the end of a run, use a filler strip. Attach it to the wall or the last cabinet, then scribe and trim for a perfect fit.
Common Mistakes And How To Avoid Them
Many people make the same errors when learning how to attach cabinets. Here are the most common and how you can avoid them:
- Not finding studs: Cabinets will not hold if attached only to drywall.
- Skipping the level check: Even a small tilt will show in the finished kitchen.
- Using the wrong screws: Drywall screws are too weak. Use cabinet or wood screws.
- Forgetting to clamp face frames: This leaves gaps and weak joints.
- Ignoring shims: Walls and floors are rarely perfect. Shims make cabinets look straight.
- Over-tightening screws: This can crush the cabinet sides or warp the frames.
Credit: www.thisoldhouse.com
Cost And Time Estimates
How long and how much does it take to attach cabinets? Here’s a simple comparison.
| Type of Project | Time (2 people) | DIY Cost (USD) | Pro Install Cost (USD) |
|---|---|---|---|
| Small kitchen (6-8 cabinets) | 6–8 hours | $50–$100 (tools, screws, shims) | $700–$1200 |
| Medium kitchen (12–15 cabinets) | 1–2 days | $70–$150 | $1200–$2000 |
| Large kitchen (20+ cabinets) | 2–3 days | $100–$200 | $2000–$4000 |
This does not include the cost of the cabinets themselves, just installation materials and labor.
Pro Tips For A Flawless Finish
- Check doors and drawers after attaching each cabinet. Adjust before moving on.
- Use a laser level for extra accuracy if you have one.
- Label your cabinets before removing doors and drawers for easier reassembly.
- Paint or finish cabinets before installing for a cleaner look.
- Attach sink base cabinets last to allow for plumbing adjustments.
Comparing Cabinet Attachment Methods
You might wonder if there’s a big difference between face frame and frameless cabinets, or if you can use brackets instead of screws.
| Method | Strength | Difficulty | Best For |
|---|---|---|---|
| Direct Screwing to Studs | High | Medium | All cabinets |
| Metal Brackets | Medium | Low | Utility cabinets, garages |
| French Cleat System | High | High | Heavy wall cabinets |
For most kitchens, direct screwing is the best mix of strength and simplicity.
Example: Small Kitchen Cabinet Installation
Let’s say you have a small kitchen with five wall cabinets and five base cabinets. You and a friend plan to do it over the weekend.
- Friday night: Remove old cabinets, repair walls, and mark studs and lines.
- Saturday: Attach wall cabinets using a ledger board, shims, and clamps.
- Sunday: Attach base cabinets, check level, and secure everything.
- Sunday afternoon: Replace doors, drawers, and clean up.
By Sunday night, your new cabinets are ready for countertops.
When To Call A Professional
Some jobs need an expert:
- If walls are very uneven or damaged
- If cabinets are custom or extra heavy
- If you are not comfortable with power tools
- If you need electrical or plumbing moved
A pro will also have tricks for perfect alignment and finish. If your budget allows, this can save time and stress.
For more tips on choosing a pro or advanced cabinet installation, check out the Family Handyman guide.
Frequently Asked Questions
How Do I Find Wall Studs For Cabinet Attachment?
Use an electronic stud finder to scan the wall. Mark each stud’s centerline with a pencil. You can also tap the wall and listen for a solid sound, but a stud finder is more reliable.
What Screws Should I Use For Attaching Cabinets?
Use 2.5″–3″ cabinet screws or #10 wood screws. These are designed for heavy loads and will not break like drywall screws.
Can I Attach Cabinets To Drywall Without Hitting Studs?
No. Drywall cannot support the weight of cabinets. Always attach to at least two studs per cabinet, using shims if needed for tight fit.
Should I Install Wall Or Base Cabinets First?
Always install wall cabinets first. This gives you room to work and keeps you from leaning over or damaging the base cabinets.
How Do I Make Cabinets Level If My Floor Is Uneven?
Insert shims under the cabinet bottom until it is level. Trim the shims flush so they do not stick out. Use a long level for best results.
Attaching cabinets is a big job, but with the right steps and attention to detail, you can do it yourself and save hundreds or even thousands of dollars. Just remember—measure twice, drill once, and always check for level. The time you spend planning and checking will show in the final result.

Credit: www.columbiadailyherald.com