Attaching a dishwasher to a cabinet is more than just a quick DIY task—it’s a step that affects your kitchen’s safety, stability, and appearance. Whether you’re installing a new dishwasher or securing an existing one, knowing how to do this job right can save you from shaky appliances, leaks, or even costly repairs down the road.
Many beginners think simply sliding the dishwasher into place is enough, but proper attachment is crucial. In this guide, you’ll learn every step, from preparation to finishing touches, with clear instructions, real examples, and practical advice.
Understanding Why Securing A Dishwasher Matters
A dishwasher needs to be firmly attached to the cabinet for several reasons. First, it prevents the unit from tipping forward when you open the door or pull out heavy racks. Second, it keeps the dishwasher stable during cycles, reducing noise and vibration.
Third, a secure fit ensures that water lines and electrical connections aren’t strained or damaged.
A common mistake is ignoring the mounting brackets or using the wrong screws. This can lead to leaks, electrical hazards, or even void your warranty. According to the National Kitchen and Bath Association, over 70% of dishwasher installations that aren’t properly secured require service calls within the first year.
So, investing some time in proper attachment pays off.
What You Need Before Starting
Before you attach your dishwasher, gather all the necessary tools and supplies. Missing just one item can mean delays or poor results.
- Mounting brackets (usually come with the dishwasher)
- Screws (most models use #8 or #10 sheet metal screws)
- Drill with Phillips and flathead bits
- Tape measure and level
- Screwdriver
- Pencil or marker
- Protective gloves
- Flashlight (for tight spaces)
- Wood shims (if you need to level the dishwasher)
- Dishwasher installation manual (check for model-specific instructions)
Many people forget to check their cabinet’s material. If your cabinets are made of hardwood, you’ll need stronger screws than for particle board. Stainless steel dishwashers sometimes require special brackets—always verify with your manual.
:max_bytes(150000):strip_icc()/how-to-install-a-dishwasher-2718667-hero-29d78cea29394348ab2bd03aad4d7cb2.jpg)
Credit: www.thespruce.com
Preparing The Cabinet And Dishwasher
Preparation is key to a smooth installation. Start by turning off the power and water supply to the dishwasher. This step is often skipped but is essential for safety.
- Clear the area: Remove items from nearby cabinets and floor space.
- Check cabinet alignment: Ensure your cabinet opening is at least 24 inches wide (standard dishwasher size) and deep enough (24–25 inches).
- Inspect the floor: The floor under the dishwasher should be flat and even. If it’s sloped or uneven, use wood shims to correct it.
- Measure: Use your tape measure to double-check the opening, making sure there’s enough space for the dishwasher’s door to open fully.
If the previous dishwasher left holes or damage in the cabinet, repair these first. A solid, clean cabinet surface is crucial for mounting brackets to hold firmly.
Positioning The Dishwasher
Slide the dishwasher into the cabinet opening, leaving about two inches of space at the front so you can connect wires and hoses. Make sure the power cord, water line, and drain hose are accessible and not pinched.
Leveling The Dishwasher
An uneven dishwasher can cause leaks or poor cleaning. Use your level from front to back and side to side. Adjust the feet at the bottom of the dishwasher until it’s perfectly level. Insert wood shims if needed.
Here’s a quick comparison of leveling methods:
| Method | Ease of Use | Accuracy | When to Use |
|---|---|---|---|
| Adjustable Feet | Simple | High | Most installations |
| Wood Shims | Moderate | Medium | Uneven floors |
| Metal Plates | Hard | High | Heavy-duty kitchens |
Many beginners skip leveling. Don’t. Even a small tilt can cause water to pool, leading to mold or damage.
Attaching The Dishwasher: Step-by-step
Once the dishwasher is level and positioned, it’s time to secure it.
Choosing The Right Mounting Location
Dishwashers are usually attached either to the top of the countertop or the side of the cabinet. The choice depends on your countertop material:
- Stone or granite countertops: Side-mount to the cabinet, since screws can’t go into stone.
- Wood or laminate countertops: Top-mount to the underside of the countertop.
Here’s a comparison of mounting methods:
| Mounting Method | Best For | Pros | Cons |
|---|---|---|---|
| Top Mount | Wood/Laminate | Strong hold, easy access | Not possible with stone |
| Side Mount | Stone/Granite | Works with any countertop | Requires drilling cabinet sides |
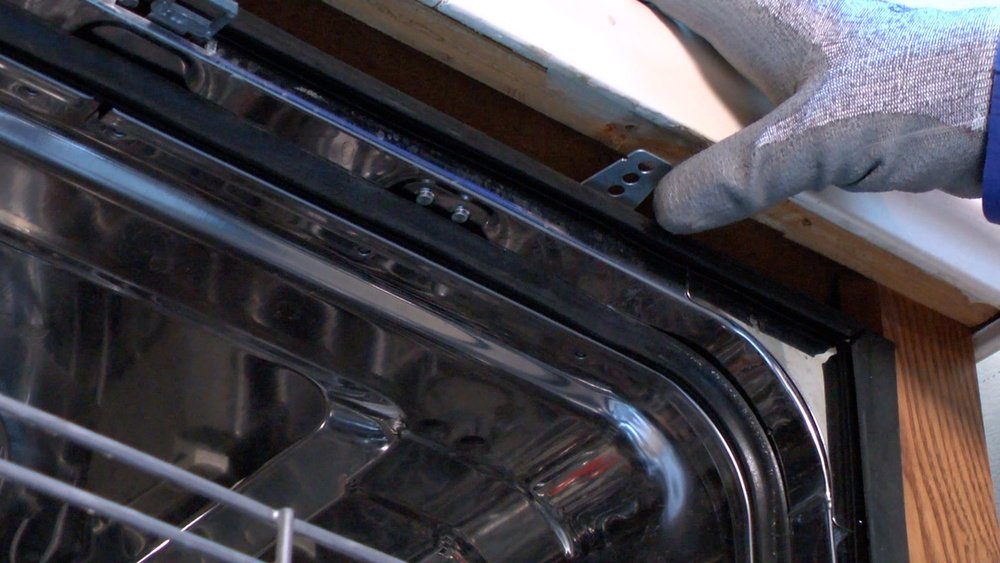
Installing The Mounting Brackets
- Locate the brackets: Find the mounting brackets in your dishwasher kit. They often slide into slots at the top or sides of the dishwasher.
- Attach the brackets: Secure them with screws as directed in your manual. Use a screwdriver or drill for this step.
- Position the dishwasher: Push the dishwasher fully into the cabinet, making sure the brackets line up with the mounting surfaces.
- Mark the screw holes: Use a pencil to mark where you’ll drill.
- Drill pilot holes: This prevents splitting wood and makes screwing easier.
- Screw in the brackets: Use the recommended screws. Don’t overtighten—this can strip the hole or crack the cabinet.
- Check stability: Gently open and close the dishwasher door. The unit should stay firm and not shift.
If your dishwasher sits between two cabinets, attach to both sides for extra stability. For island kitchens or where there are no side cabinets, use top mounting.
Connecting Water, Drain, And Power
With the dishwasher secured, connect the water supply line, drain hose, and power cord. Follow your manufacturer’s instructions. Most dishwashers use a 3/8-inch braided water line and a ¾-inch drain hose.
- Water line: Connect to the dishwasher inlet valve. Tighten but don’t overtighten.
- Drain hose: Attach to the sink drain or garbage disposal. Use a high loop or air gap to prevent backflow.
- Power cord: Plug into a grounded outlet or hardwire, depending on your local code.
Here’s a quick data table for connection sizes:
| Connection Type | Standard Size | Common Mistake |
|---|---|---|
| Water Line | 3/8 inch | Loose fittings cause leaks |
| Drain Hose | 3/4 inch | Low loop causes backflow |
| Power Cord | 120V, grounded | Ungrounded outlets unsafe |
Always test the connections before running a full cycle. Wipe fittings dry, run a short cycle, and check for leaks.

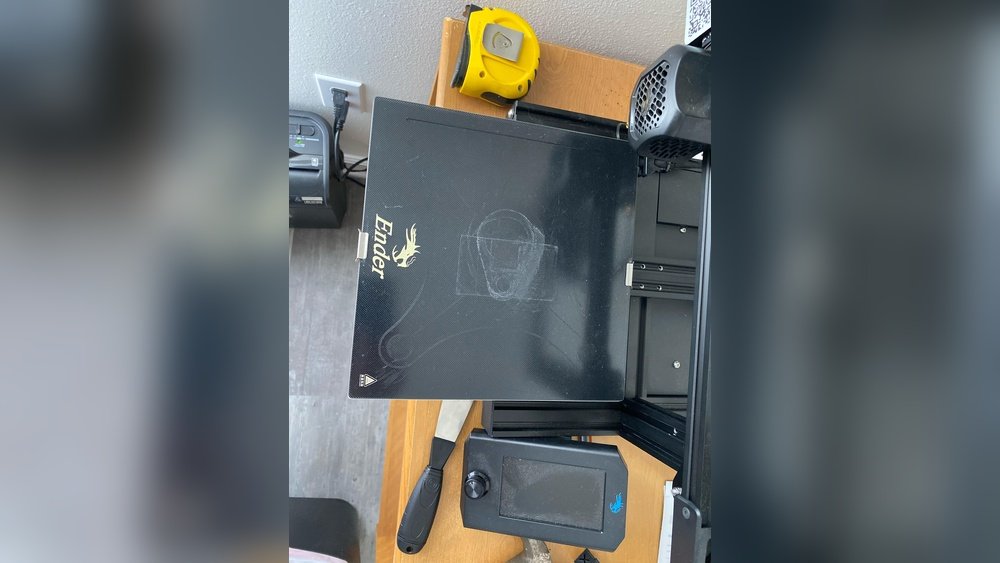
Credit: www.reddit.com
Finishing Touches And Final Checks
With everything connected, push the dishwasher in so the front aligns with the cabinets. Adjust the feet if needed for a flush look.
- Install the kick plate: Most dishwashers come with a front kick plate. Snap or screw this in place.
- Check door clearance: Open and close the door several times. It should not hit the cabinets.
- Inspect brackets: Make sure all screws are tight and brackets are flat against the cabinet or countertop.
If your dishwasher sticks out or doesn’t sit flush, adjust the feet or reposition the unit. A neat fit improves your kitchen’s look and ensures proper operation.
Common Beginner Mistakes And How To Avoid Them
Even confident DIYers can overlook key steps. Here are frequent errors:
- Skipping leveling: Leads to leaks and noisy cycles.
- Wrong screw size: Causes weak attachment or damages cabinet.
- Not checking cabinet material: Stone countertops require side-mounting.
- Loose drain hose: Results in water on your floor.
- Not testing for leaks: Can cause mold or damage before you notice.
A non-obvious insight: Some dishwashers have hidden mounting slots behind insulation. Always remove any packaging or insulation before searching for brackets.
Another insight: If your cabinet sides are thin (less than ¾ inch), reinforce them with a wood block before mounting. This prevents splitting and increases stability.
Safety And Maintenance Tips
Safety goes beyond installation. Always turn off power and water before starting. Use gloves to protect your hands from sharp edges.
After installation:
- Check brackets every six months for looseness.
- Inspect hoses for cracks or leaks annually.
- Clean around the kick plate to prevent dust buildup.
Proper maintenance can extend your dishwasher’s life by several years.
When To Call A Professional
If your kitchen has complex plumbing, electrical work, or you notice damage during installation, it’s wise to call a professional. According to the US Department of Energy, improper dishwasher installation can increase water usage by up to 20% due to leaks or inefficient cycles.
Professionals ensure code compliance and optimal performance.
For more technical details on dishwasher installation, refer to the official National Association of Home Builders resource.

Credit: www.youtube.com
Frequently Asked Questions
How Do I Know If My Dishwasher Is Level?
Place a bubble level on the top of the dishwasher, both front-to-back and side-to-side. Adjust the feet or add shims until the bubble is centered.
What Should I Do If My Countertop Is Granite Or Stone?
Use side-mount brackets to attach the dishwasher to the cabinet sides. Never drill into stone or granite countertops.
Can I Use Any Screws To Attach My Dishwasher?
No. Use the screws recommended in your dishwasher manual—usually #8 or #10 sheet metal screws. Wrong screws can damage your cabinet or fail to hold.
How Tight Should The Brackets Be Screwed In?
Tighten until the bracket is snug against the cabinet, but do not overtighten. Overtightening can strip holes or crack the cabinet.
Is It Safe To Install The Dishwasher Myself?
Yes, if you follow safety steps, use the right tools, and check your local codes. For complex plumbing or electrical setups, or if you’re unsure, hiring a professional is recommended.
Attaching a dishwasher to a cabinet may seem simple, but careful steps, the right materials, and attention to detail make all the difference. A secure installation keeps your kitchen safe and efficient, and gives you peace of mind every time you run a cycle.